Introduction
We appreciate you using our WordPress theme, TE Daycare Pro. That you decided to use our TE Daycare Pro WordPress Theme for your website makes us very happy.
The TE Daycare Pro theme for WordPress is simple, incredibly adaptable, and completely responsive.
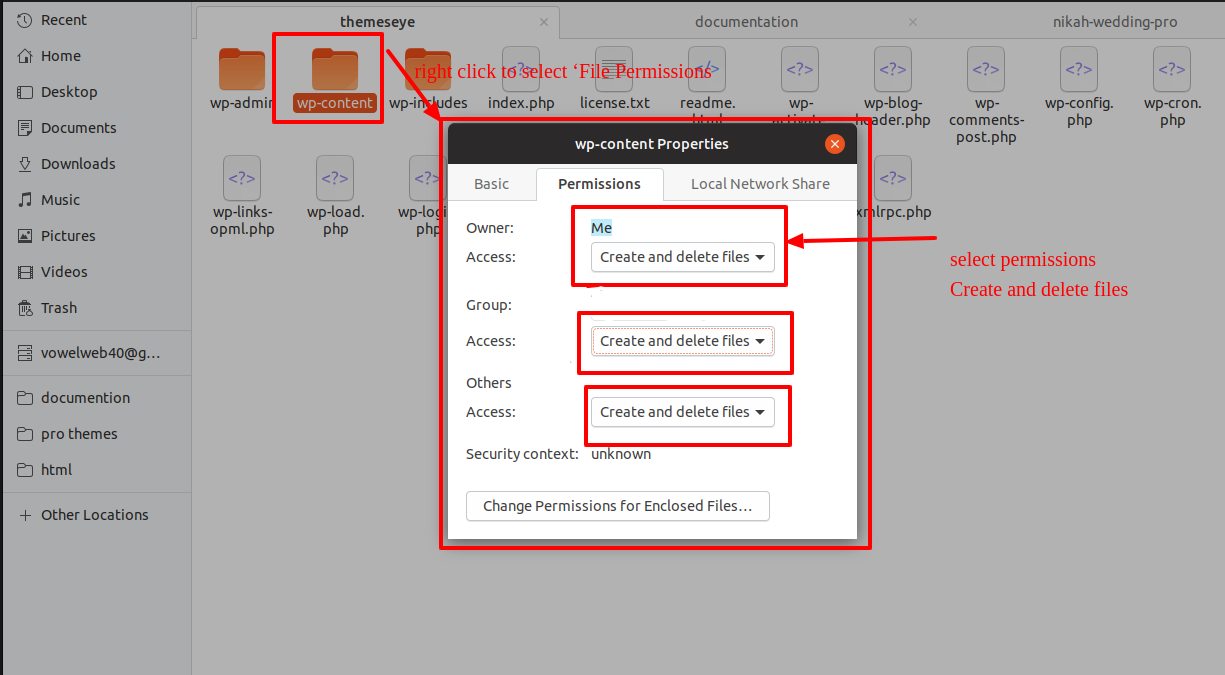
My site was working fine before? Who changed the File Permissions?
WordPress may be unable to create folders, submit images, or execute some scripts if file permissions are set incorrectly.
To manage files and make folders on the server, WordPress requires permissions.
- After that, right-click to choose "File Permissions" after selecting all of the folders in the main directory.
- the access dialogue box in wp-config check the option next to "Read and Write" >> To go further, click the OK option.
- Repeat the same procedure for the wp-content subdirectory.
This document was carefully crafted with the goal of making it simple to comprehend for both new and experienced users and developers. This document is divided into three major sections.
1) Getting Started : In order to get started quickly and to grasp how to set up a theme, refer to this section.
2) Detailed Document : The entire theme, including all settings, is explained in this part.
3) Other : This section gives details on various items, such as theme features, etc.
Please reach us at if you have any questions that go beyond the scope of this document. [email protected]
- Email: [email protected]
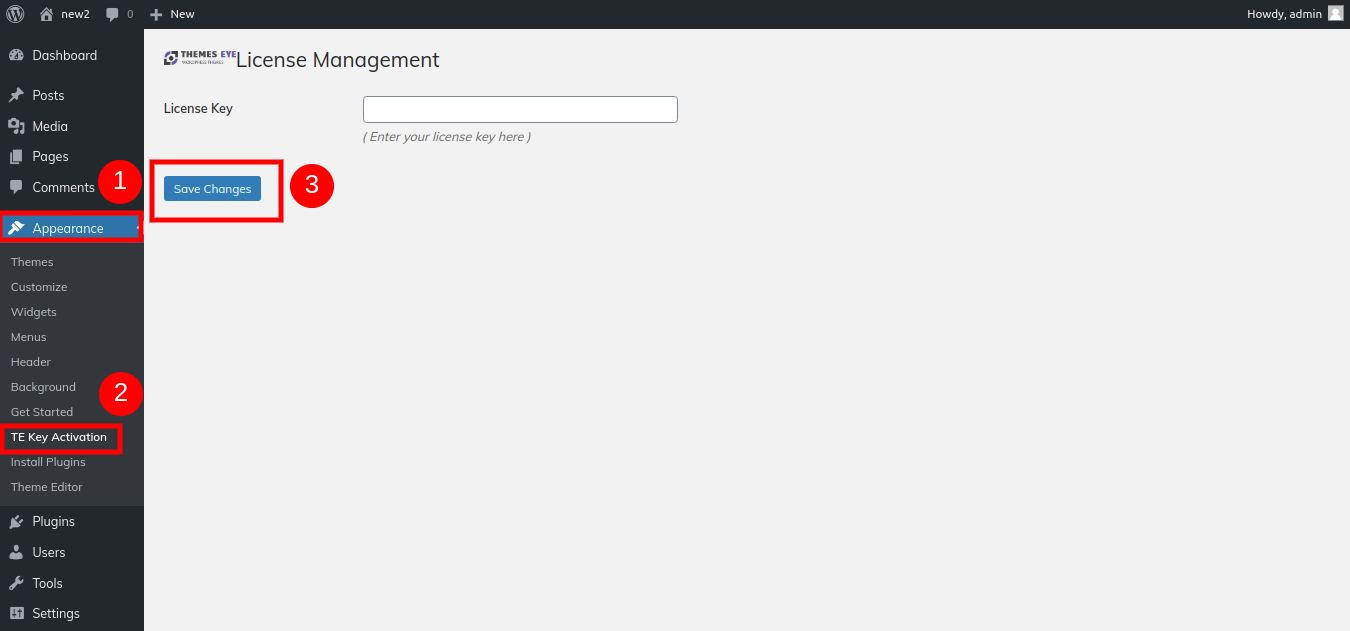
TE Key Activation
The steps for activating a TE key are as follows.
Given that you will receive the License Key via Email, use that key to Activate License.
Utilize the procedure below to Activate License.
Visit the "Dashboard" and then "Appearance"Key Activation for TEKey in>Save Adjustments.
After Key Entry, select Activate License.
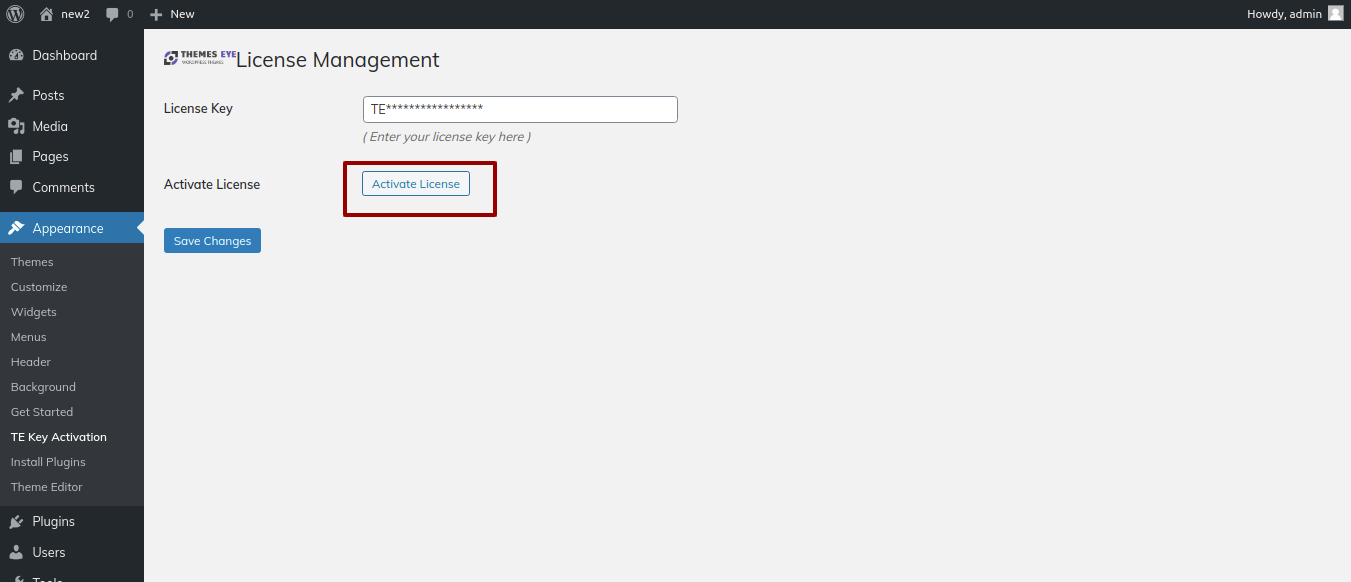
After you Activate Licence,the key will be active and then you can Getstarted with the Theme.
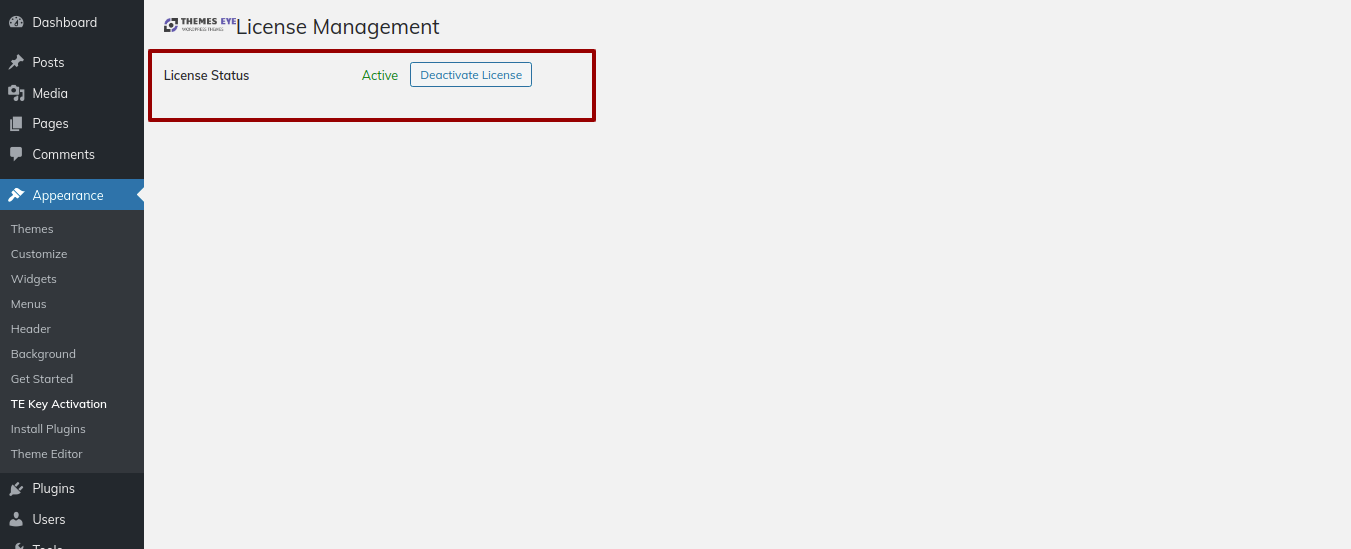
In this way you can activate your Licence Key.
You need to already have a functioning installation of WordPress in order to setup this theme. Please refer to the WordPress Codex for details on how to setup the WordPress platform. https://codex.wordpress.org/Installing_WordPress
Step One : Utilizing the WordPress Admin section to install
- Step 1 - Log into your WordPress admin area.
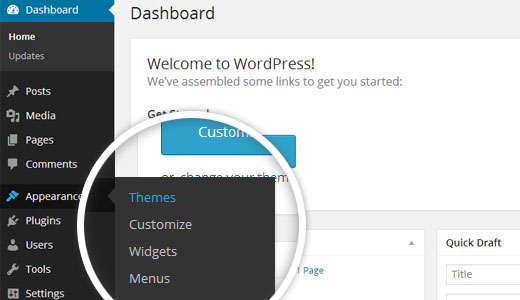
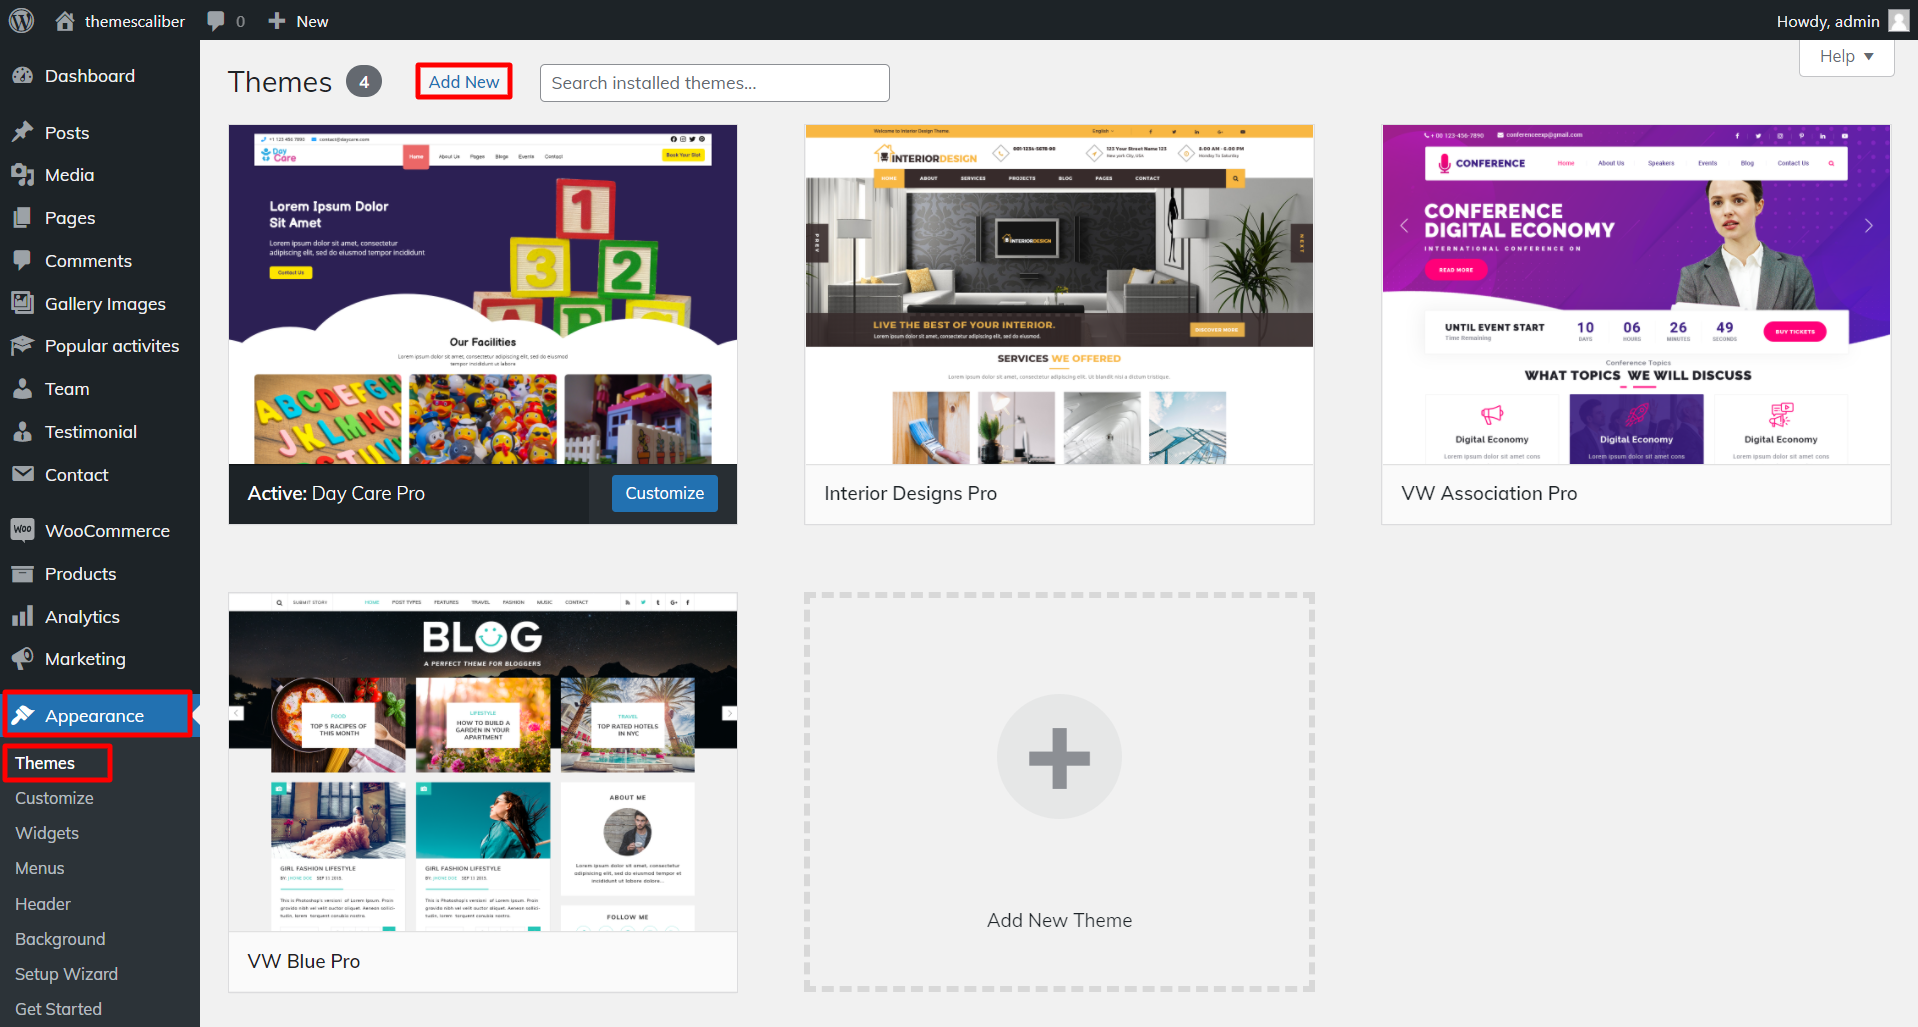
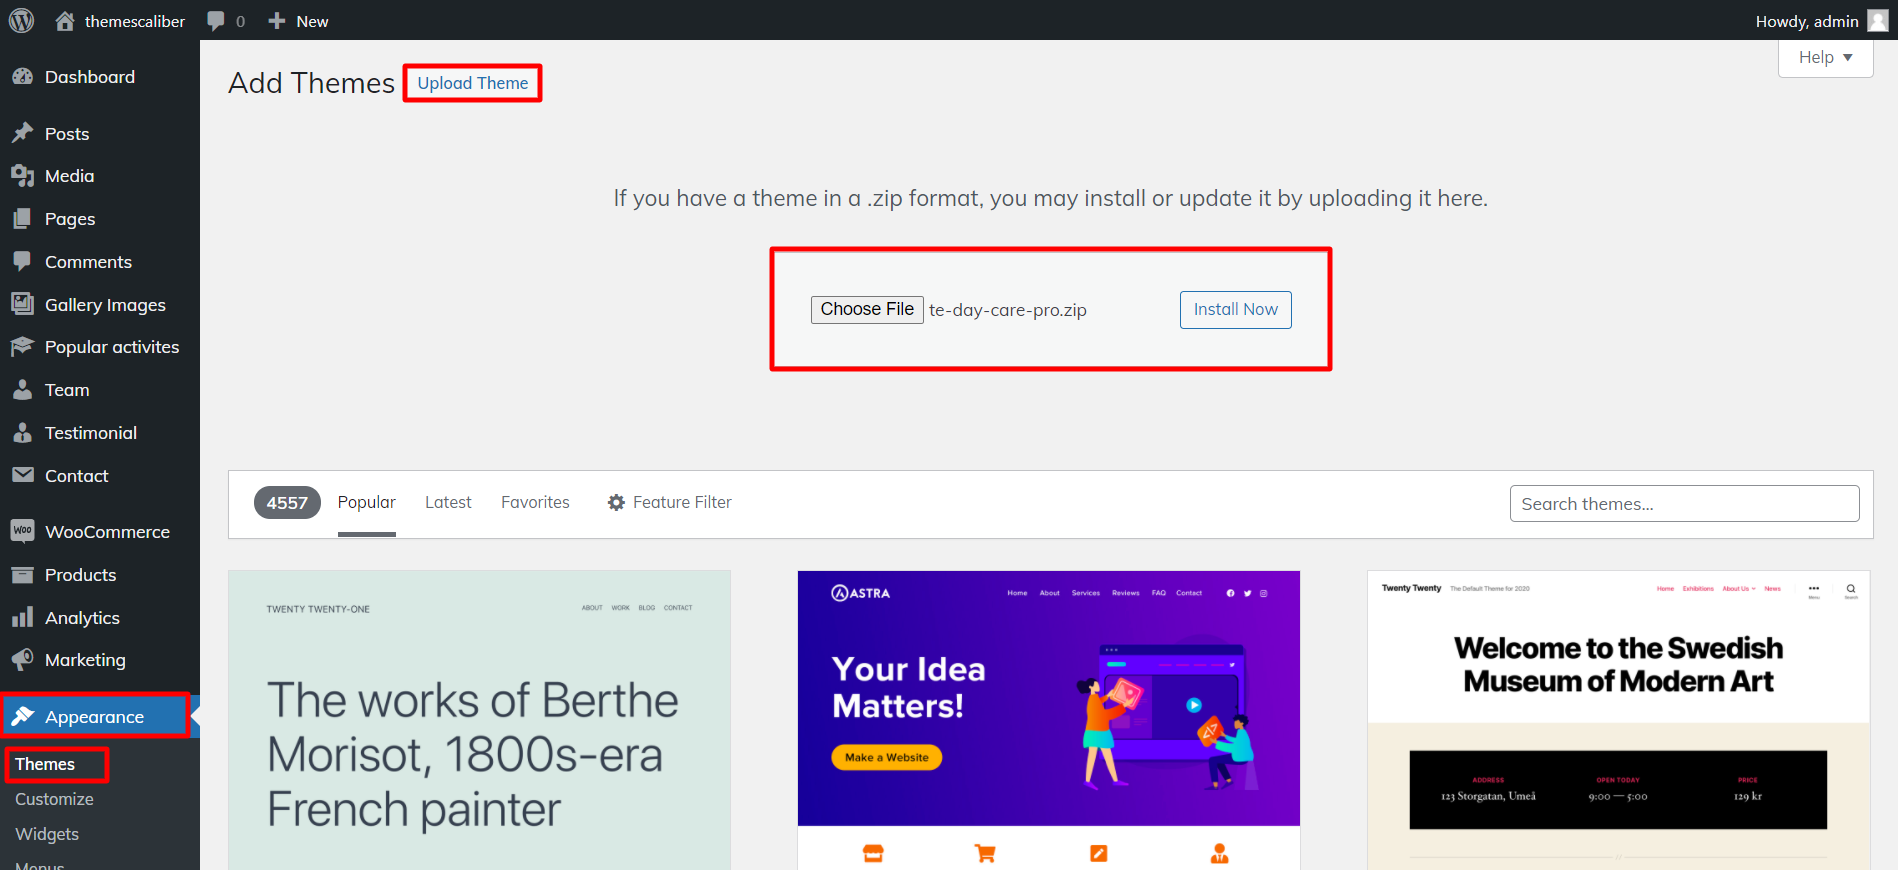
- Step 2 - Go to Dashboard >> Appearance >> Themes.
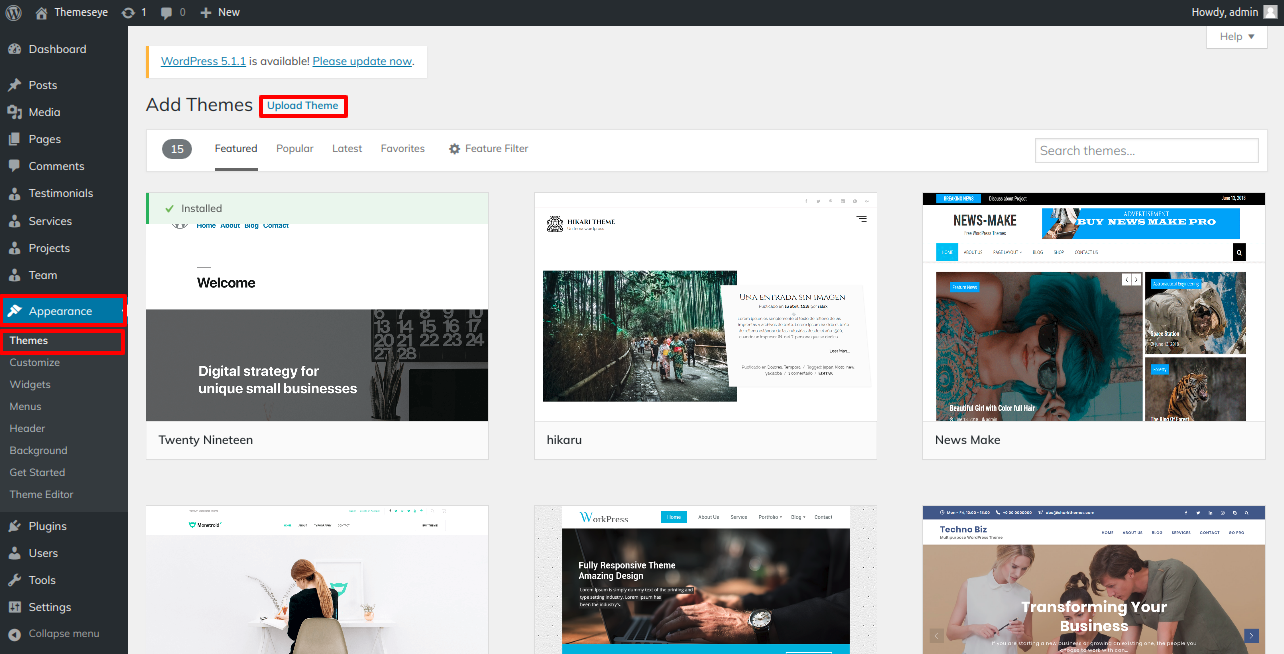
- Step 3 - Click on Add New Theme button at top.
- Step 4 - Now, it Upload Theme button at top and upload.
- Step 5 - Choose your te-daycare-pro.zip theme by clicking the Browse option, and then click the Install Now button.
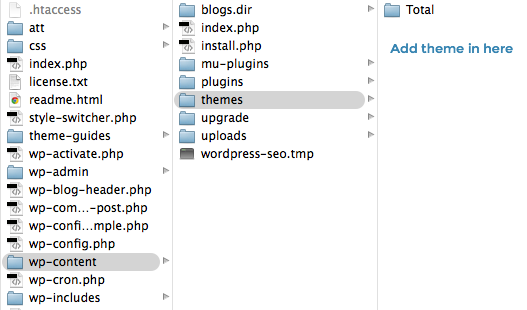
Step Two : Installation Using FTP
- Step 1 - Download te-daycare-pro.zip file from your My Account ThemesEye.
- Step 2 - Extract Zip file.
- Step 3 - Upload the theme subdirectory that isn't zipped using your FTP application to the "/wp-content/themes/" folder on your server.
- Step 4 - Go to Dashboard » Appearance » Themes and find TE Daycare Pro theme from list
- Step 5 - Click on Activate to active Te-Daycare-pro Posttype theme.
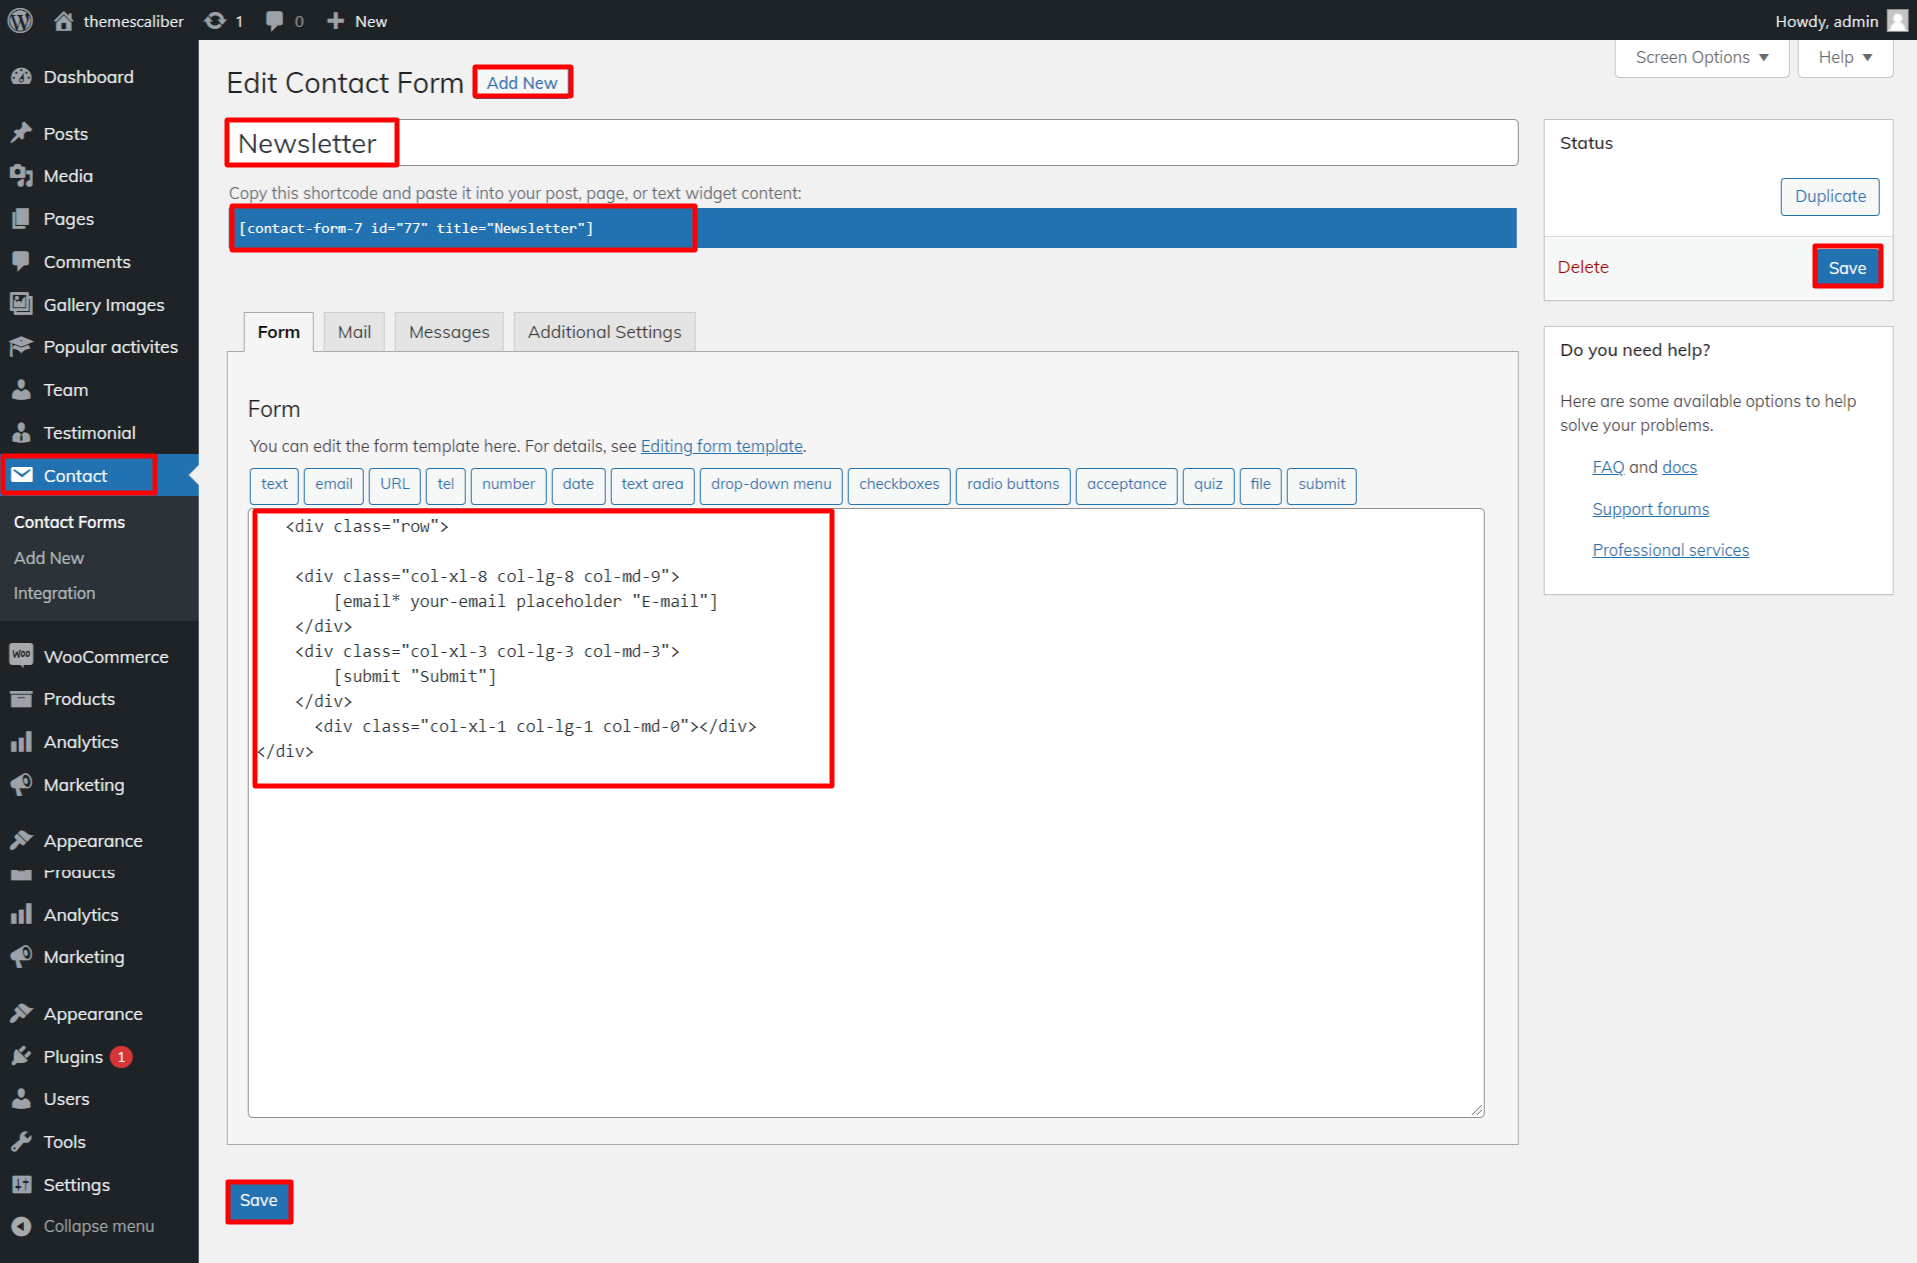
Plugin Installation
To install a WordPress Plugin manually by .zip archive and follow the below steps for Upload plugin
- Install Required Plugins:
- contact-form-7, gallery image plugin, and te-daycare-pro - posttype component
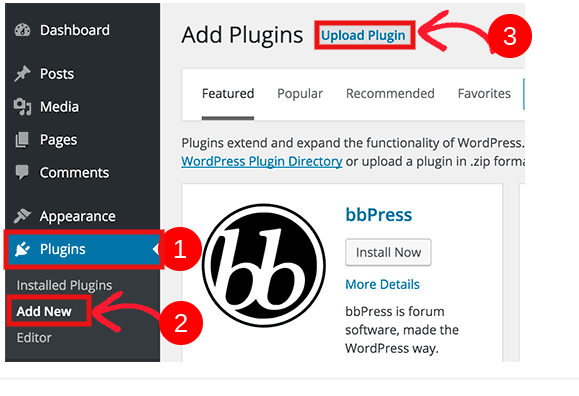
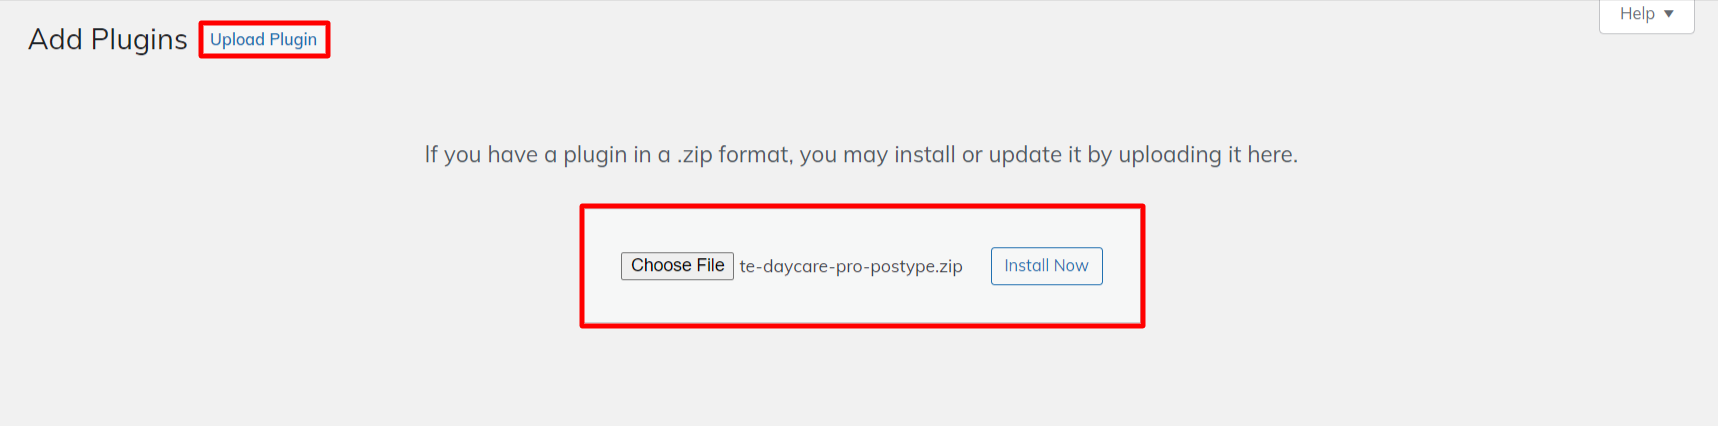
- Go to Dashboard >> plugin >> Add New >> Upload plugin.
- enable the install button after clicking it.
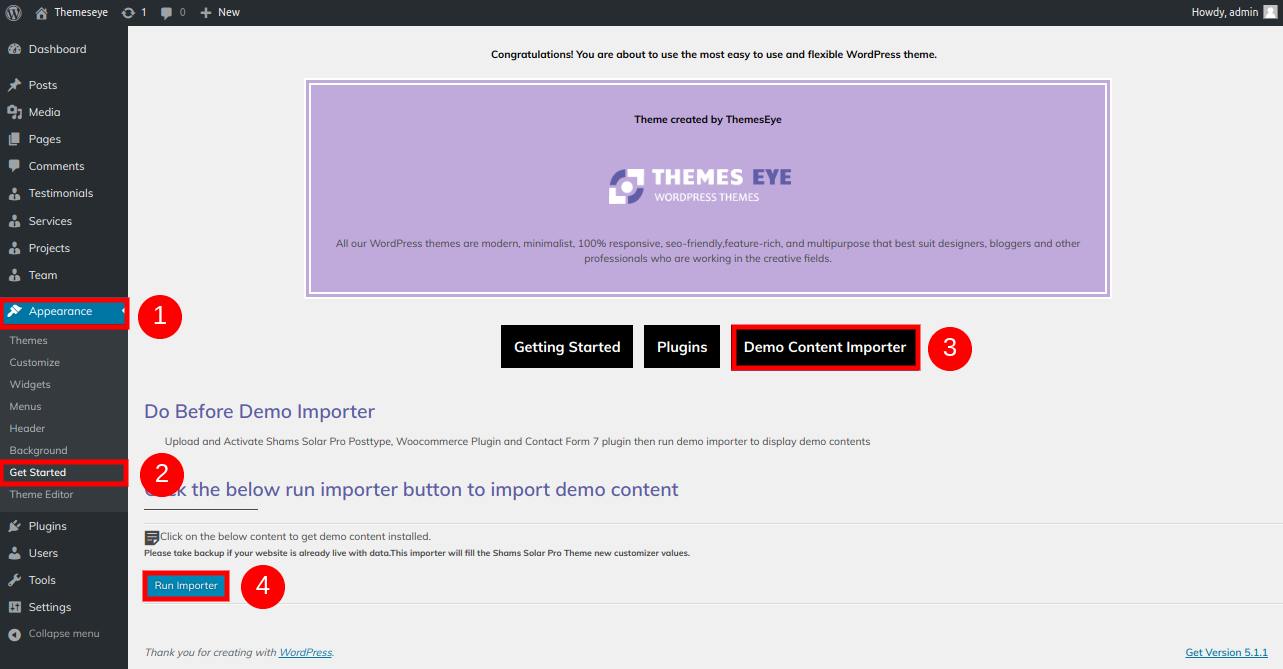
Demo Importer
To set up your theme, simply select to import sample content. You can follow the instructions in this content to create your website for website creation.
Go to Dashboard >> Appearance >> Get started
You must first install the contact-form-7 and TE Daycare Pro Posttype plugins before you can select "Run Importer."
After selecting "Demo Content Importer," click "Run Importer."
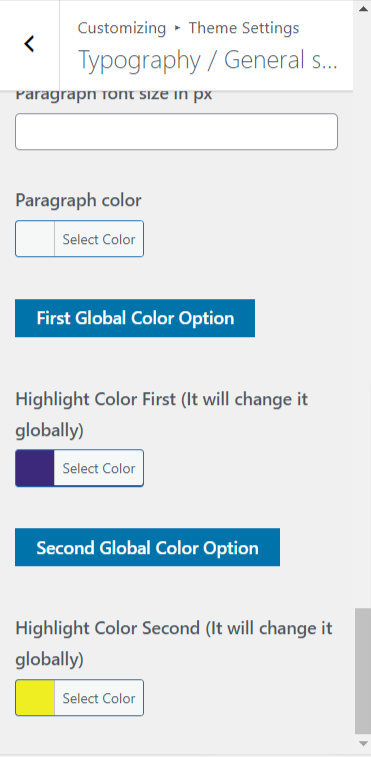
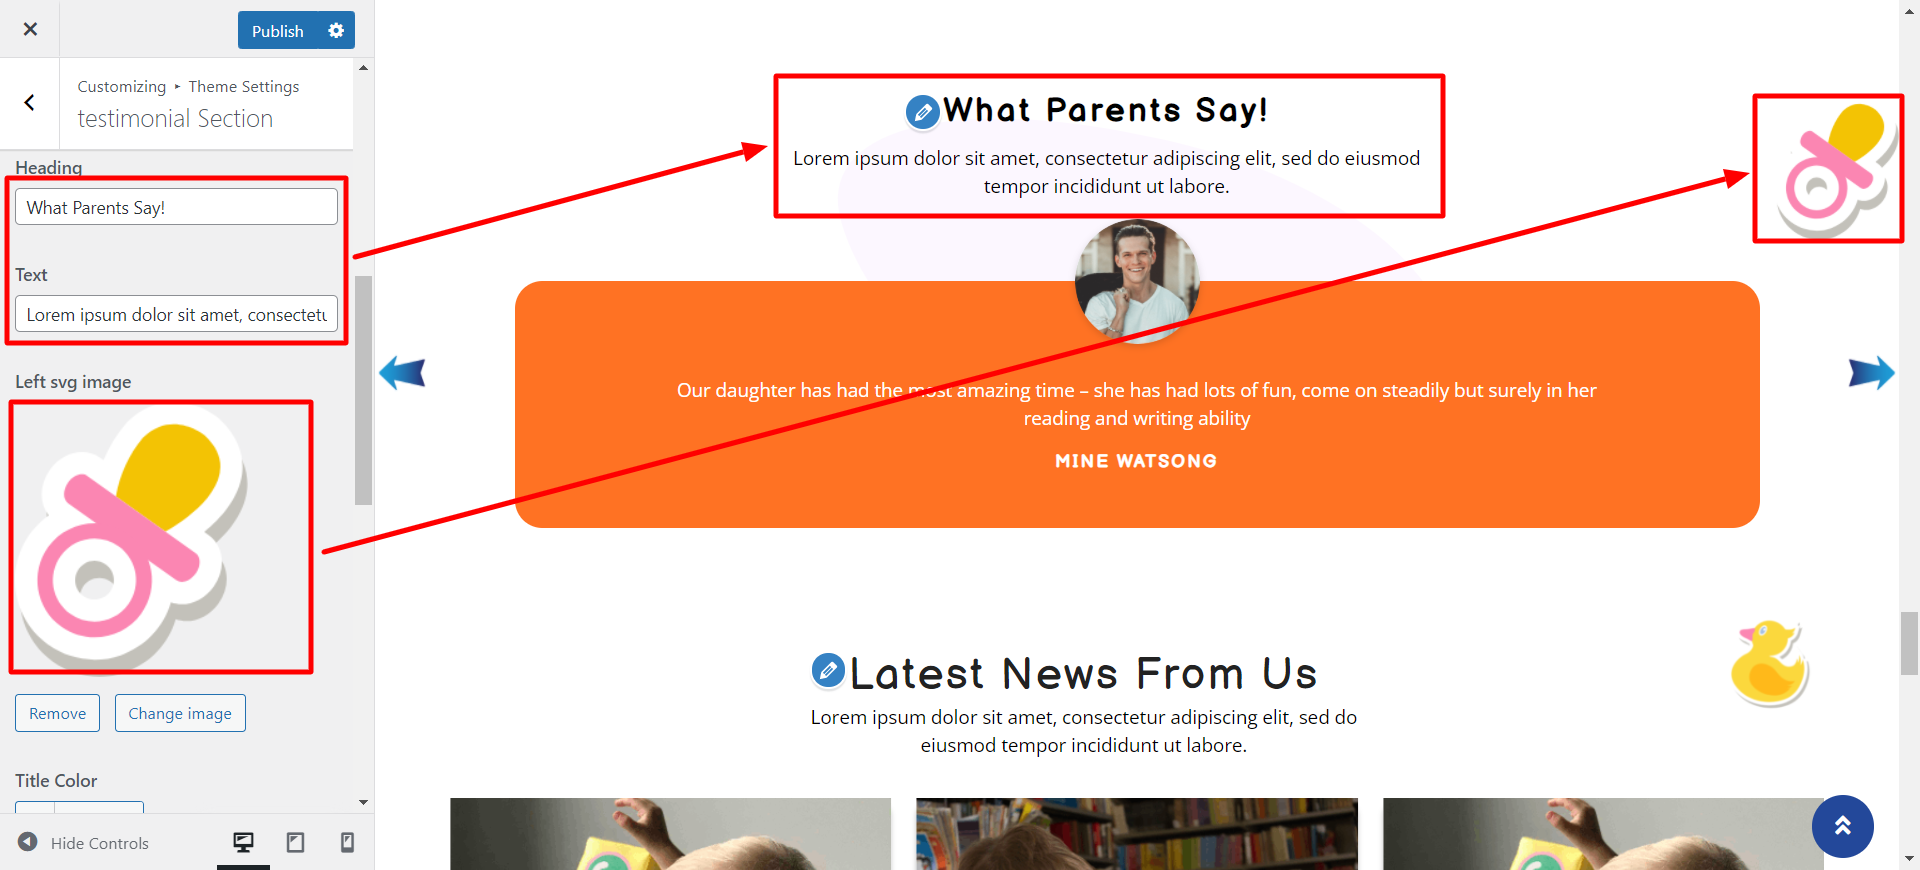
Color/Font Pallette
The procedure of changing the colour or font is very simple. These choices are available in all customizer sections. It is a full image that demonstrates the font and colour palette. You can change the colour and font of the headings, paragraphs, and buttons with a single look or click.
Depending on the amount of options available in each section, there is an option to change the colour scheme for the headings, title/text, paragraph, button text, and button background.

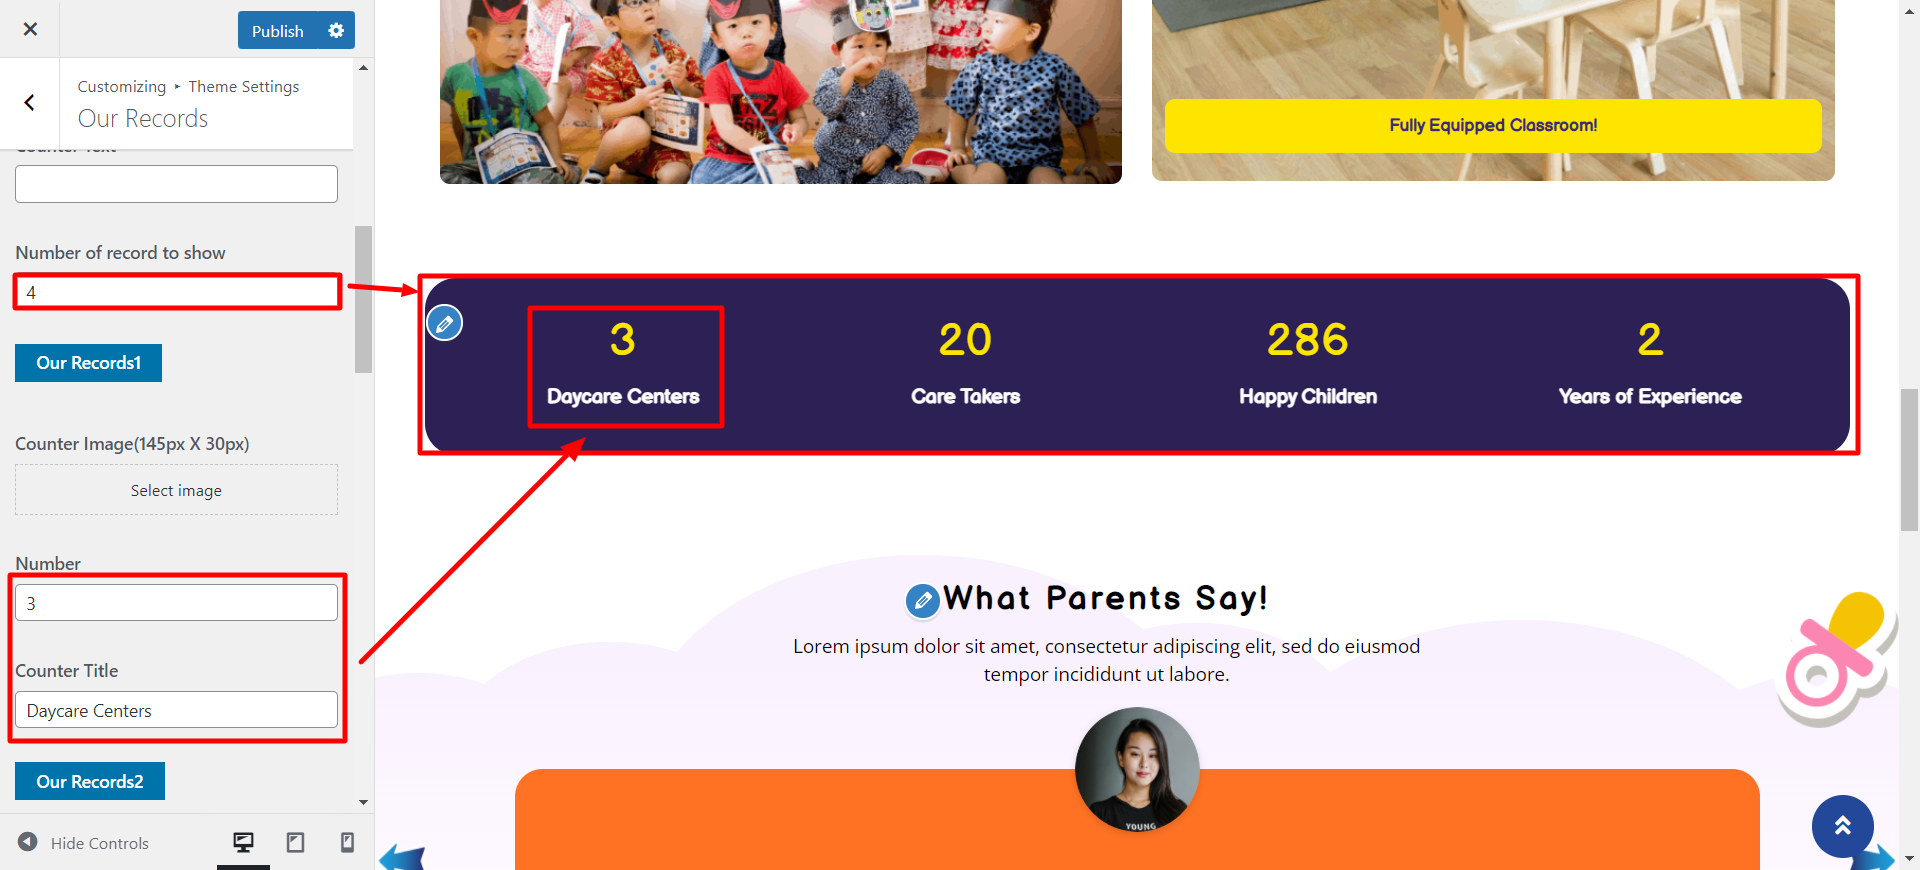
Section Ordering
How to Arrange and Reordering Section
To reorder an area simply means to arrange it according to our needs. Drag the section to the top or bottom as necessary to continue with this part. Your front view will alter in accordance with customizer values when you drag any section to the top or bottom.
You can reorder sections by simply dragging and dropping the choices into the desired order.
to continue with Section Ordering.
Step 1 - Go to Appearance >>Theme Settings >> Section Ordering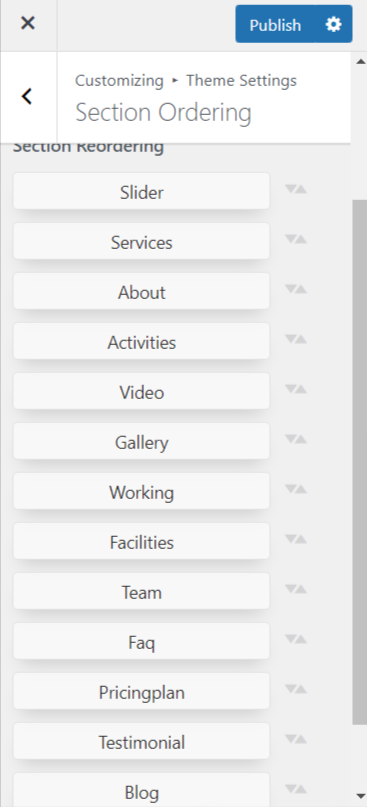
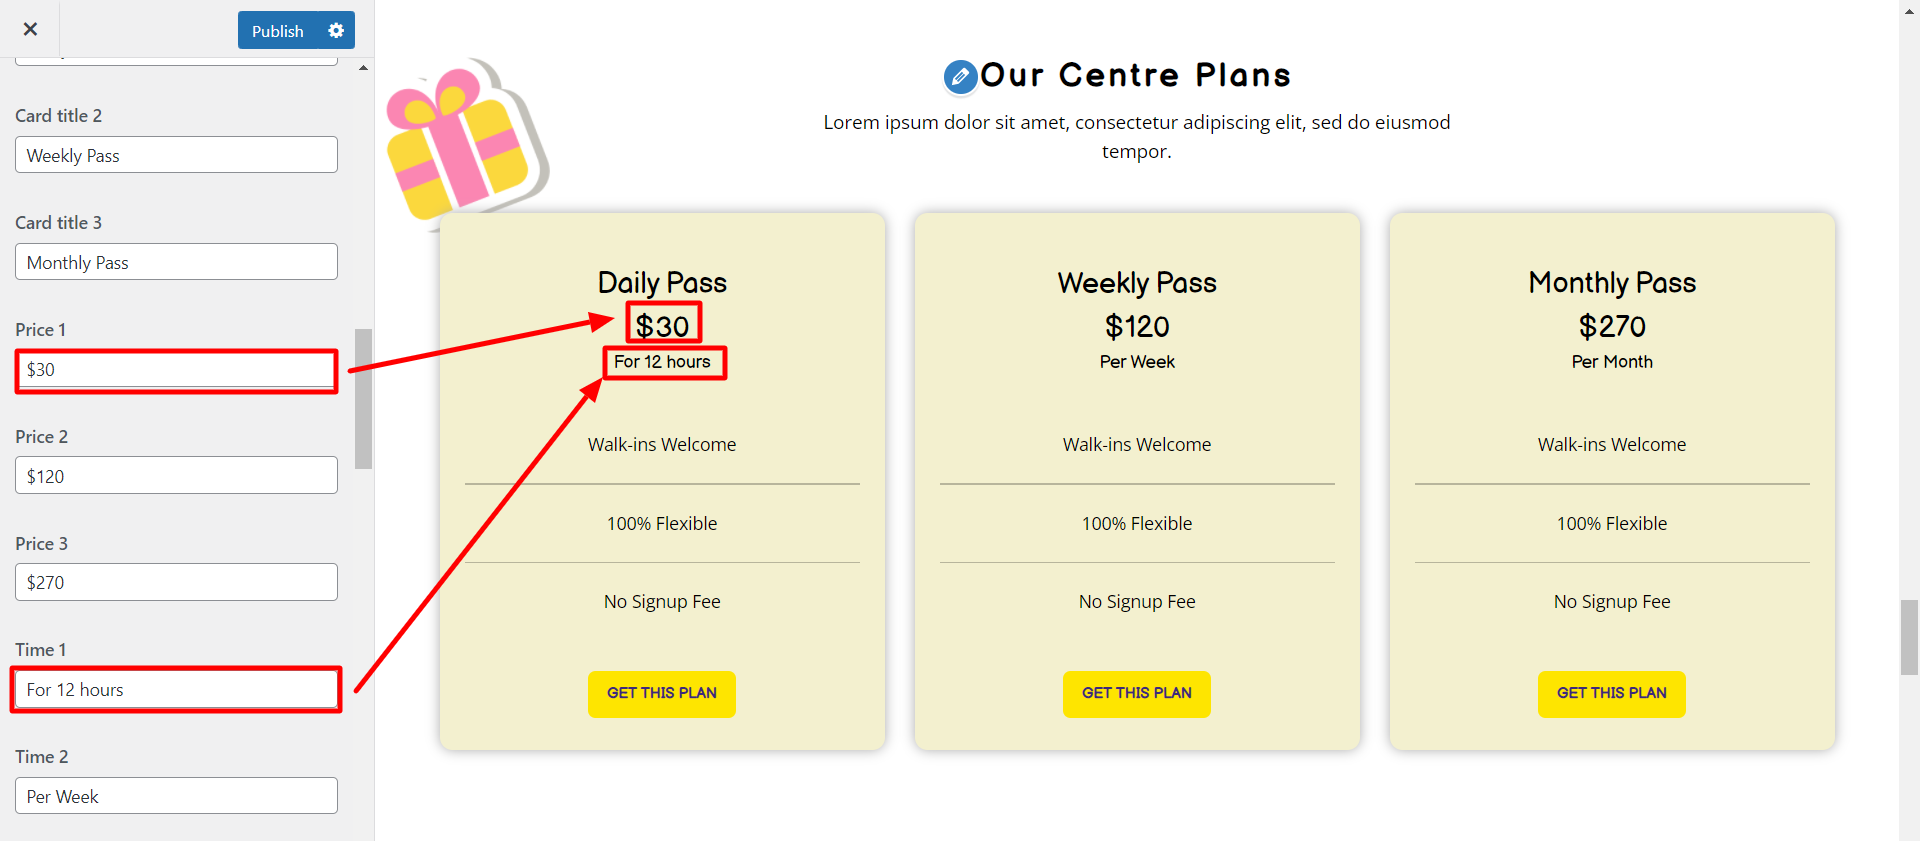
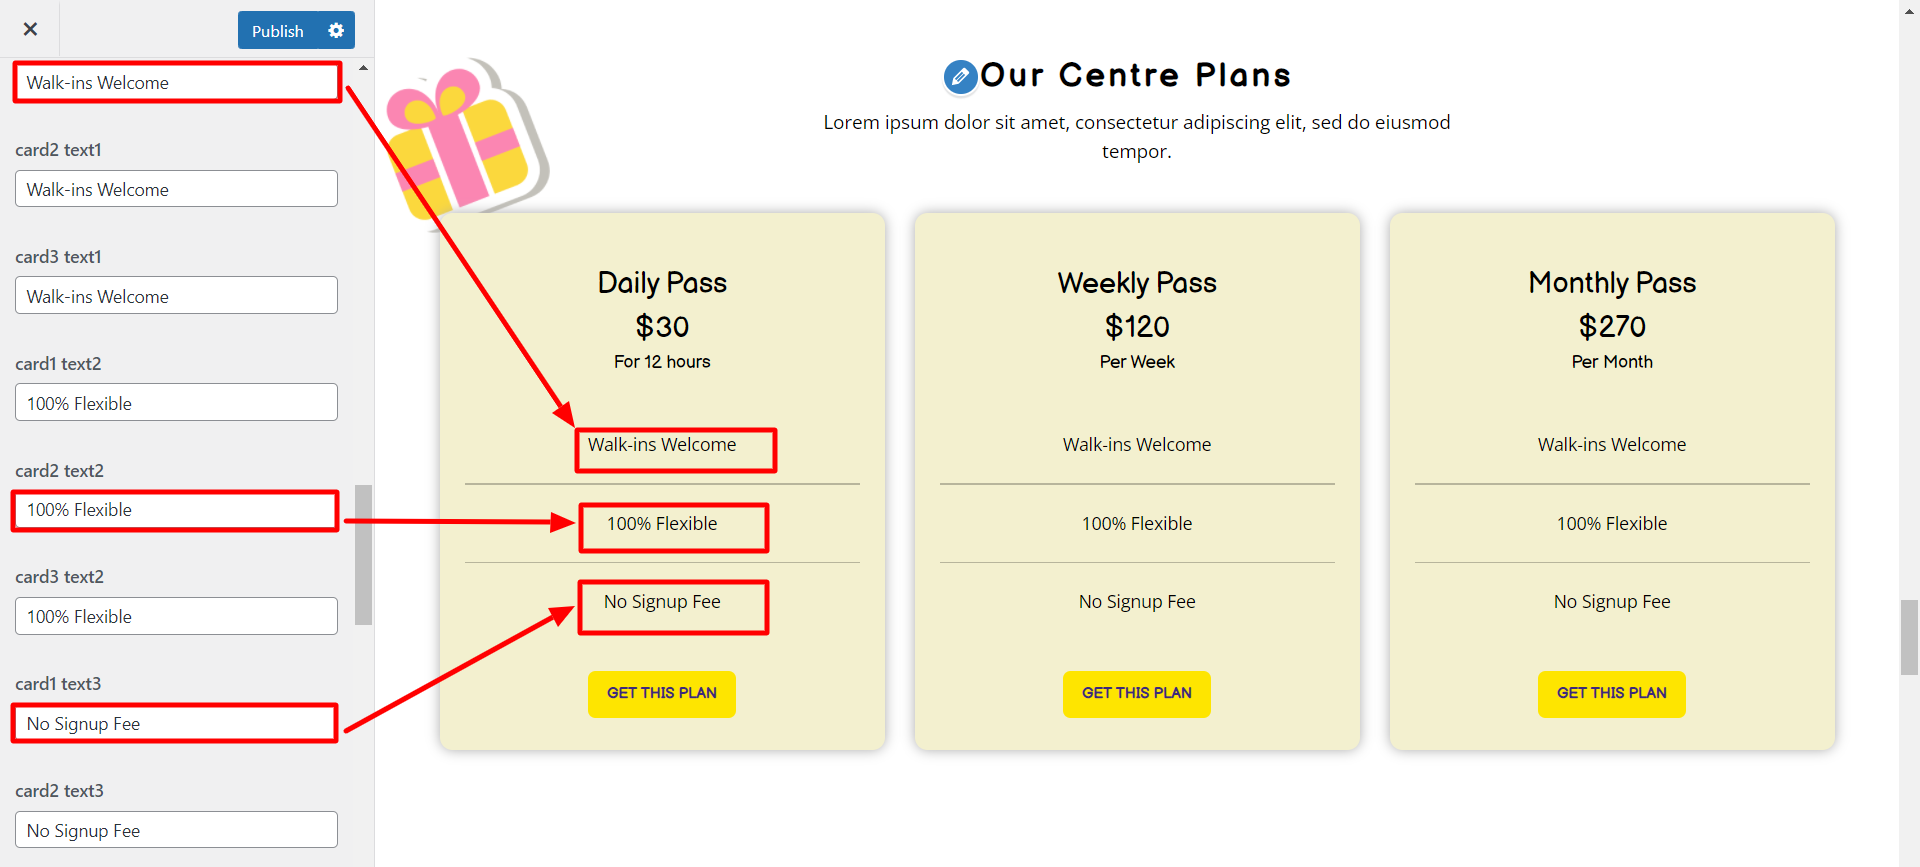
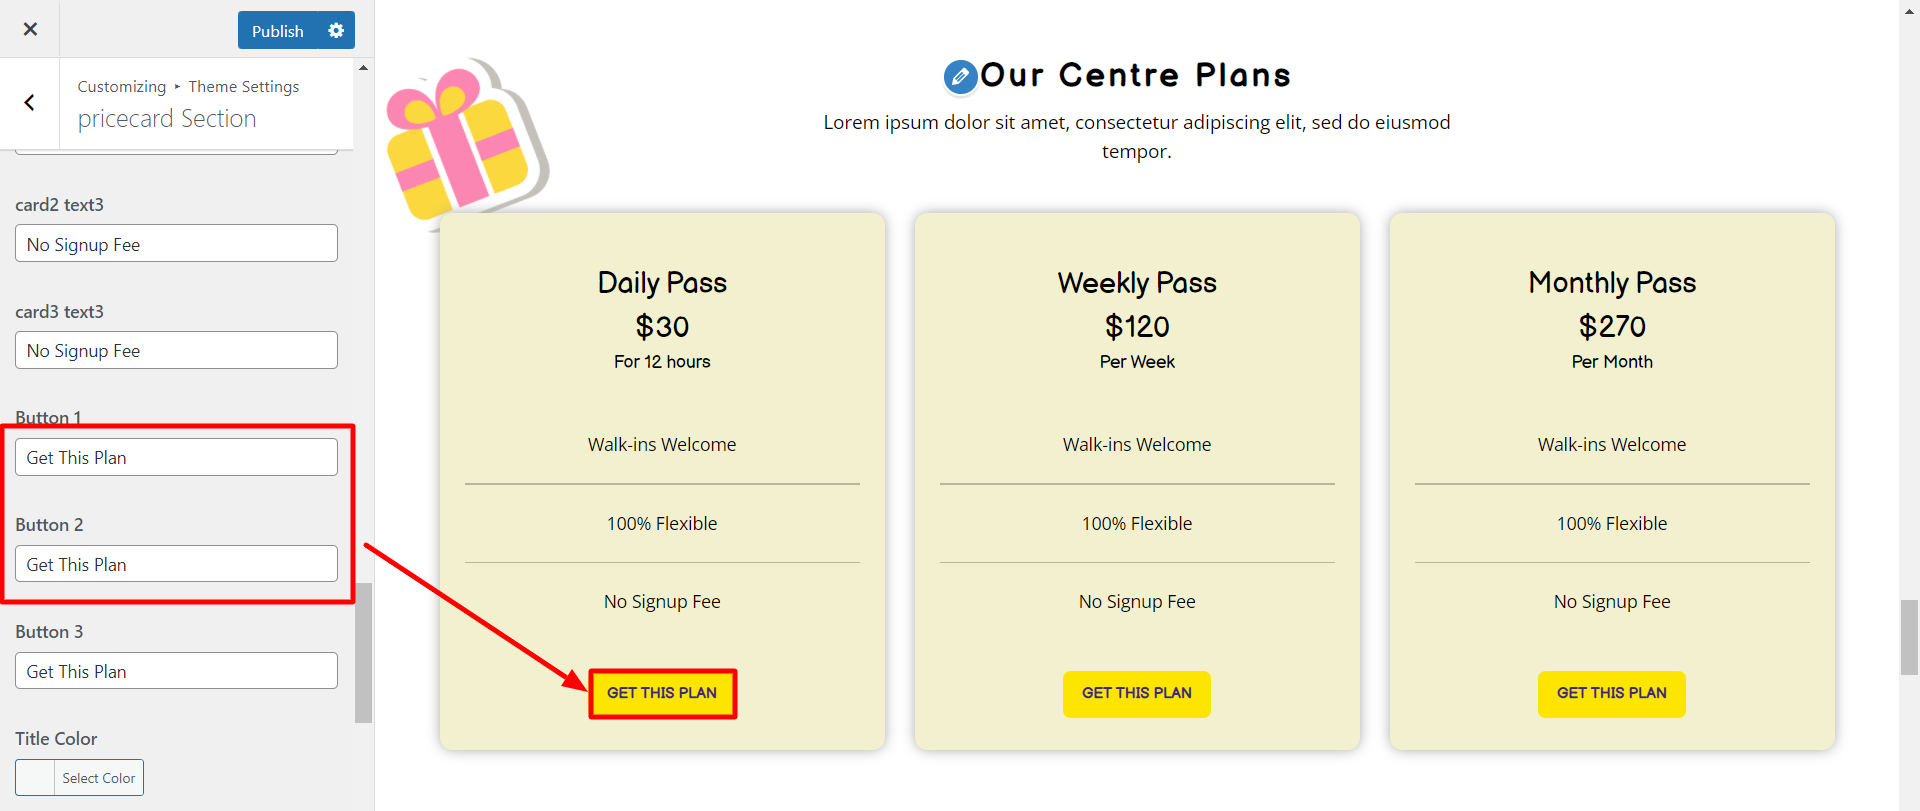
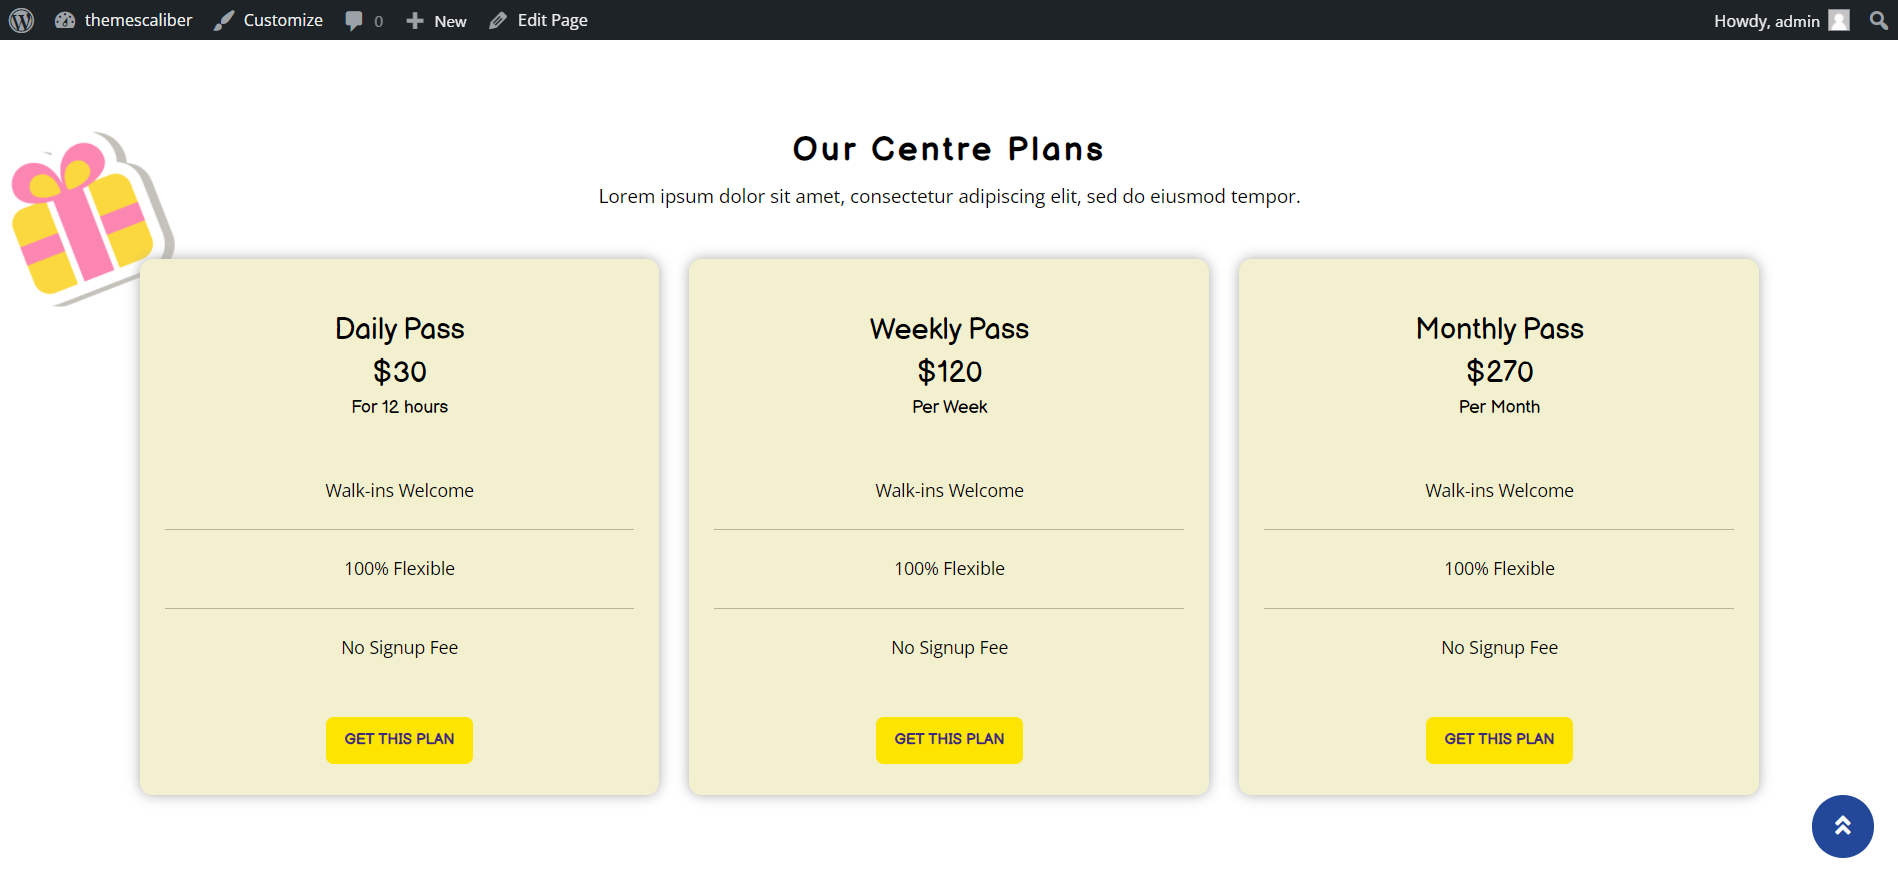
Home Page Section
Setup Home Page Template
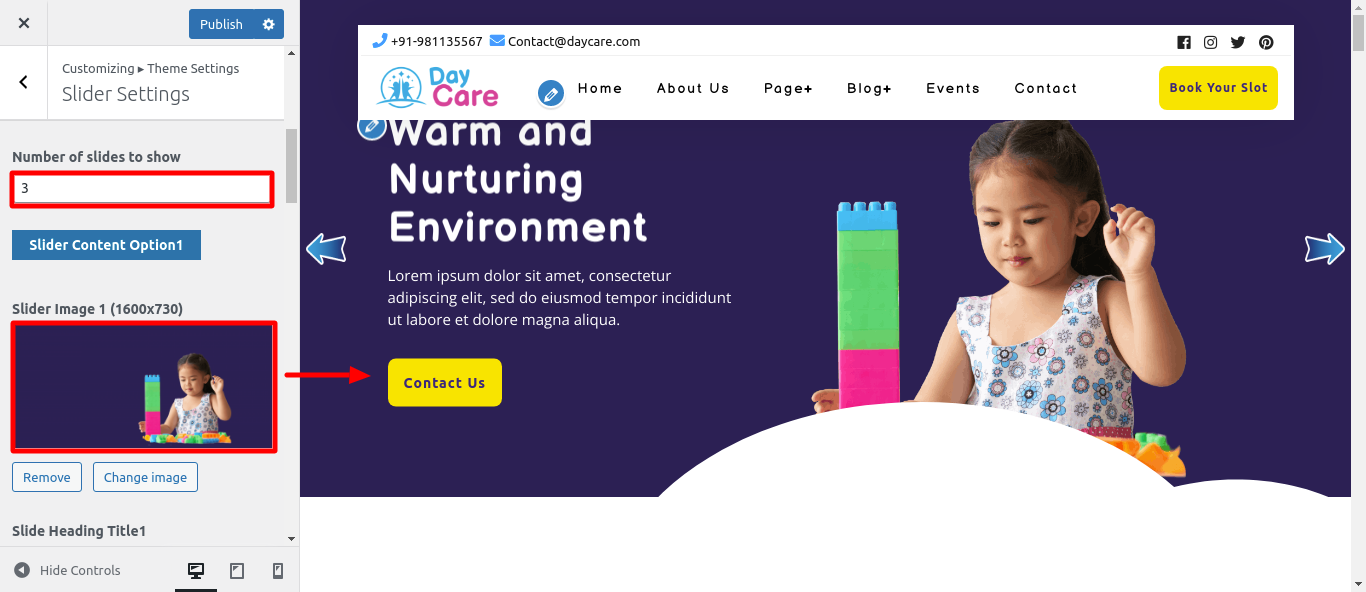
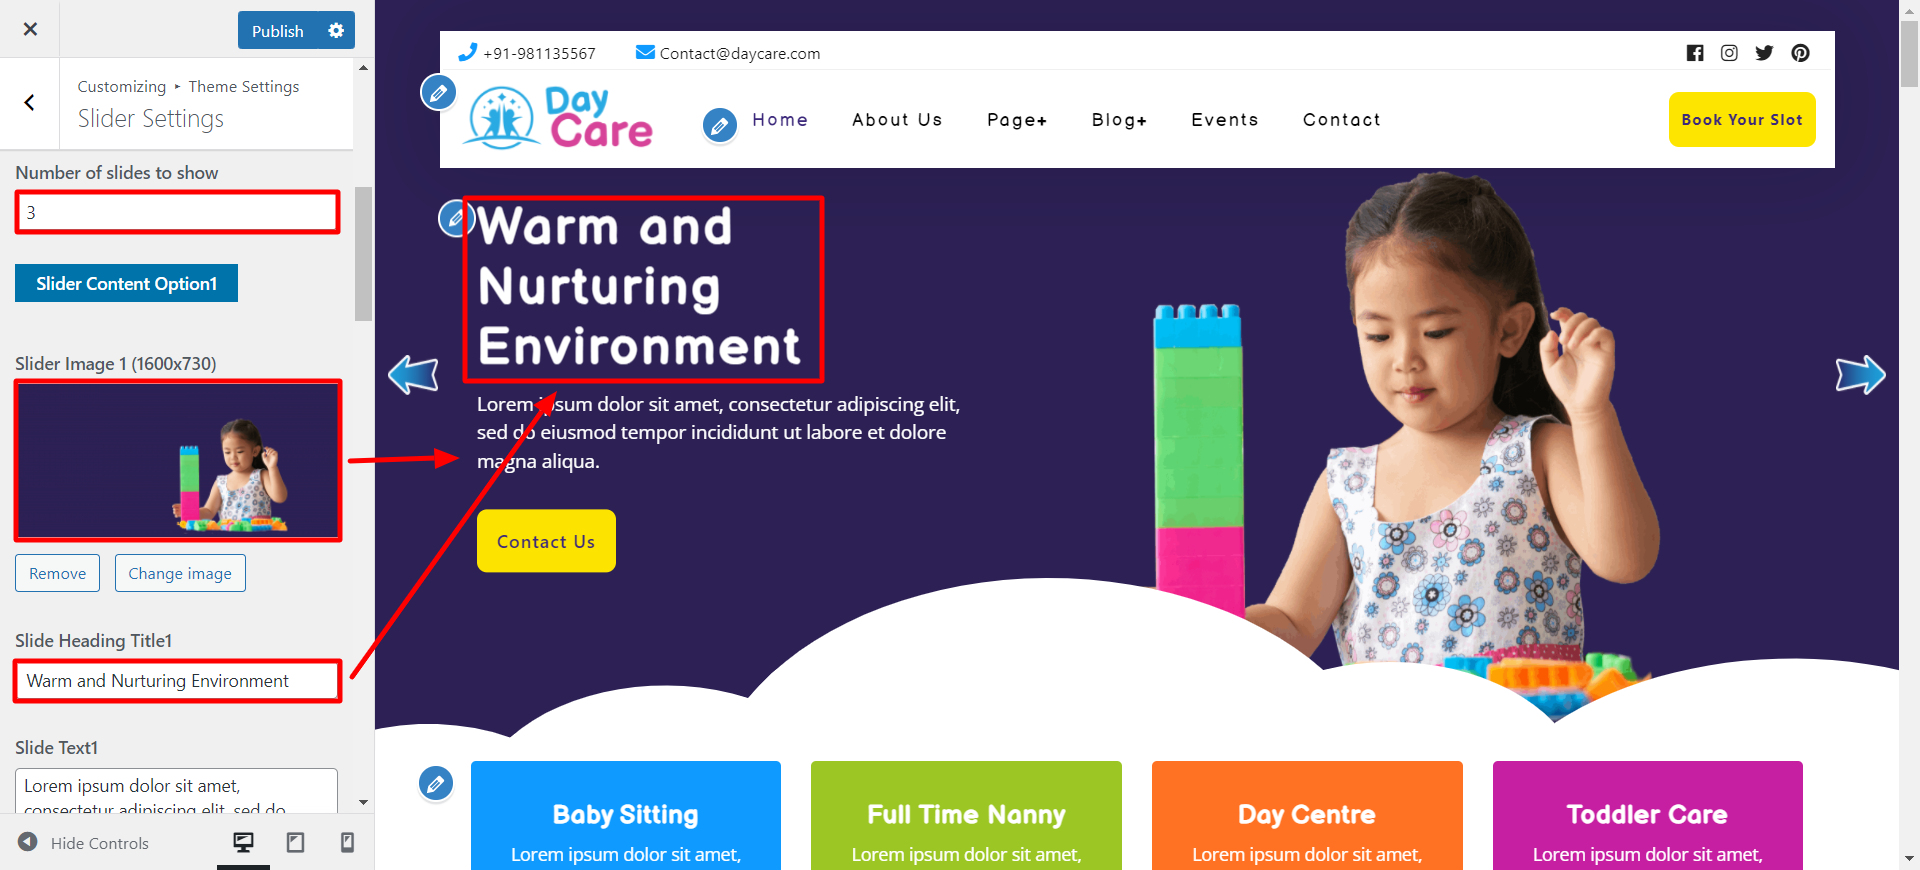
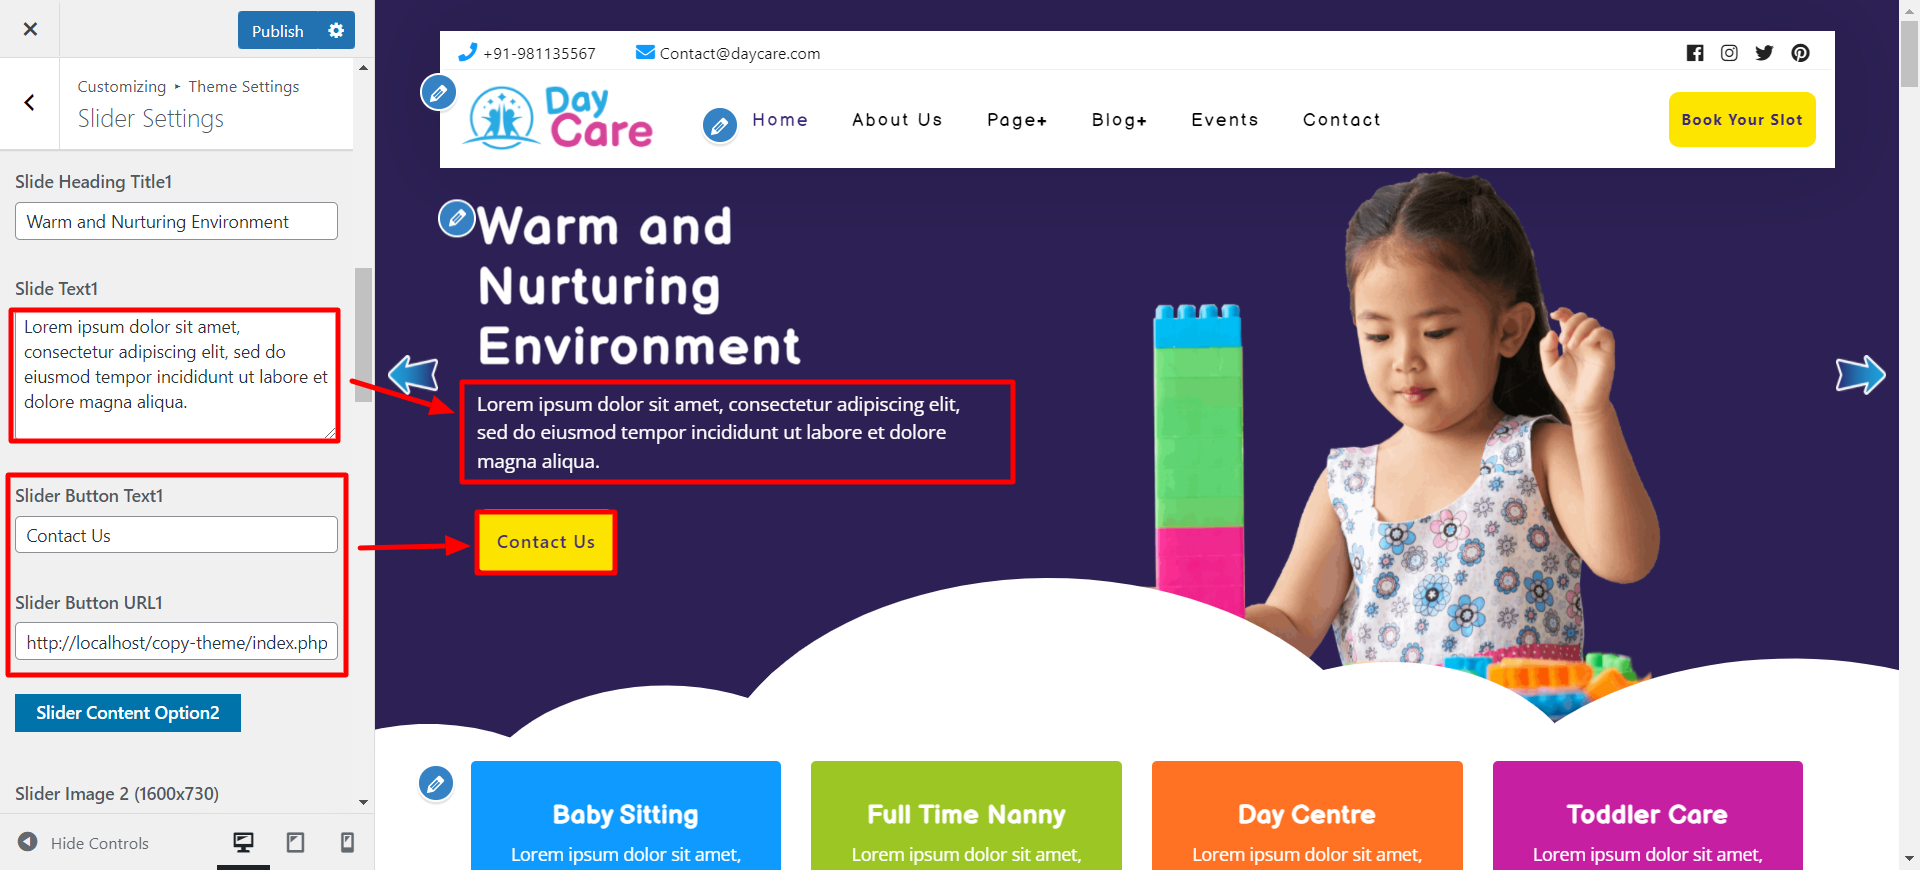
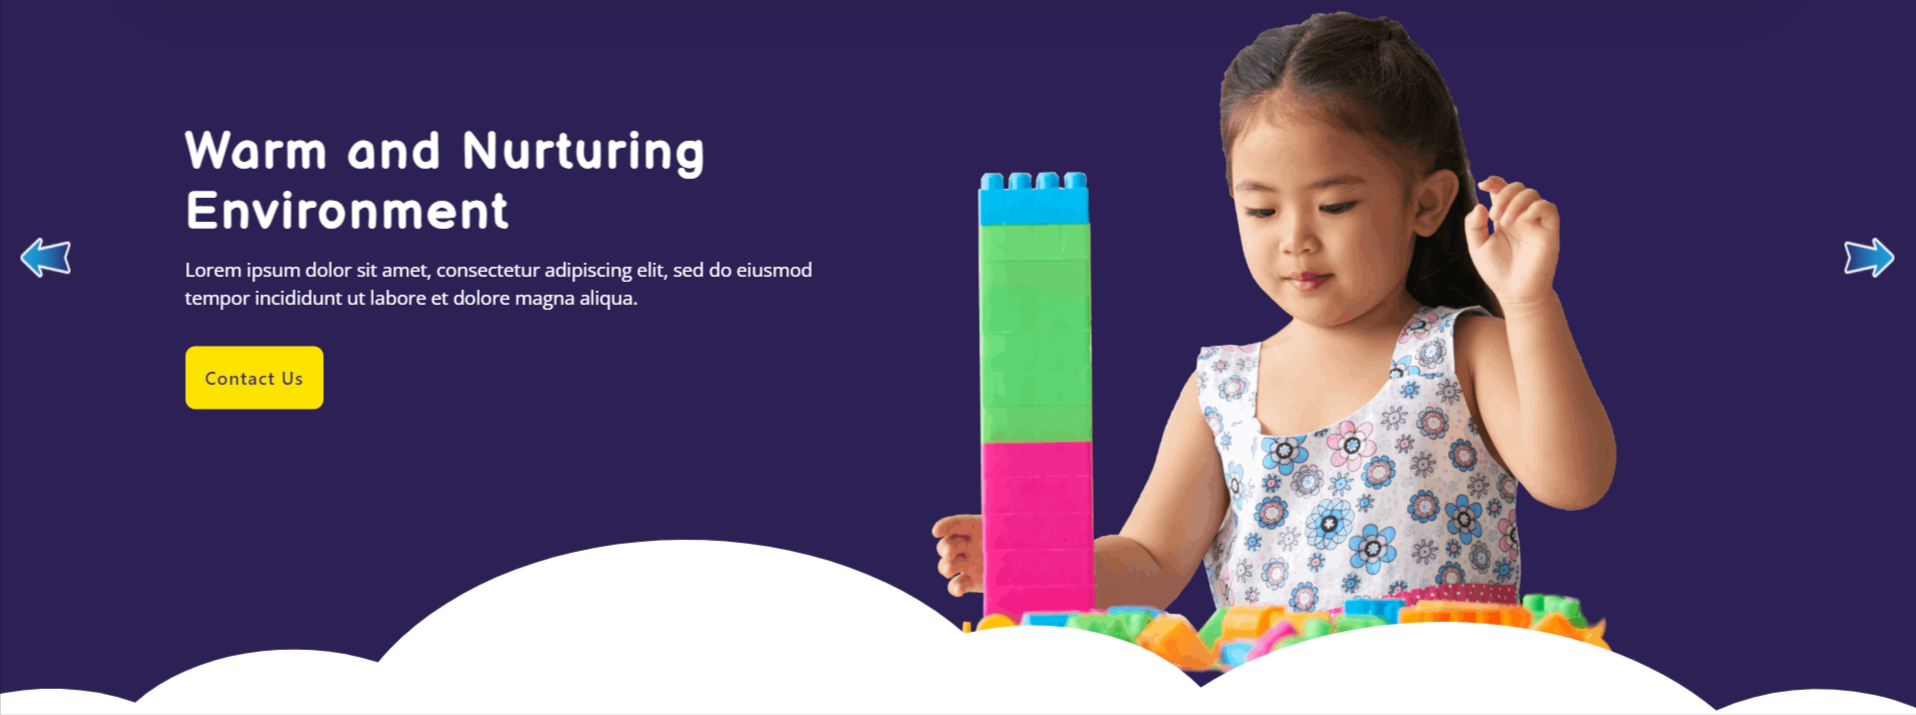
You can organise your site's home page and other pages with the aid of this part. Additionally, it will show you how to set up WordPress menus, make a slider, make a home page, use page templates, and put shortcode into pages.
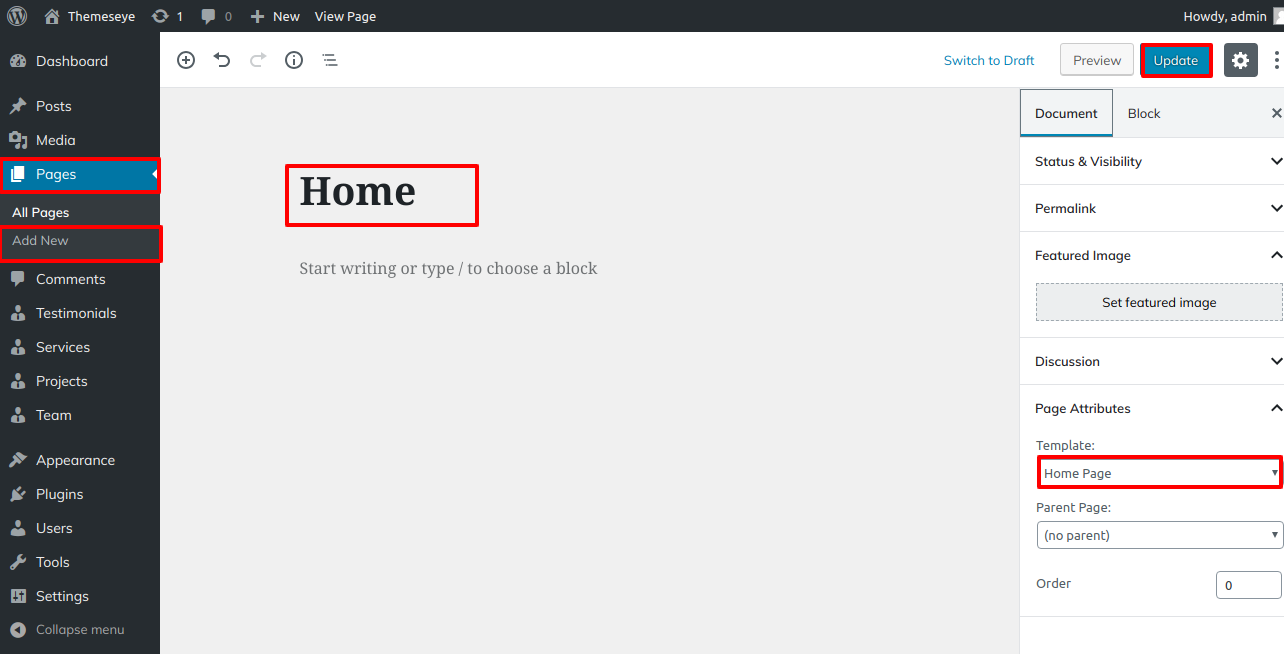
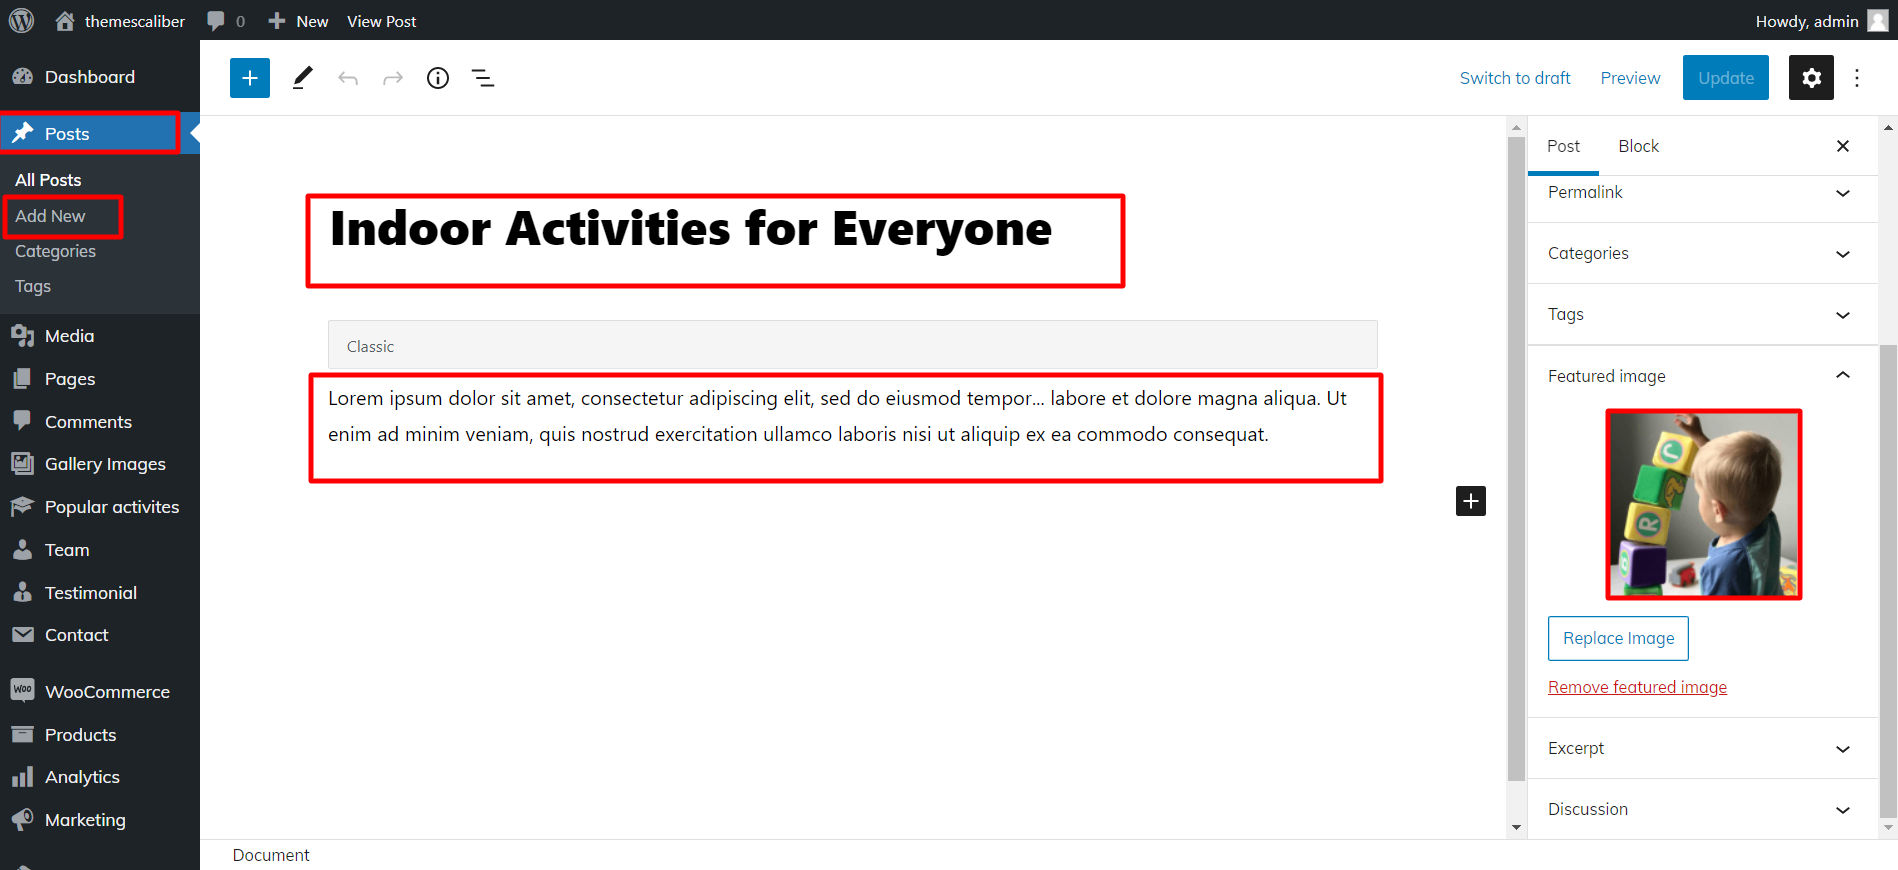
- Step 1 - Go to Dashboard >> Pages >> Add New, enter page name and select template as Home Page Template from Page Attribute as shown in below image
- Step 2 - Publish this page
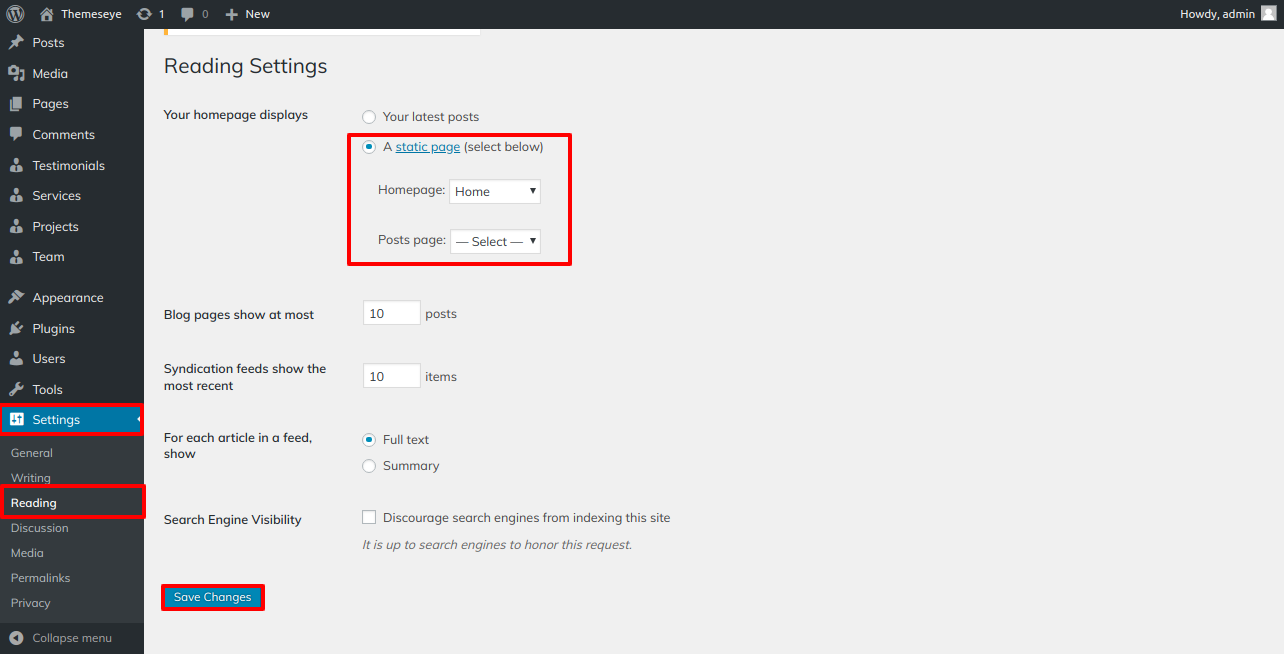
- Step 3 - Go to Dashboard >> Settings >> Reading, select home page as a front page


Header Setting
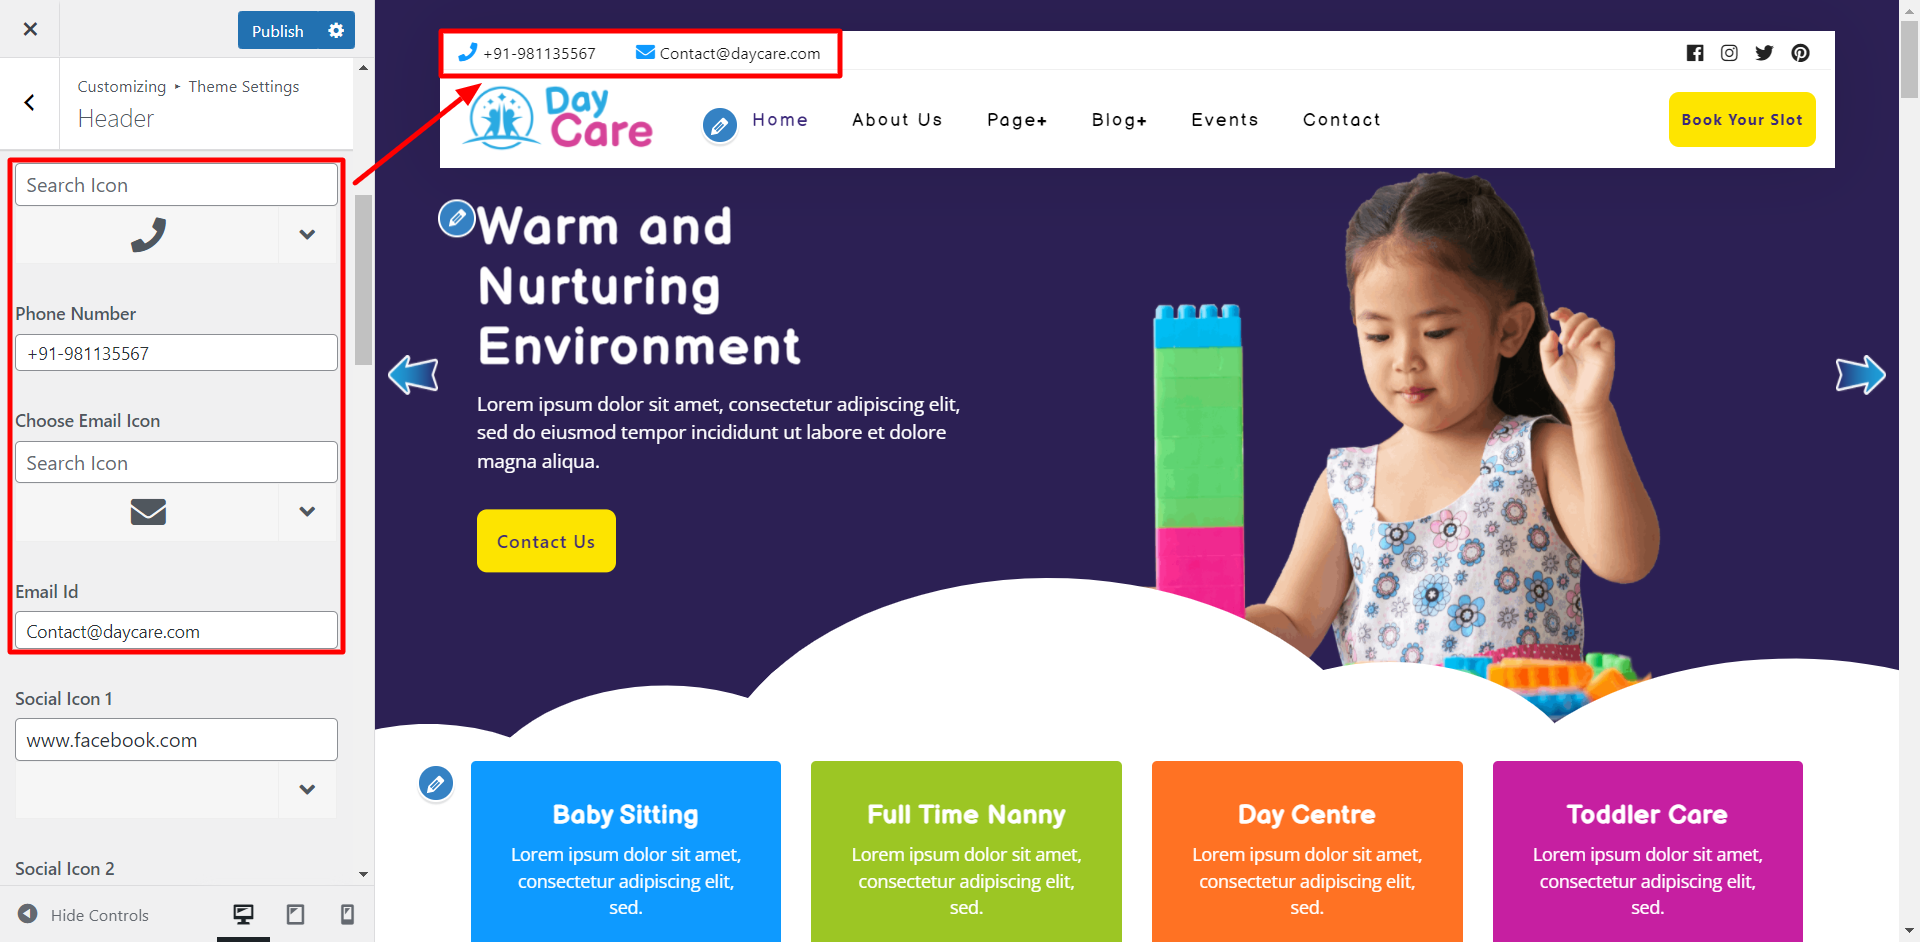
- Step 1 - Go to Dashboard >> >> Appearance >> Customize >> Site Identity.
- a. You can add logo from Select Logo button for set logo
- Step 2 If you want to add and assign the page to that area, go to Dashboard >> Pages >> add new page with addition of image. To allocate numerous pages to the same section, repeat this process several times.
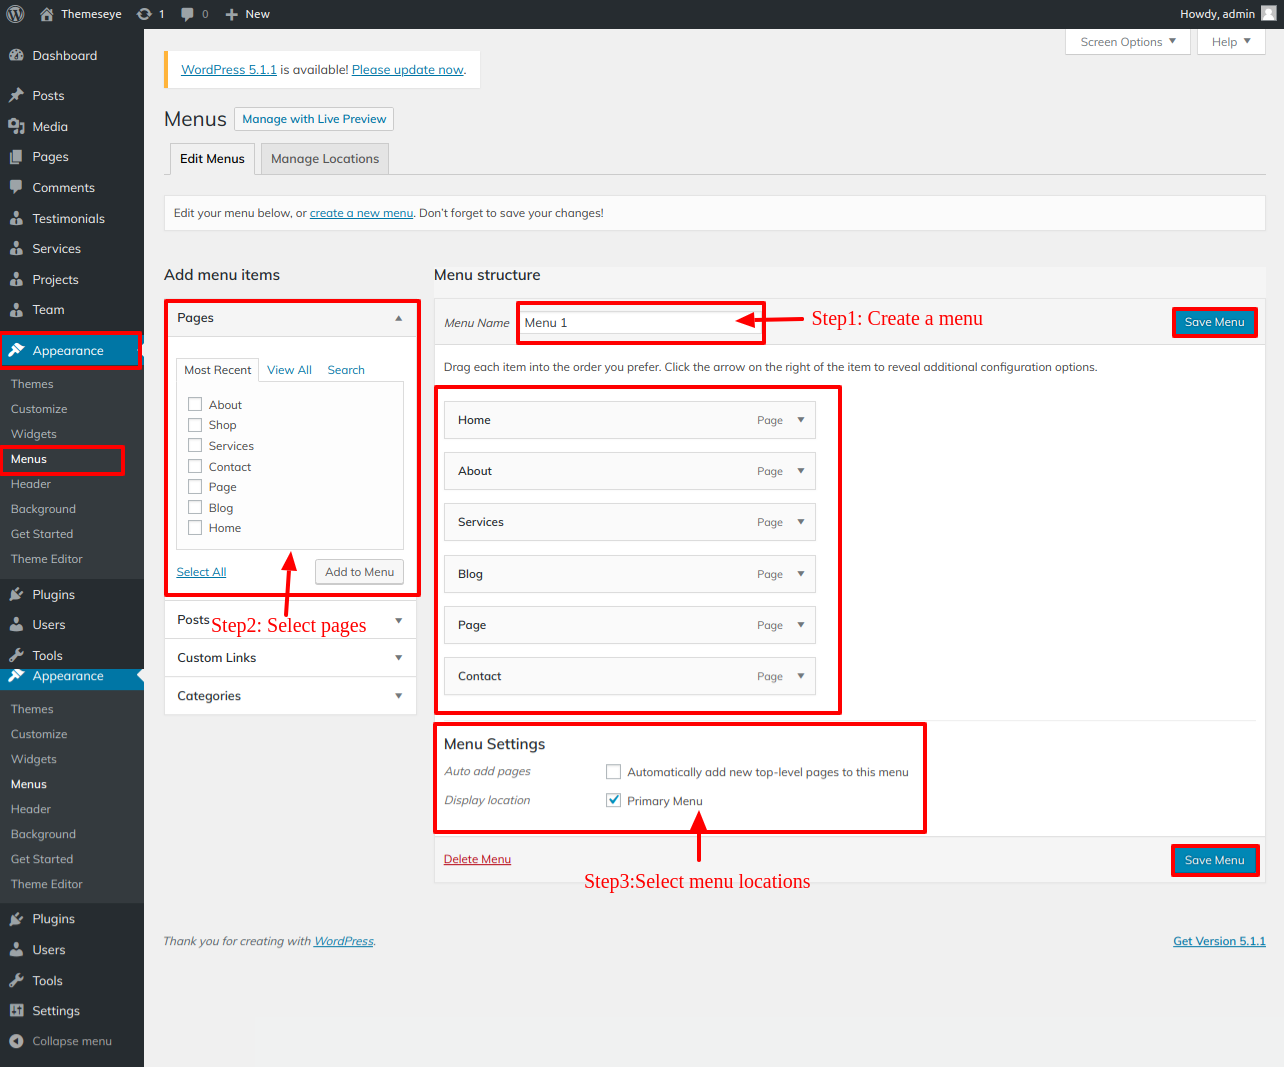
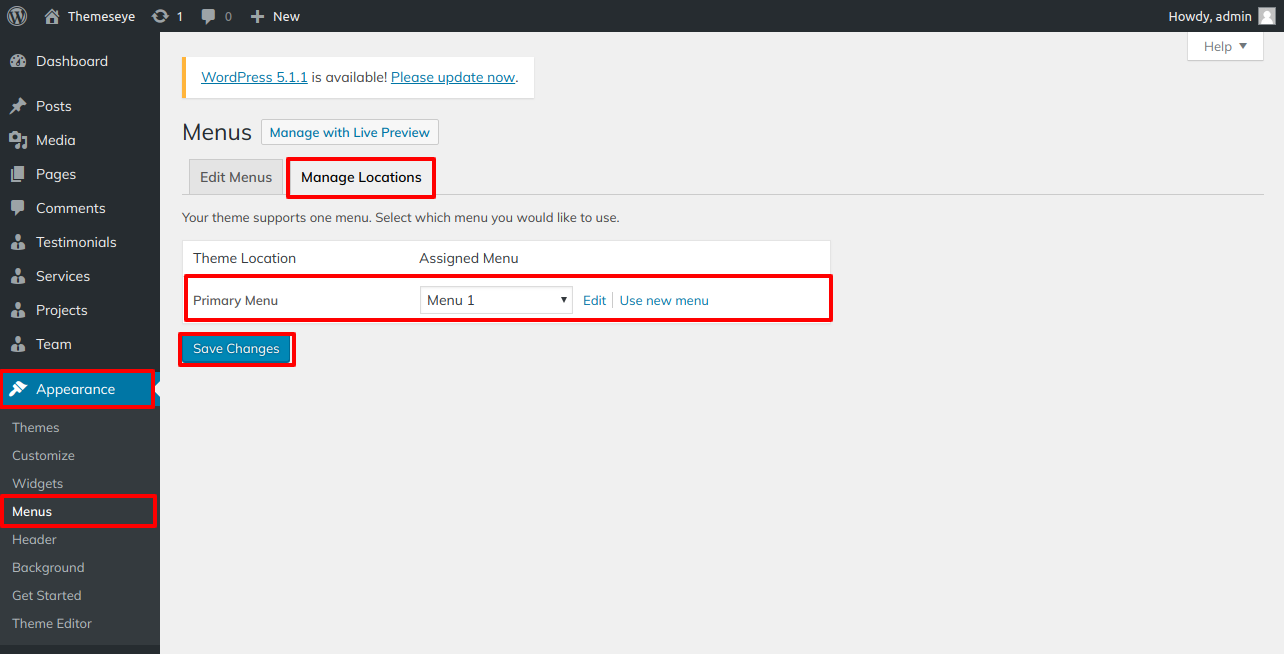
- Step 3 - Go to Dashboard >> Appearance >> Menus.
- Step 4 - Click on create a new menu as show in below image.
- Step 5 - Enter menu name and click on Create Menu as shown in below image.
- Step 6 - From the left side, choose Pages like Latest Blog, Pages, and About Us, then select Add to Menu button as show in below image
- Step 7 - Following the selection of pages, choose the menu option and press save menu.
- Step 8 - Click on Manage Locations as show in below image.
- Front Preview of the Primary Menu

Final Header show
Setup About Section
Follow the steps below to build up the About Section.
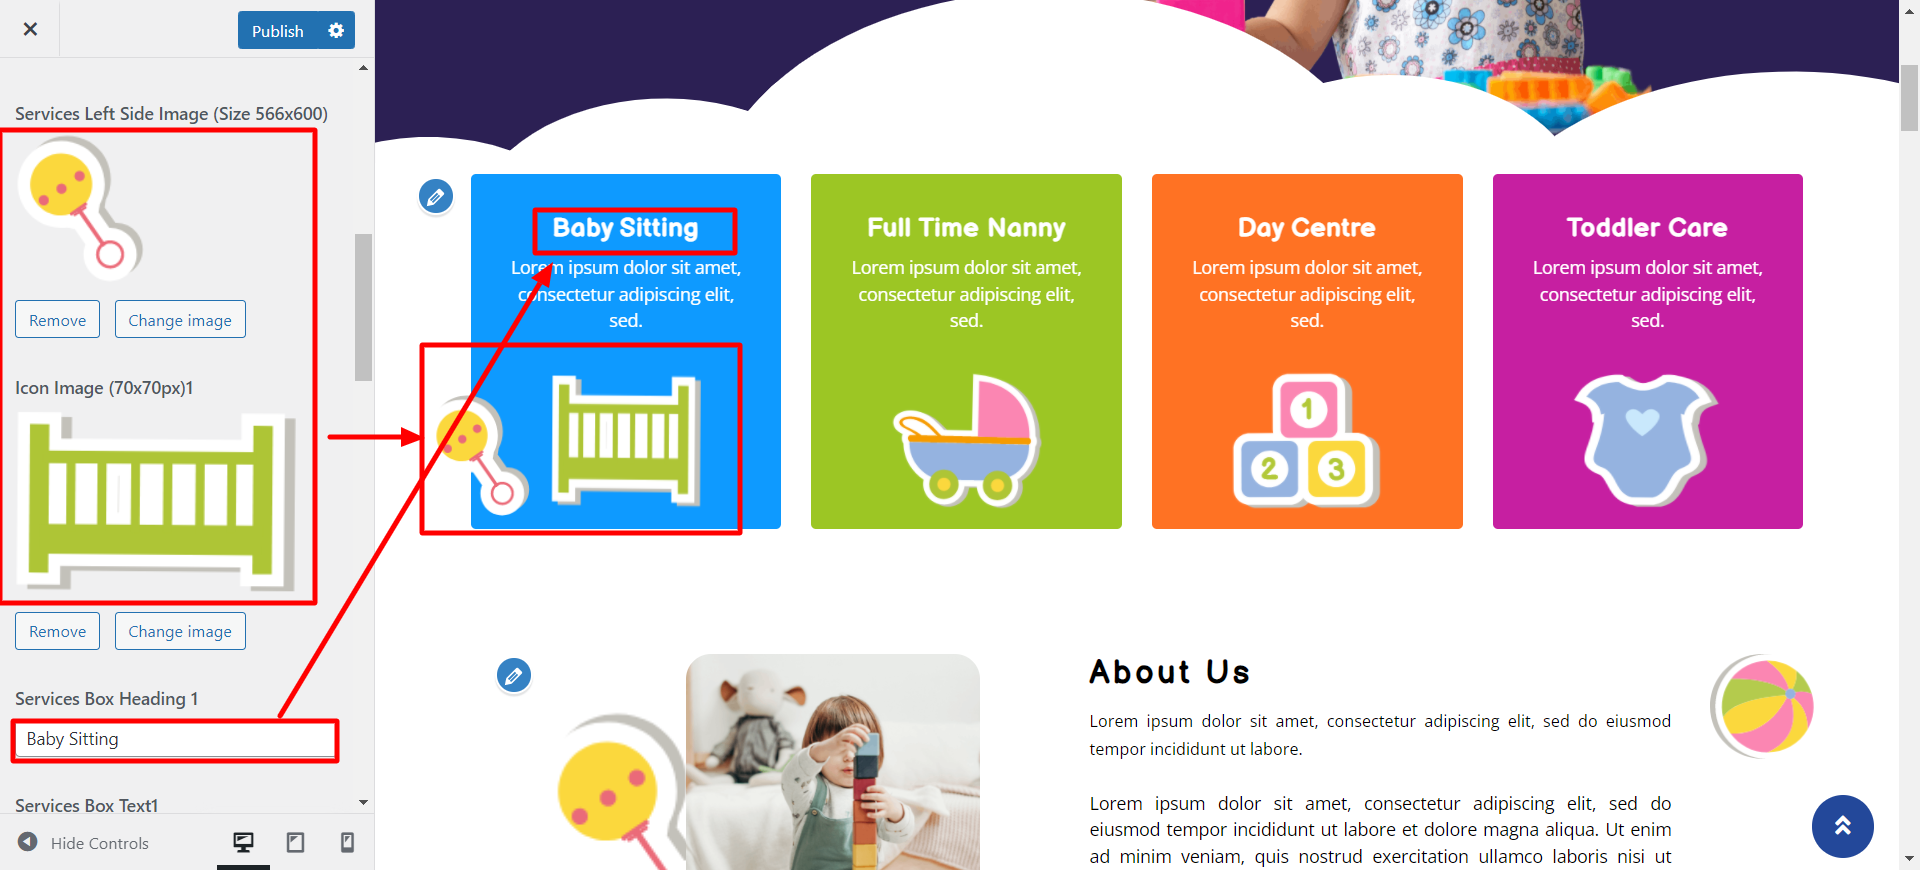
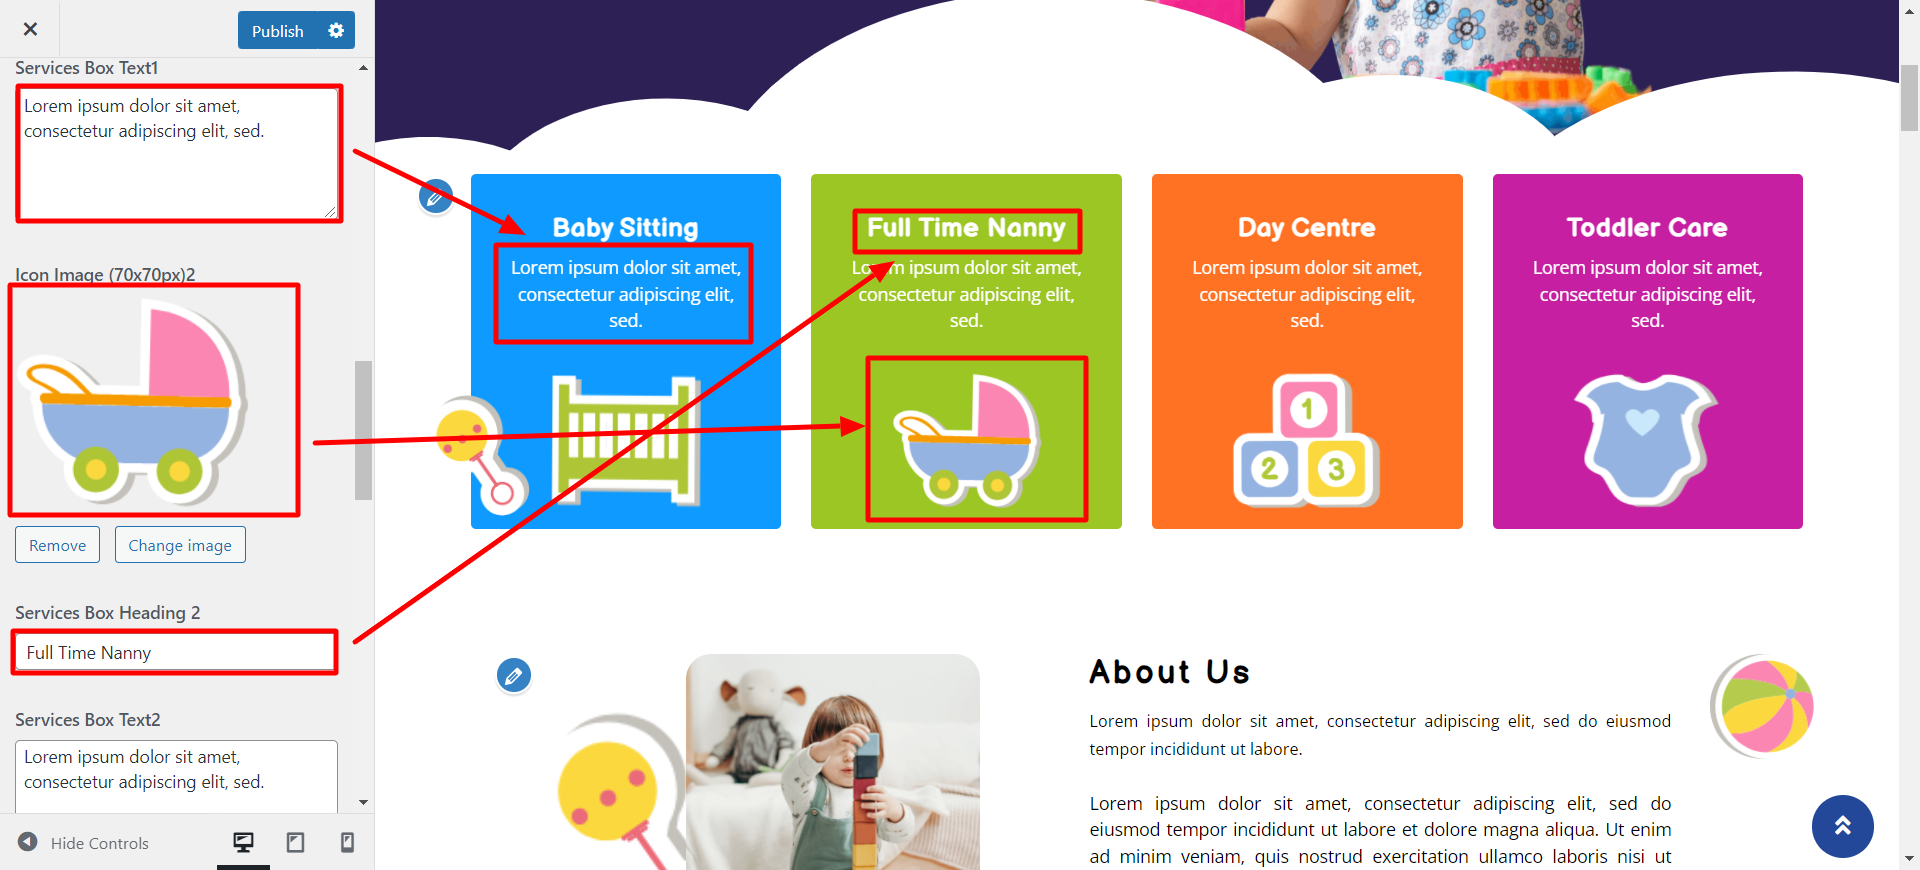
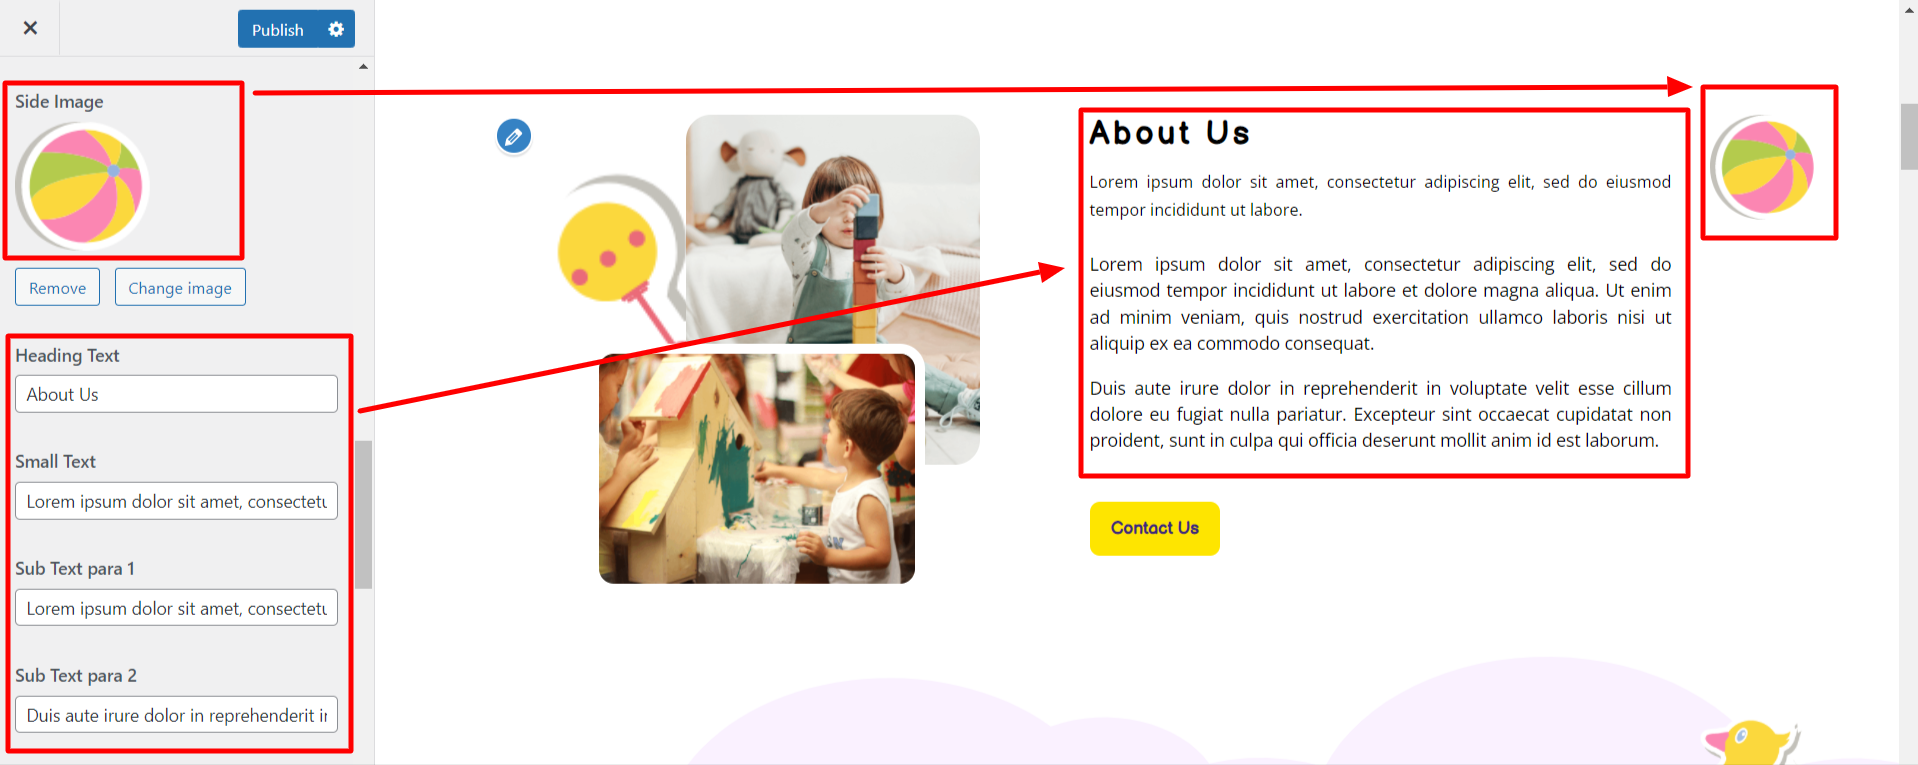
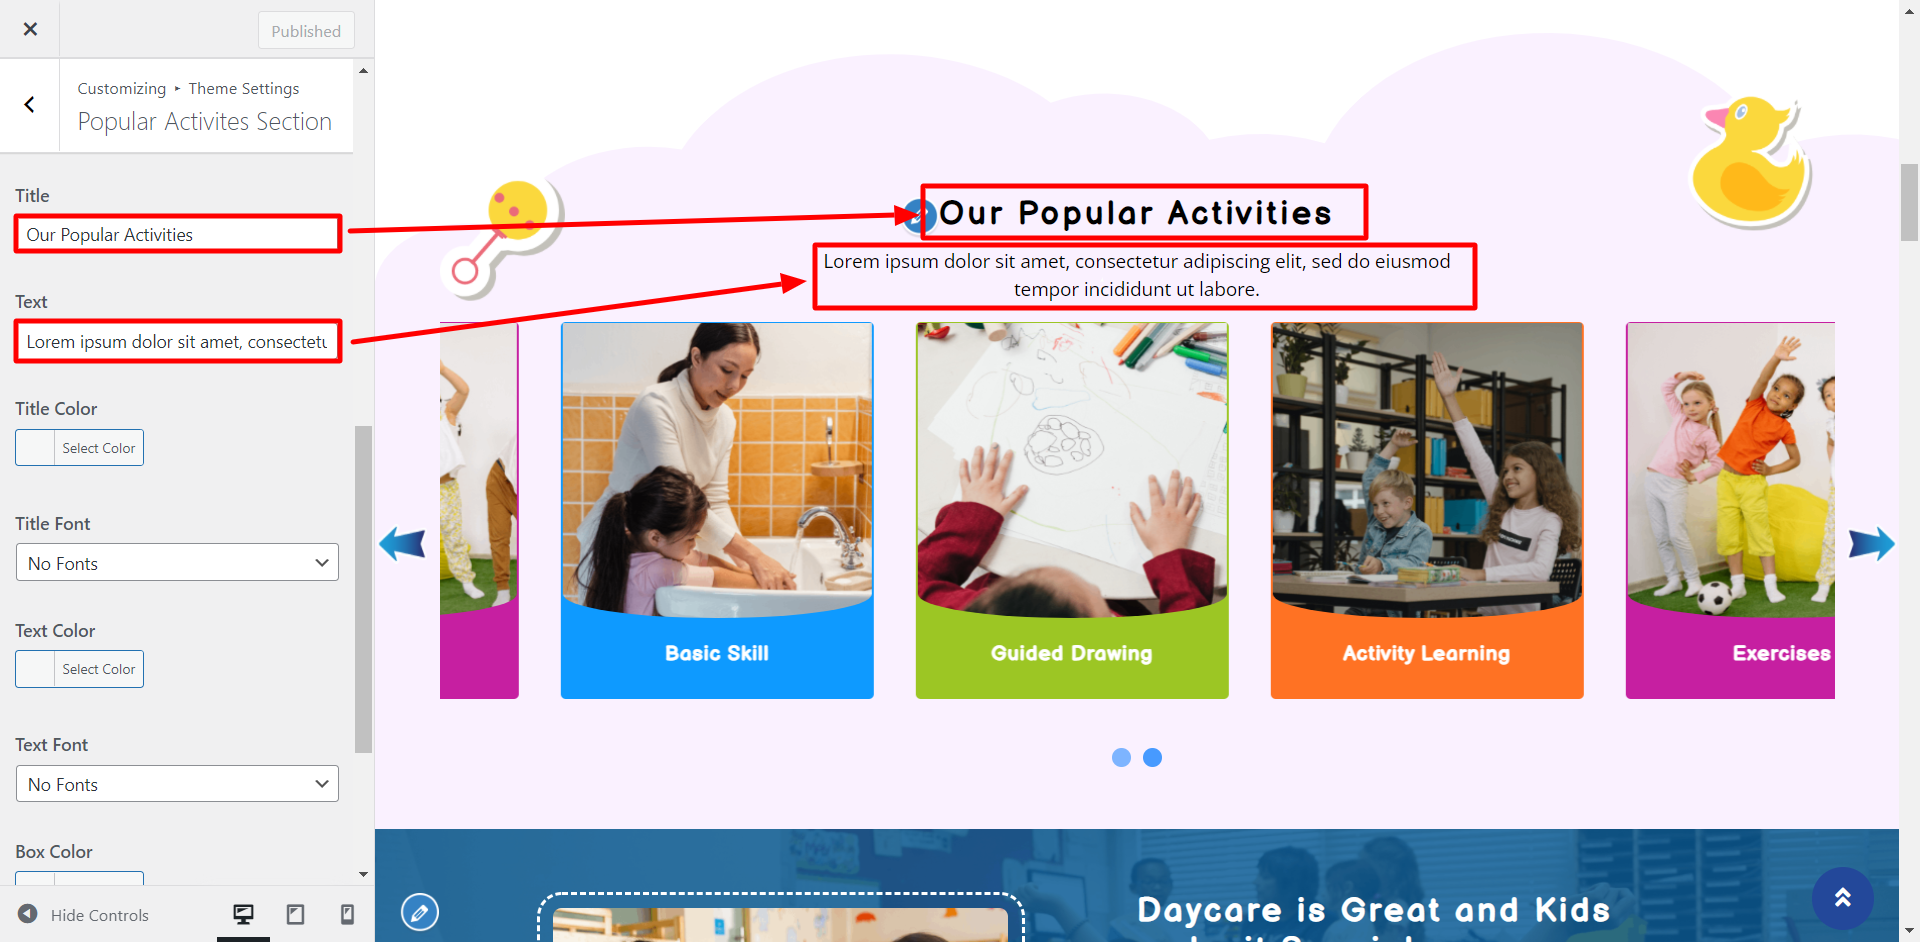
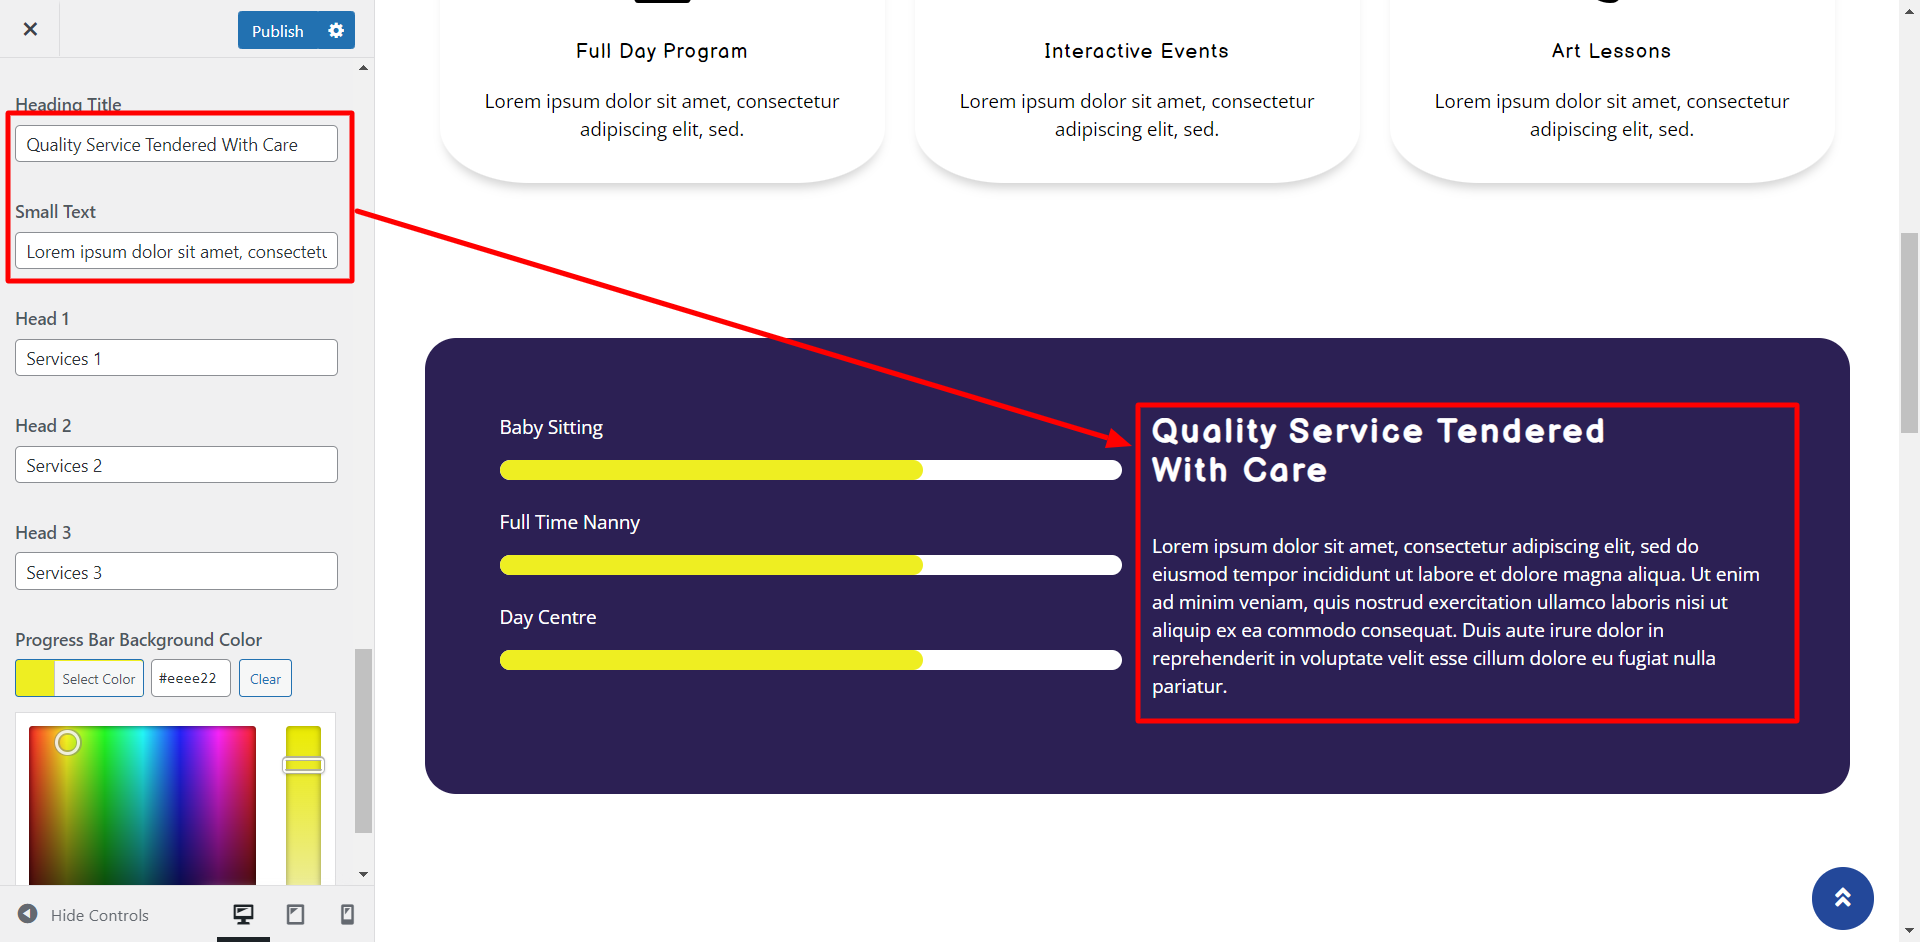
- Step 1 - Go to Dashboard >> Appearance >> Customize >> Theme Settings >> About Section.
- (a) Add Background Image
- (b) Add Tab Title
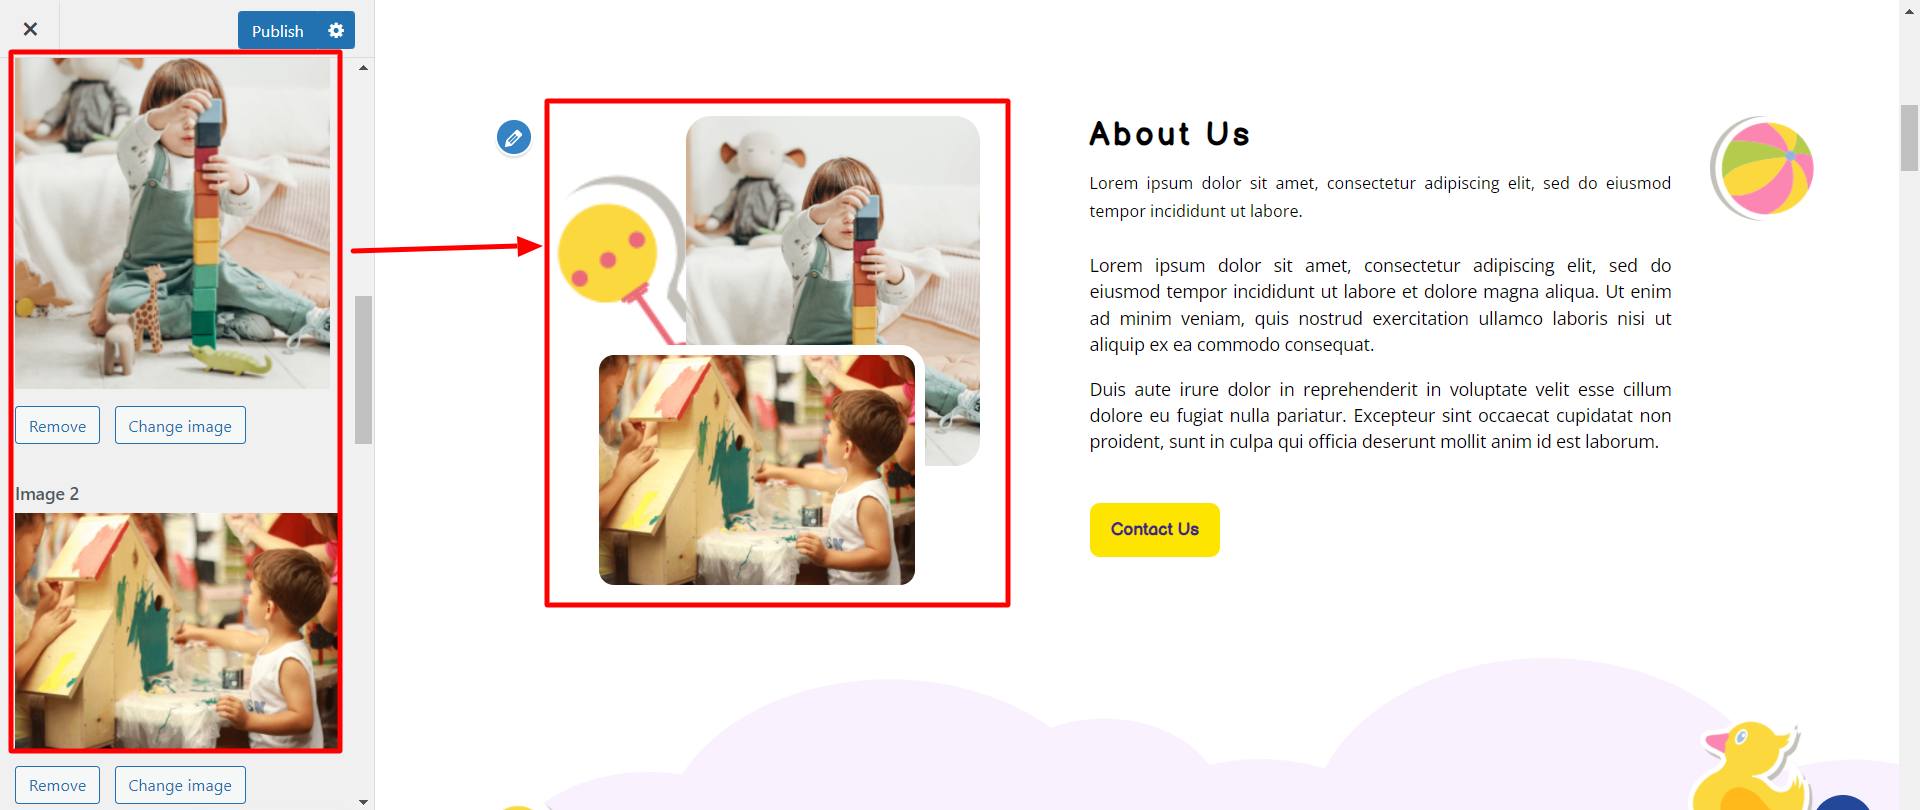
- (c) Select About Image 1
- (d) Add Tab button Link
Step 2 - Manage Background
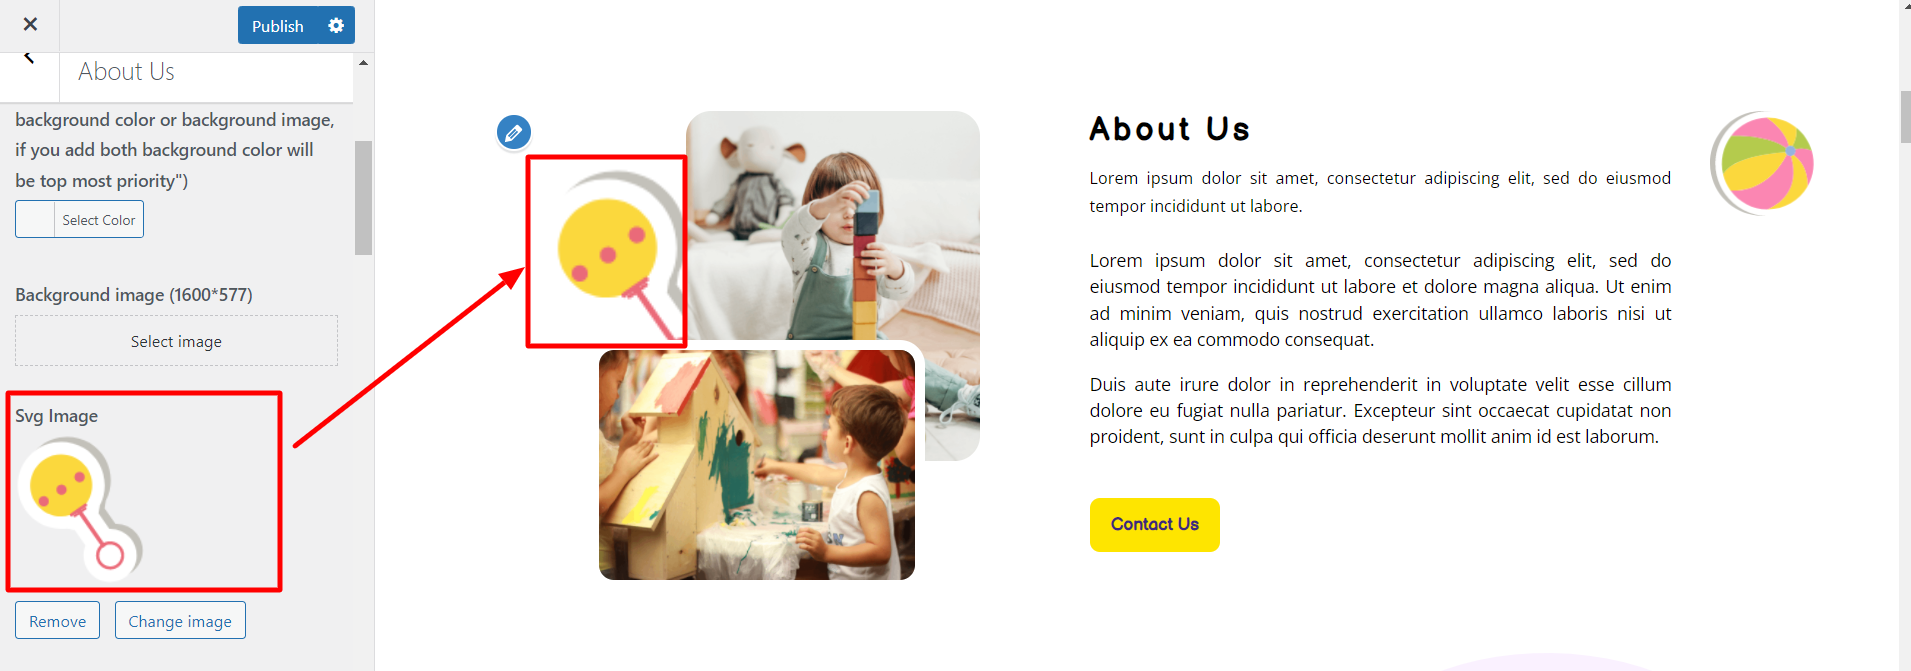
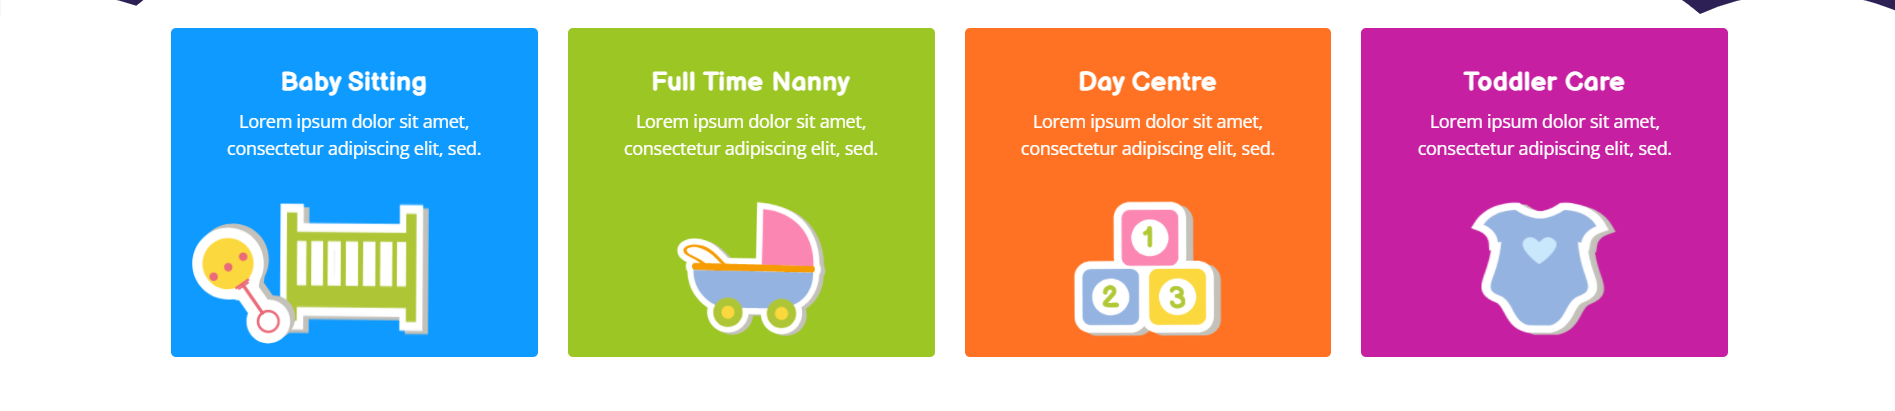
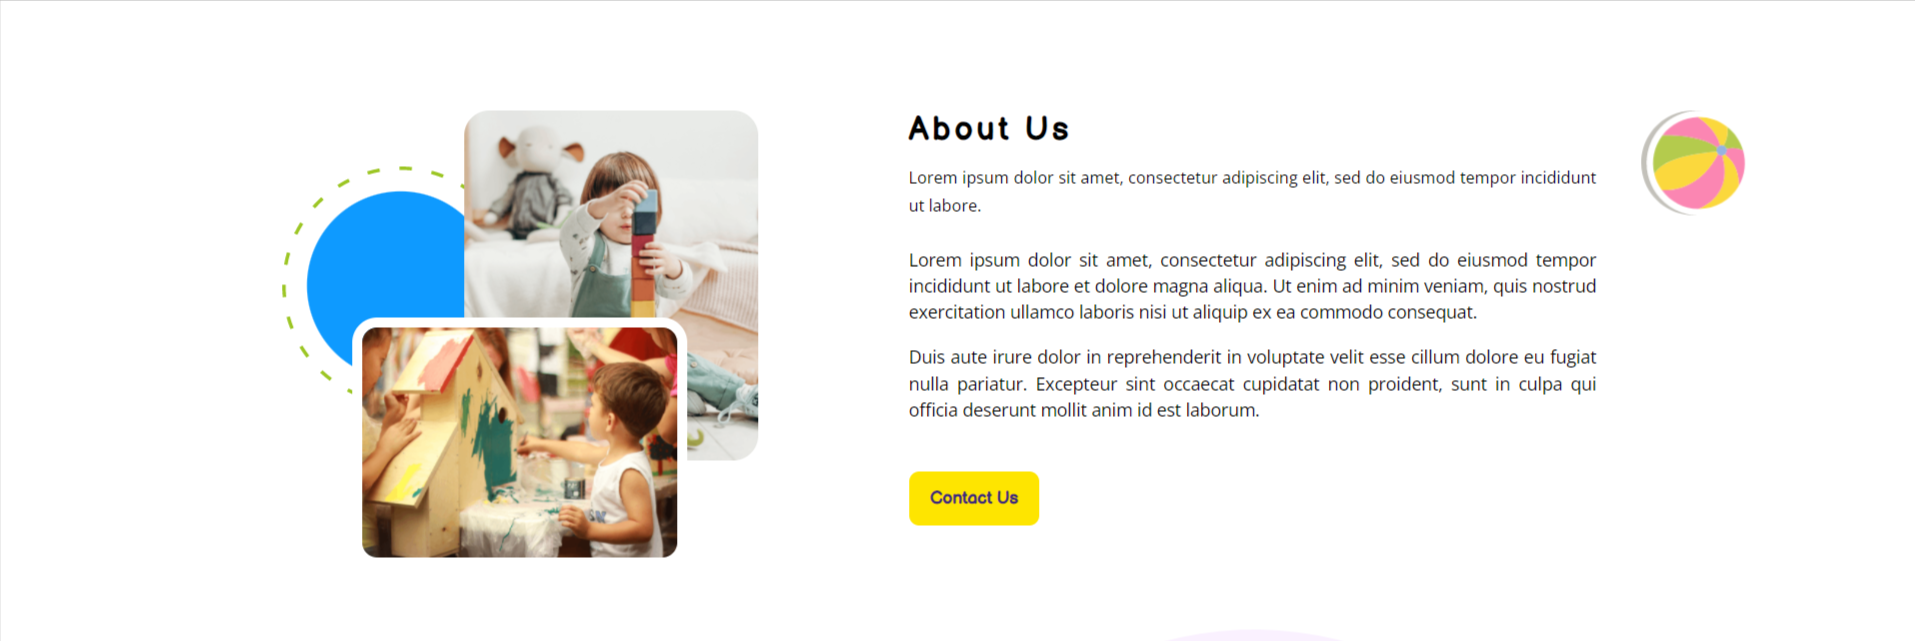
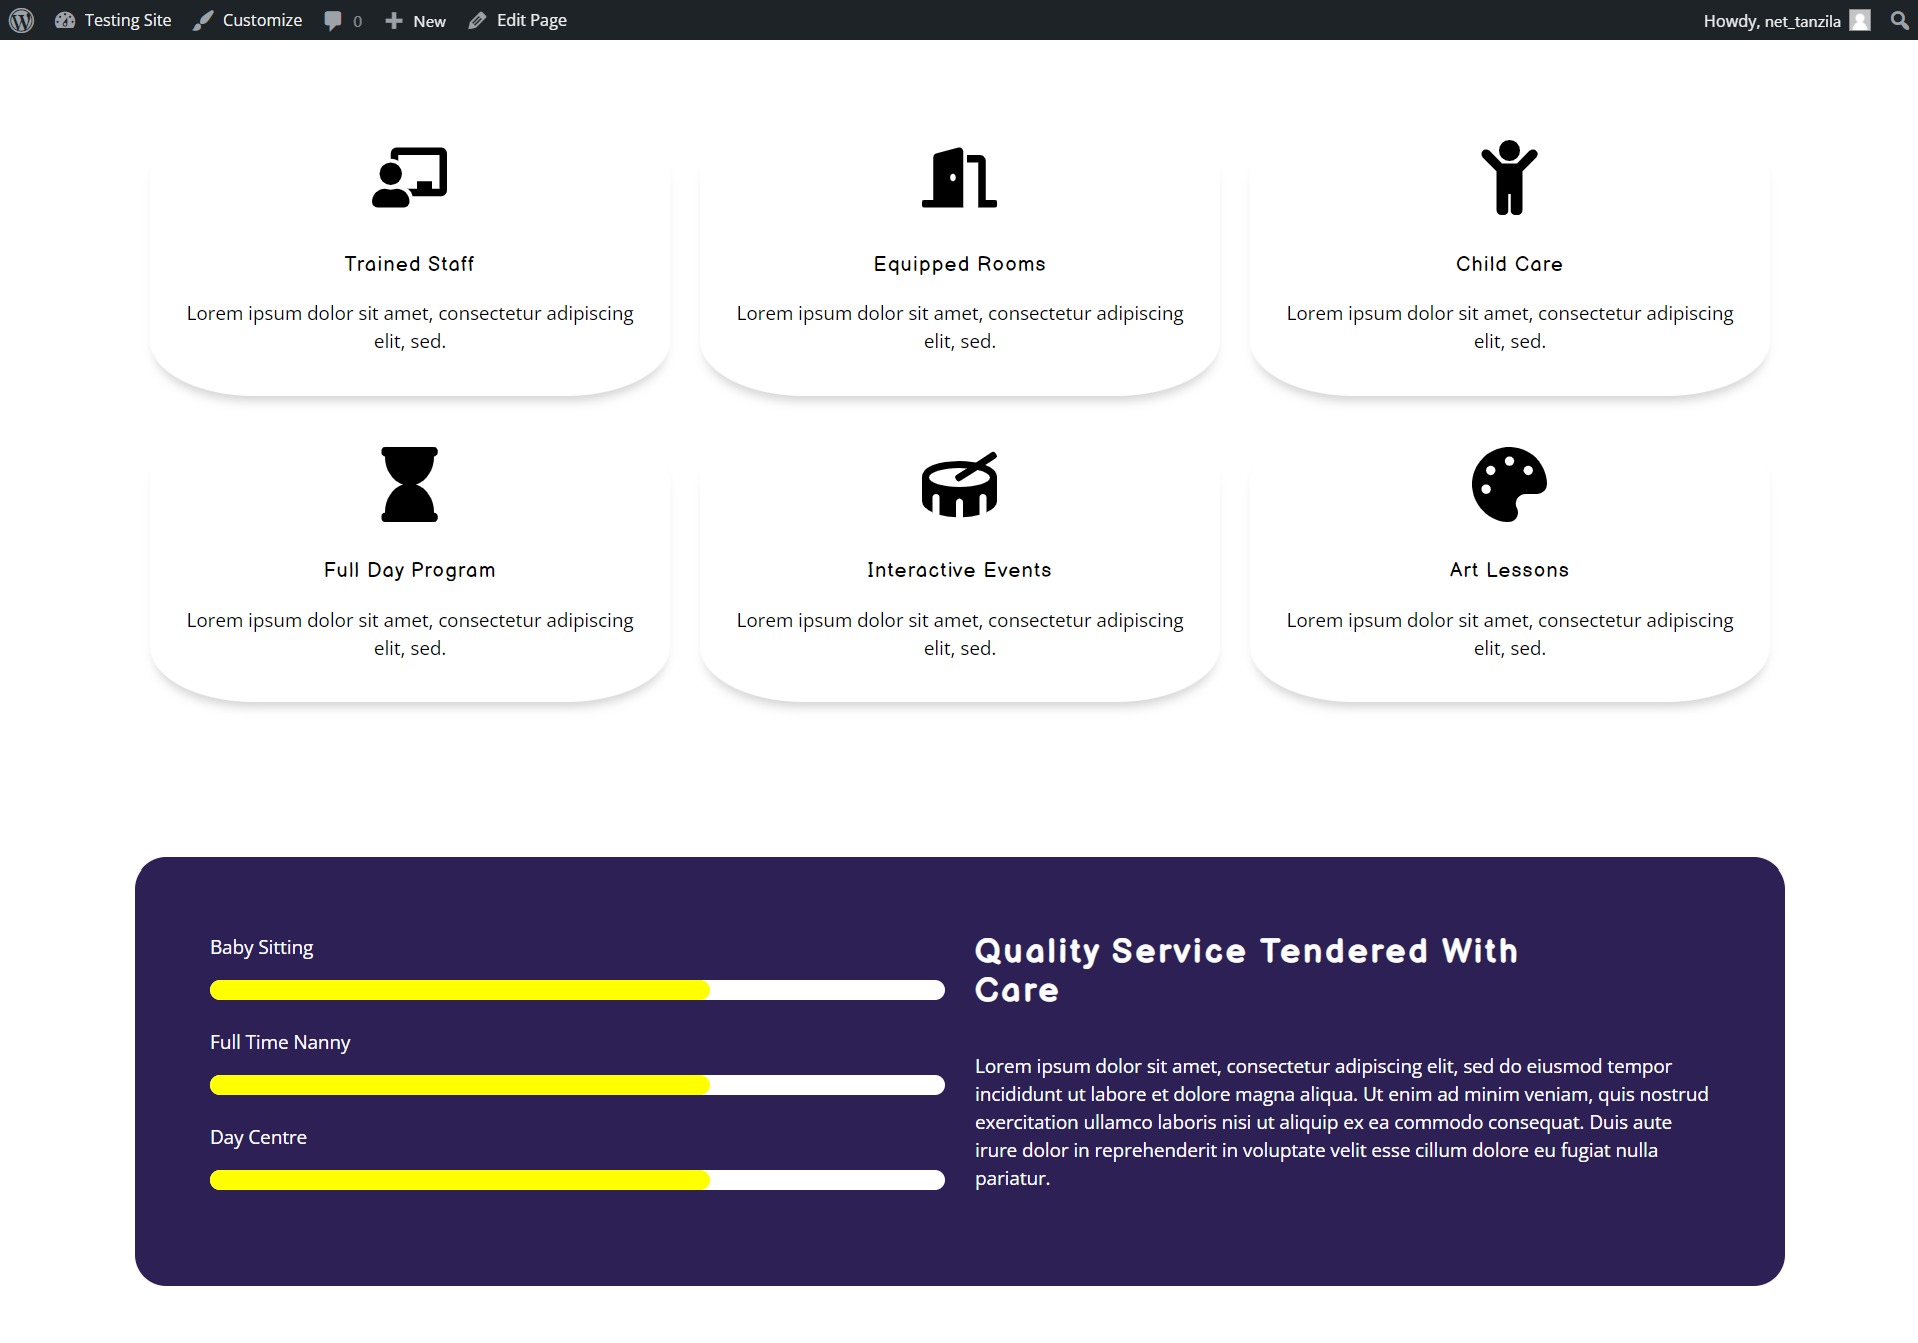
Final display of About Section
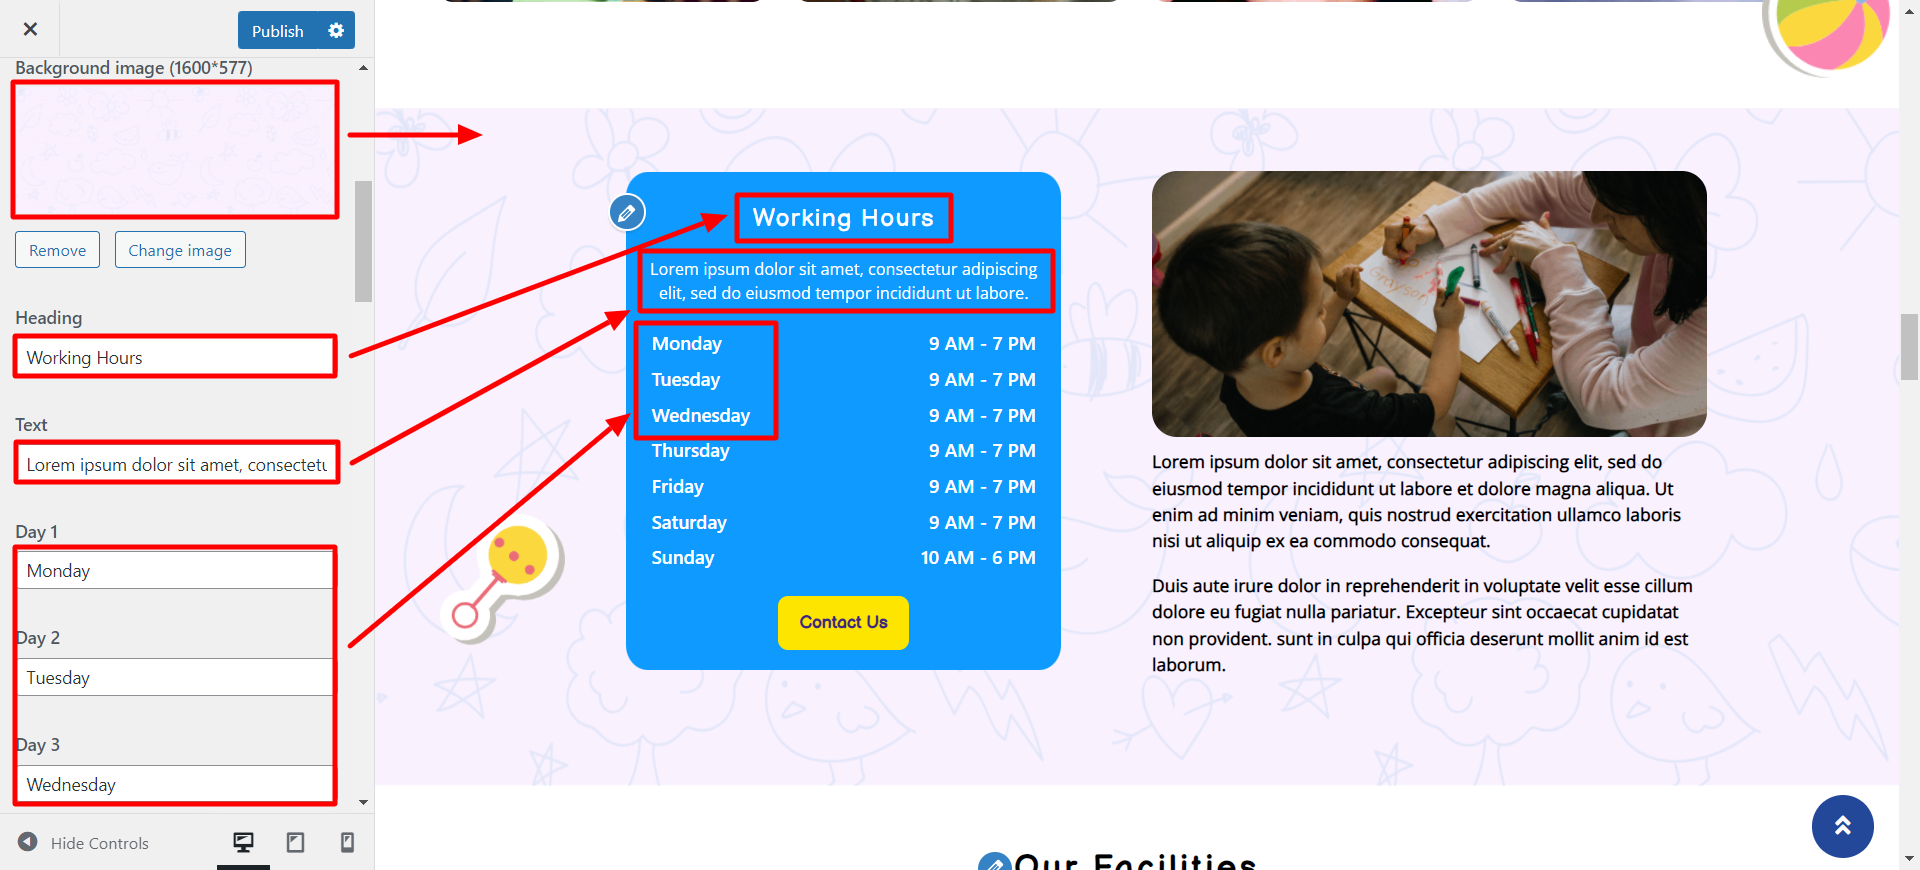
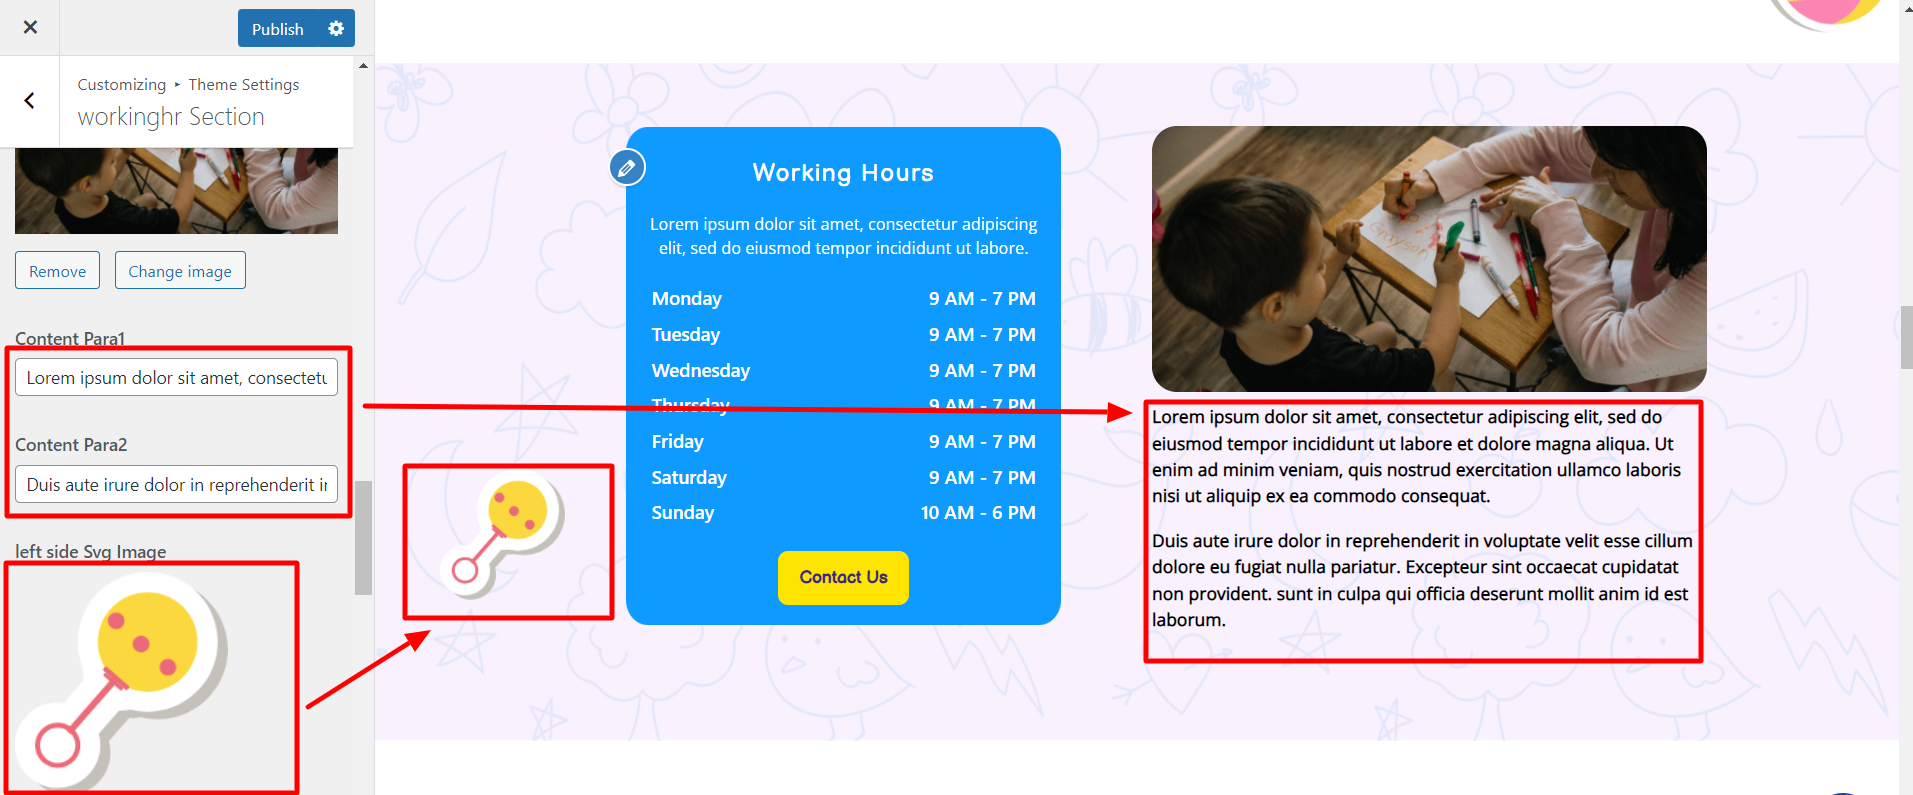
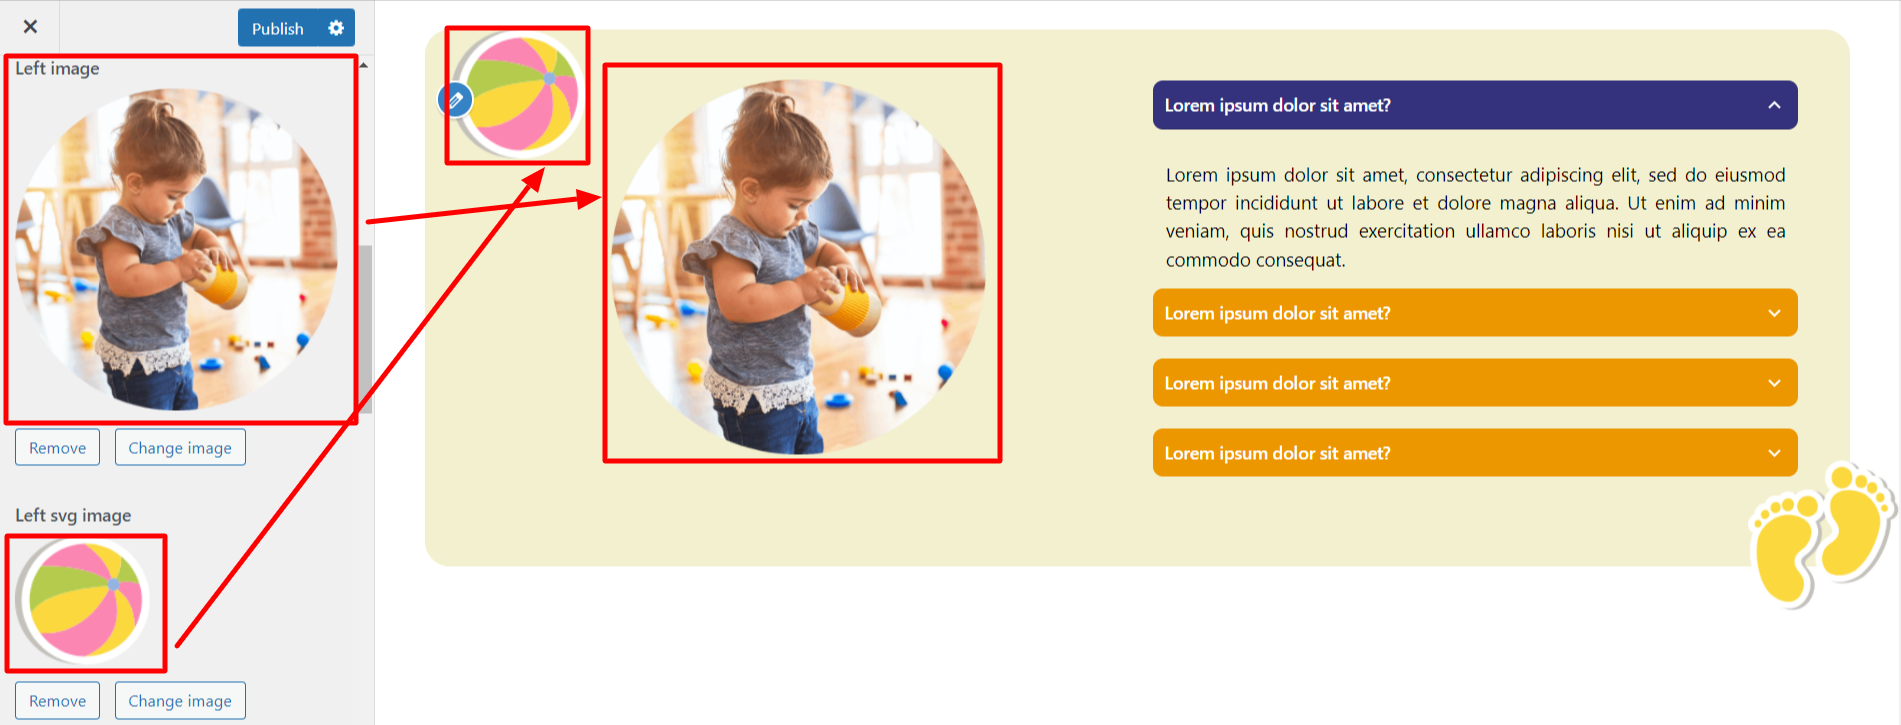
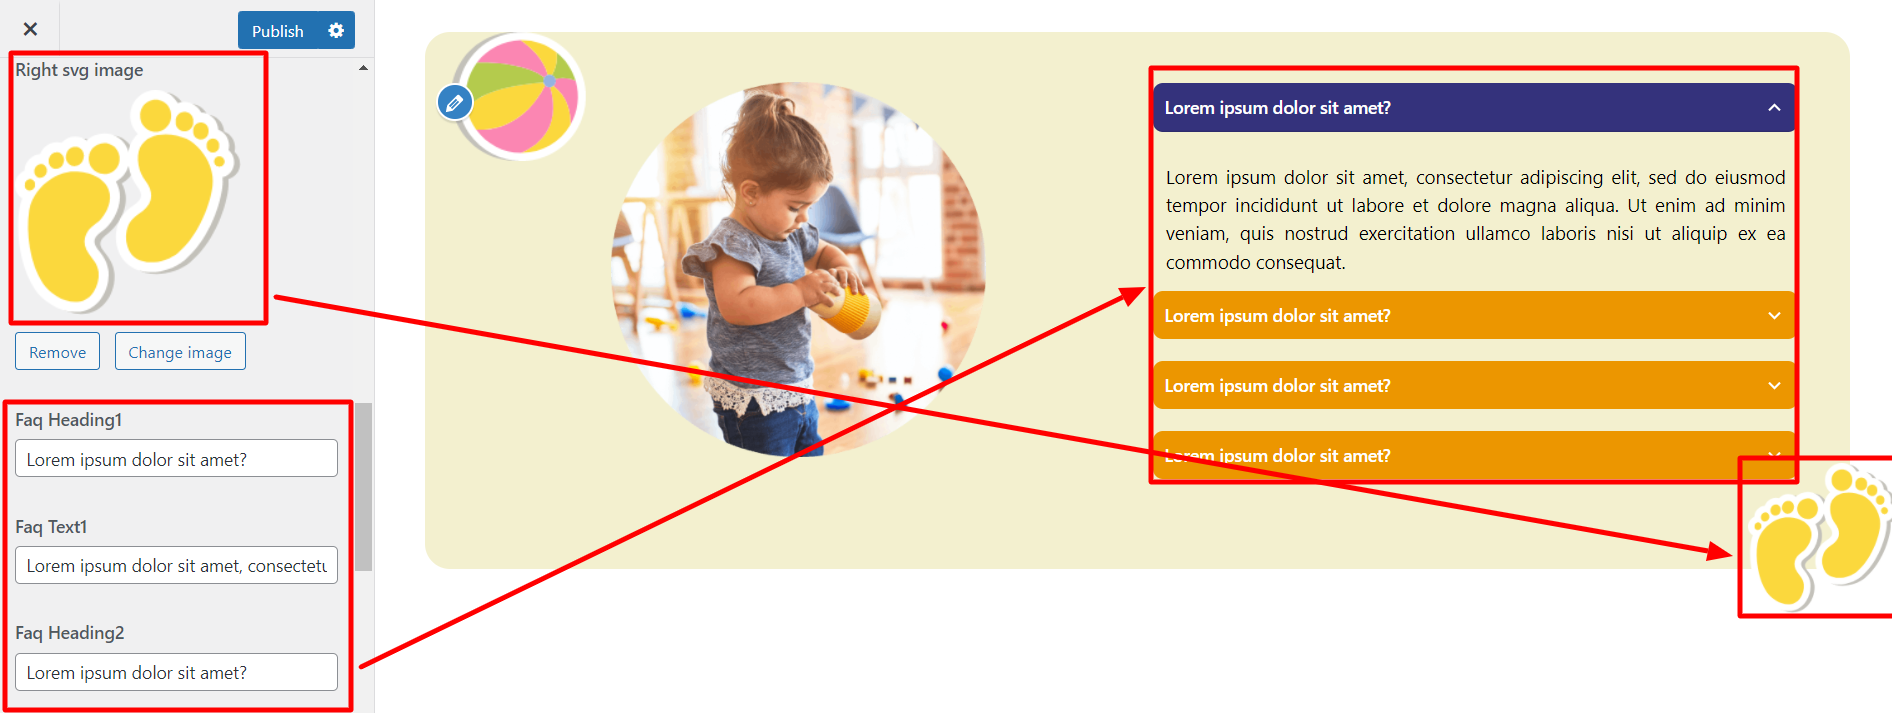
Setup Video Section
Follow the instructions below to set up the video section.
- Step 1 - Go to Dashboard >> Appearance >> Customize >> Theme Settings >> See Video Section.
- (a) Add Background Image
- (b) Add Tab Title
- (c) Select About Image 1
- (d) Add Tab button Link
Step 2 - Manage Background
You must copy the source from the YouTube movie's embed code for this video.
You must substitute the URL for your particular movie in the About Section.
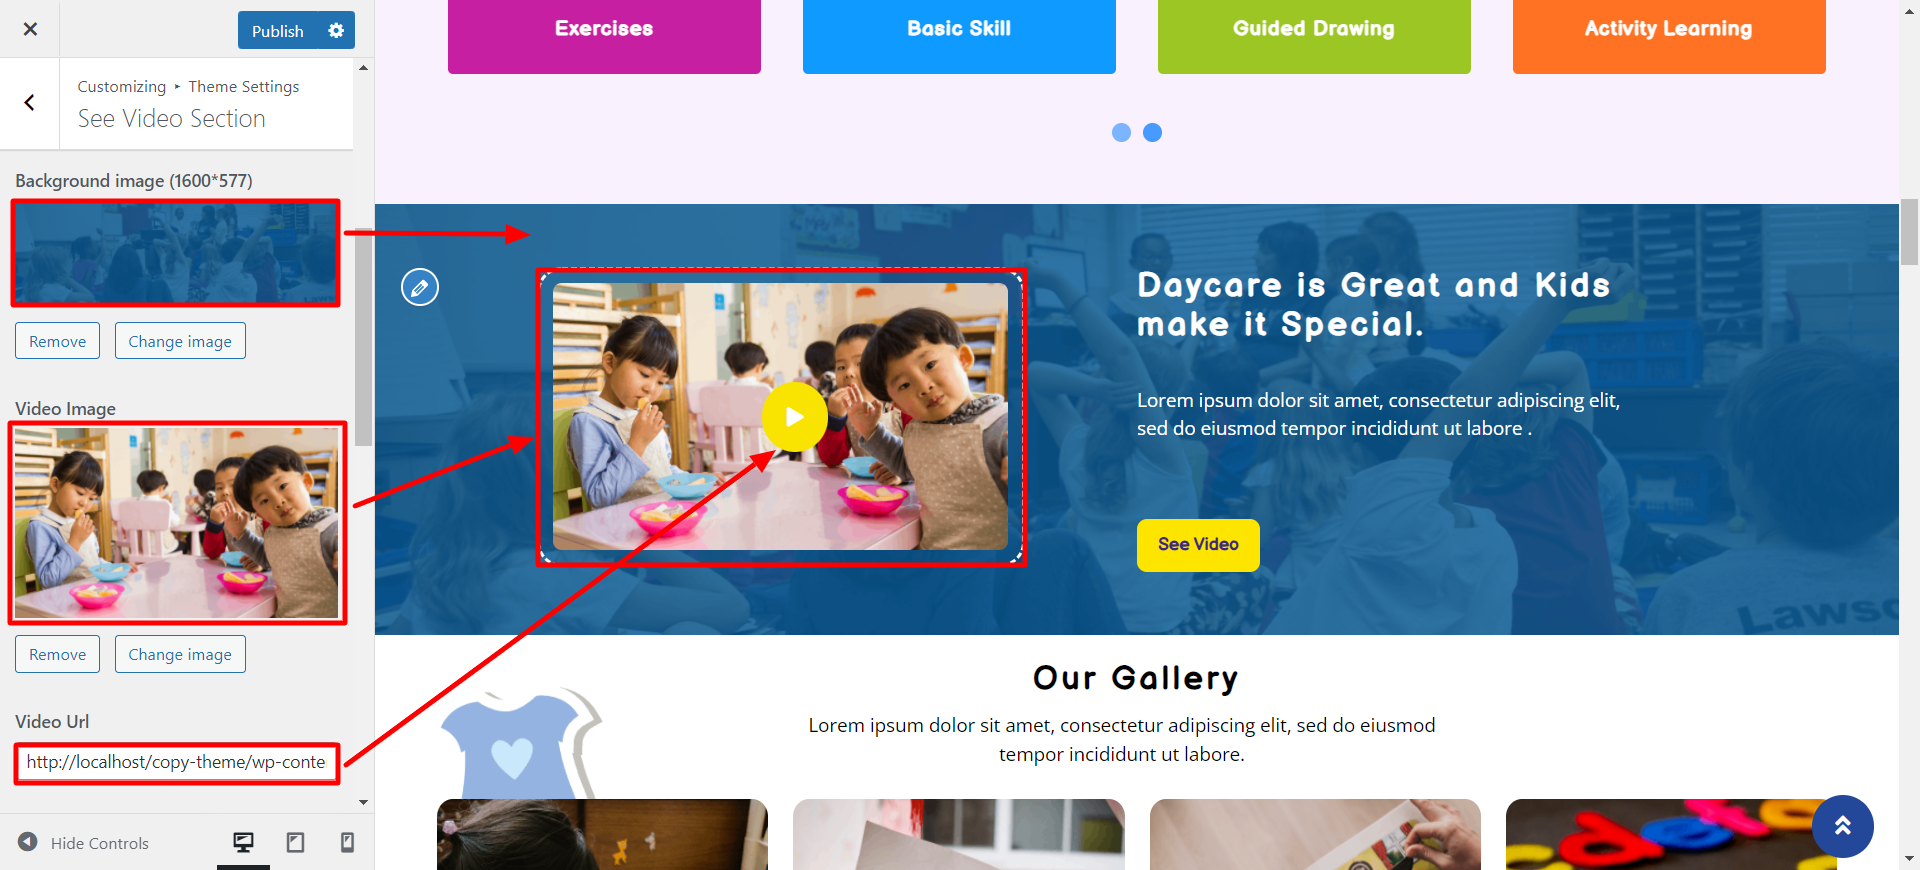
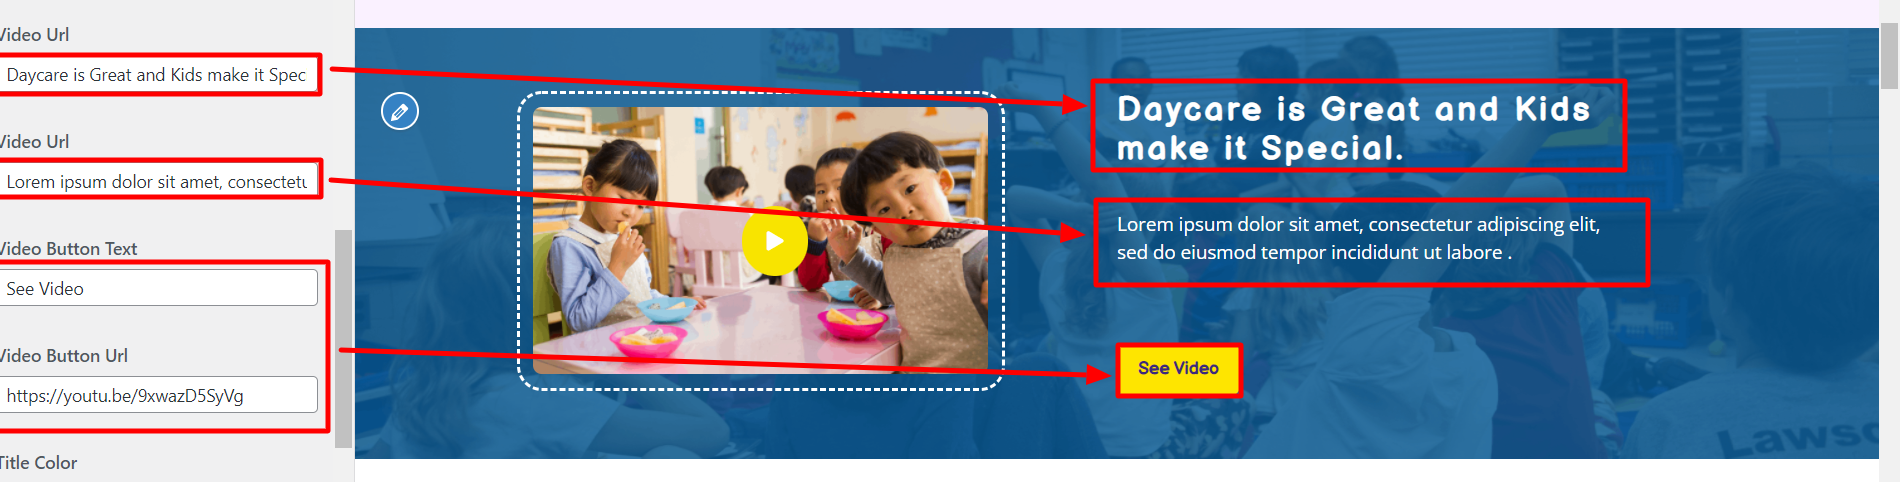
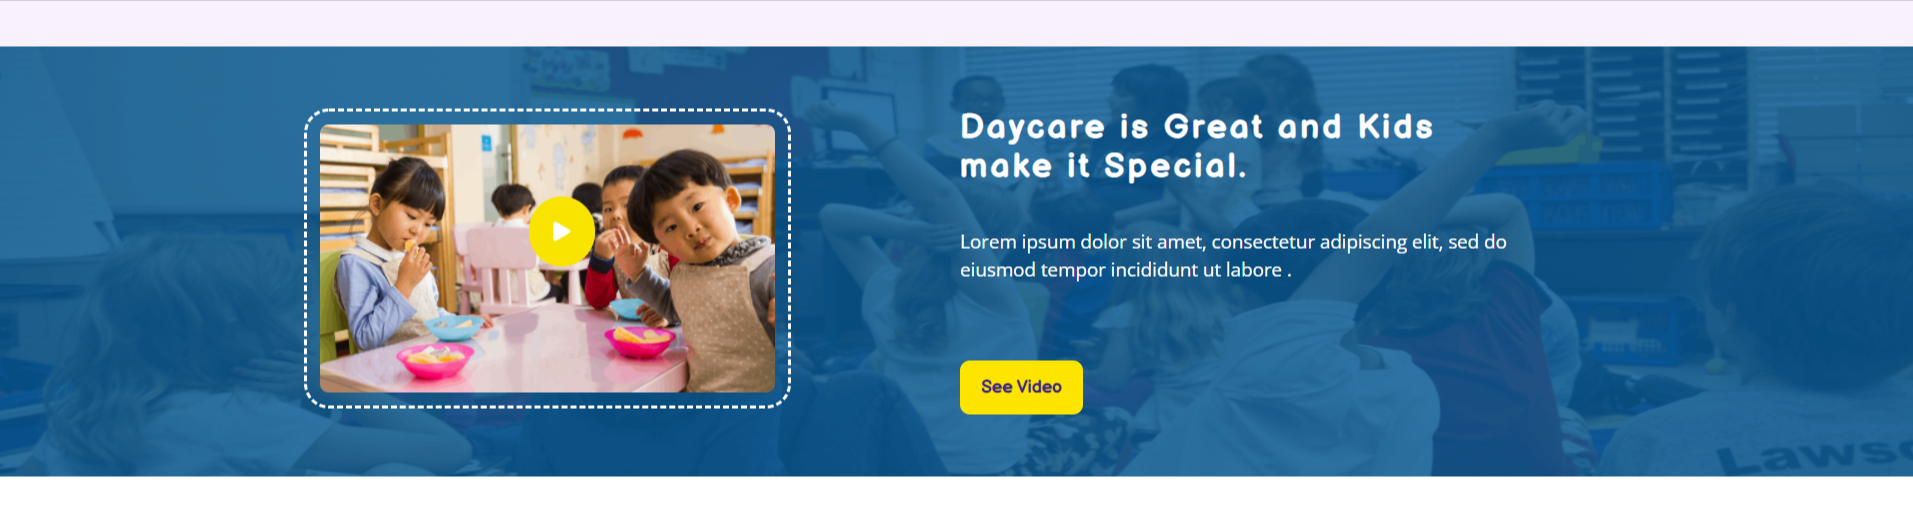
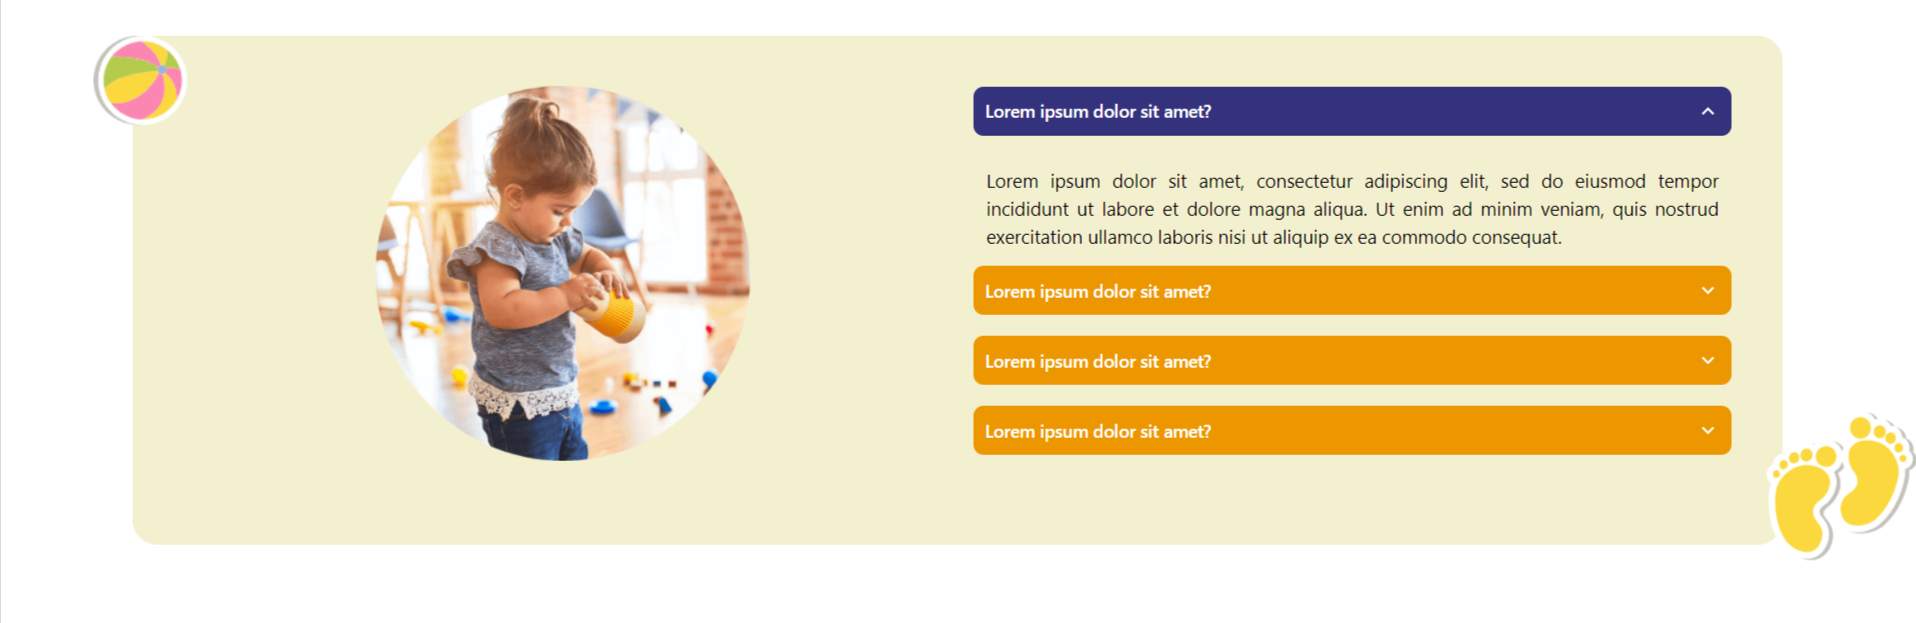
Final display of Video Section
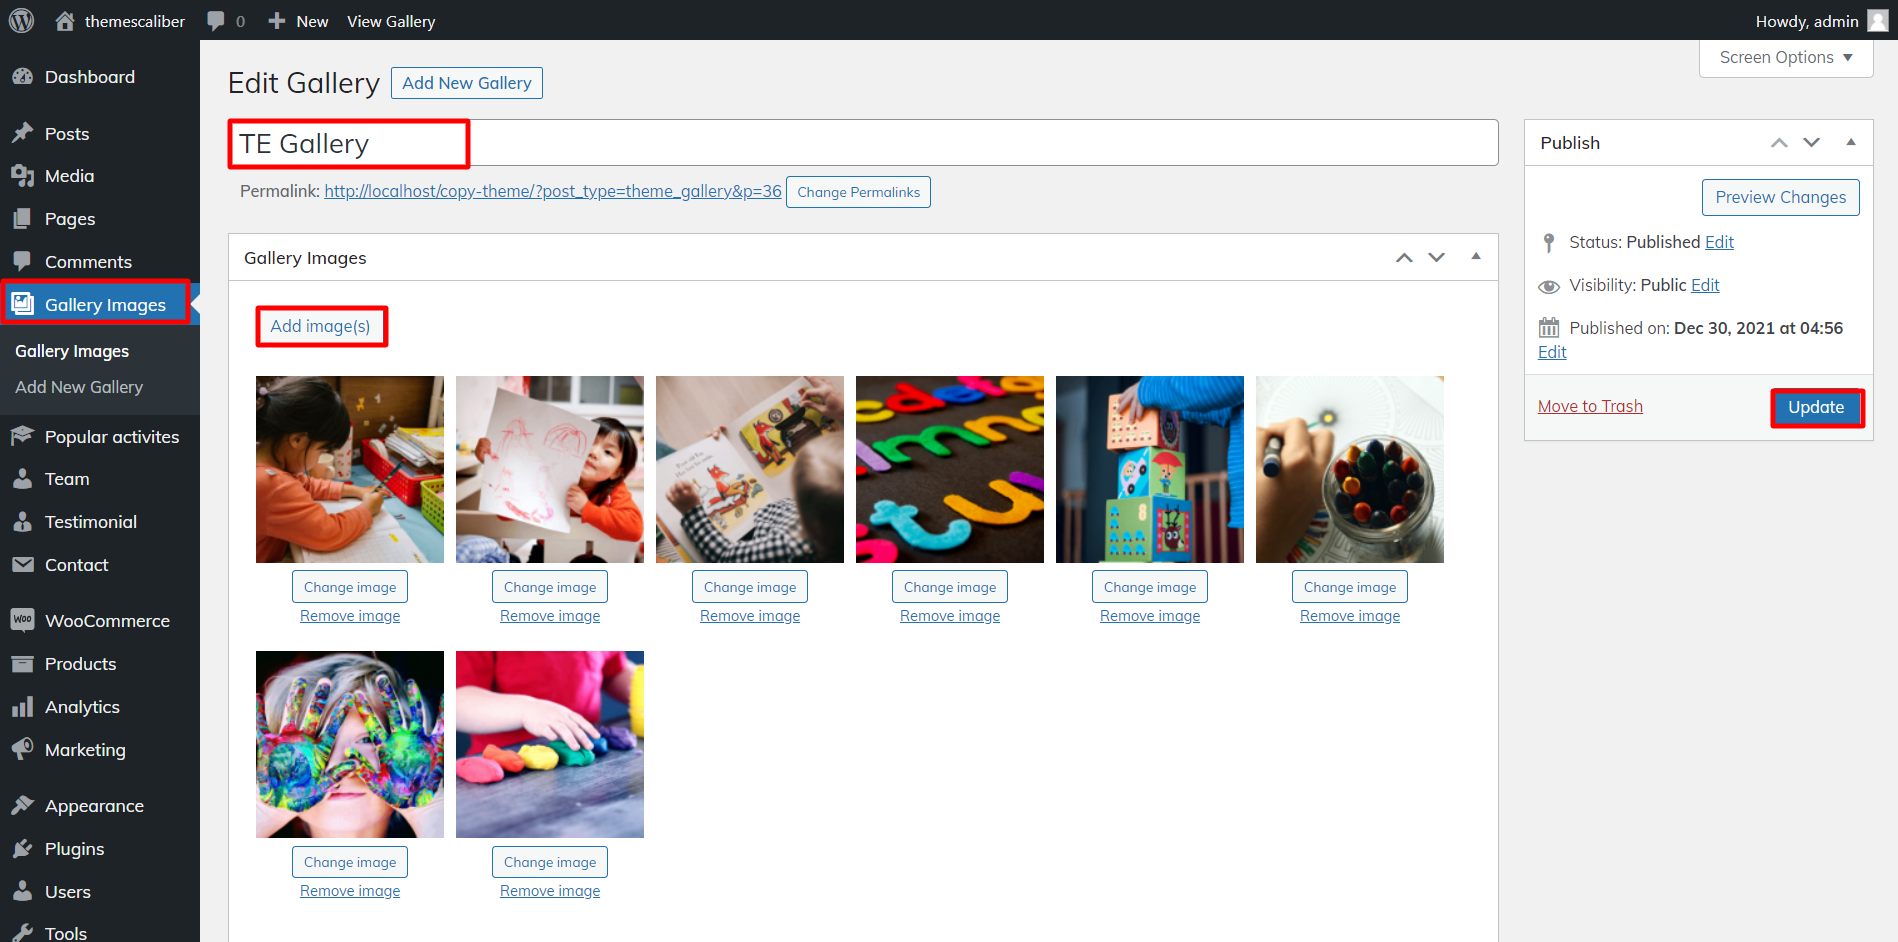
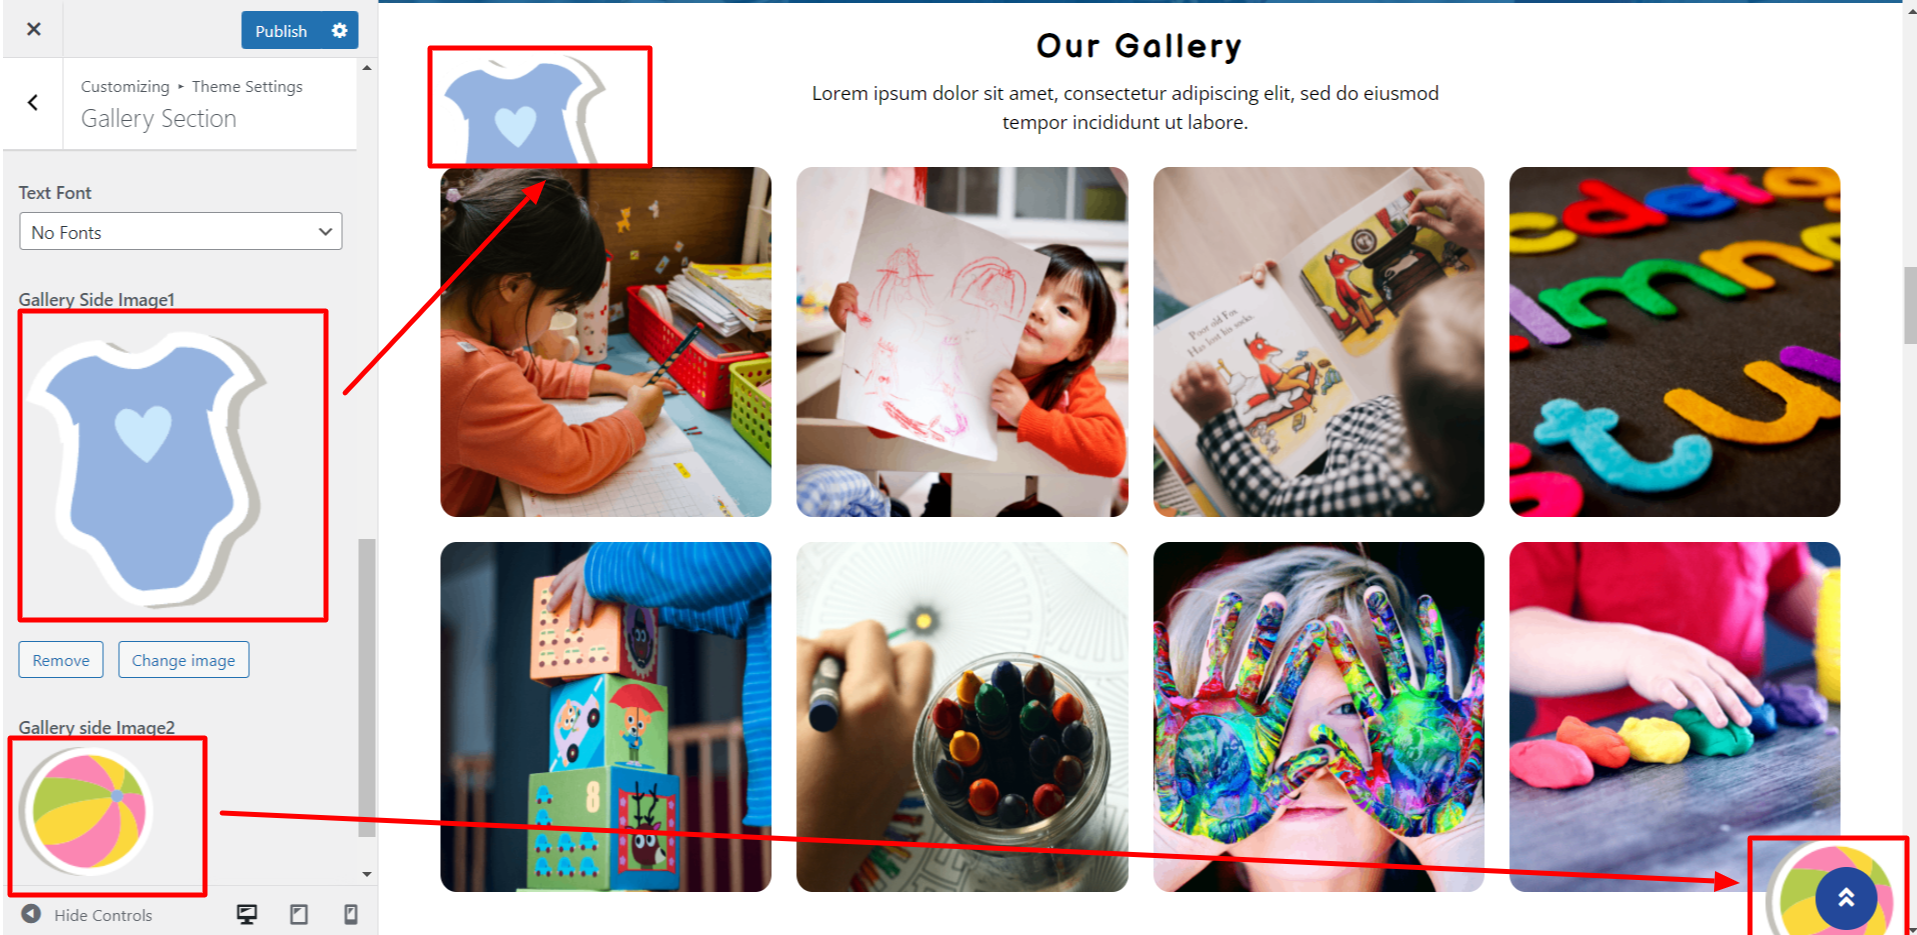
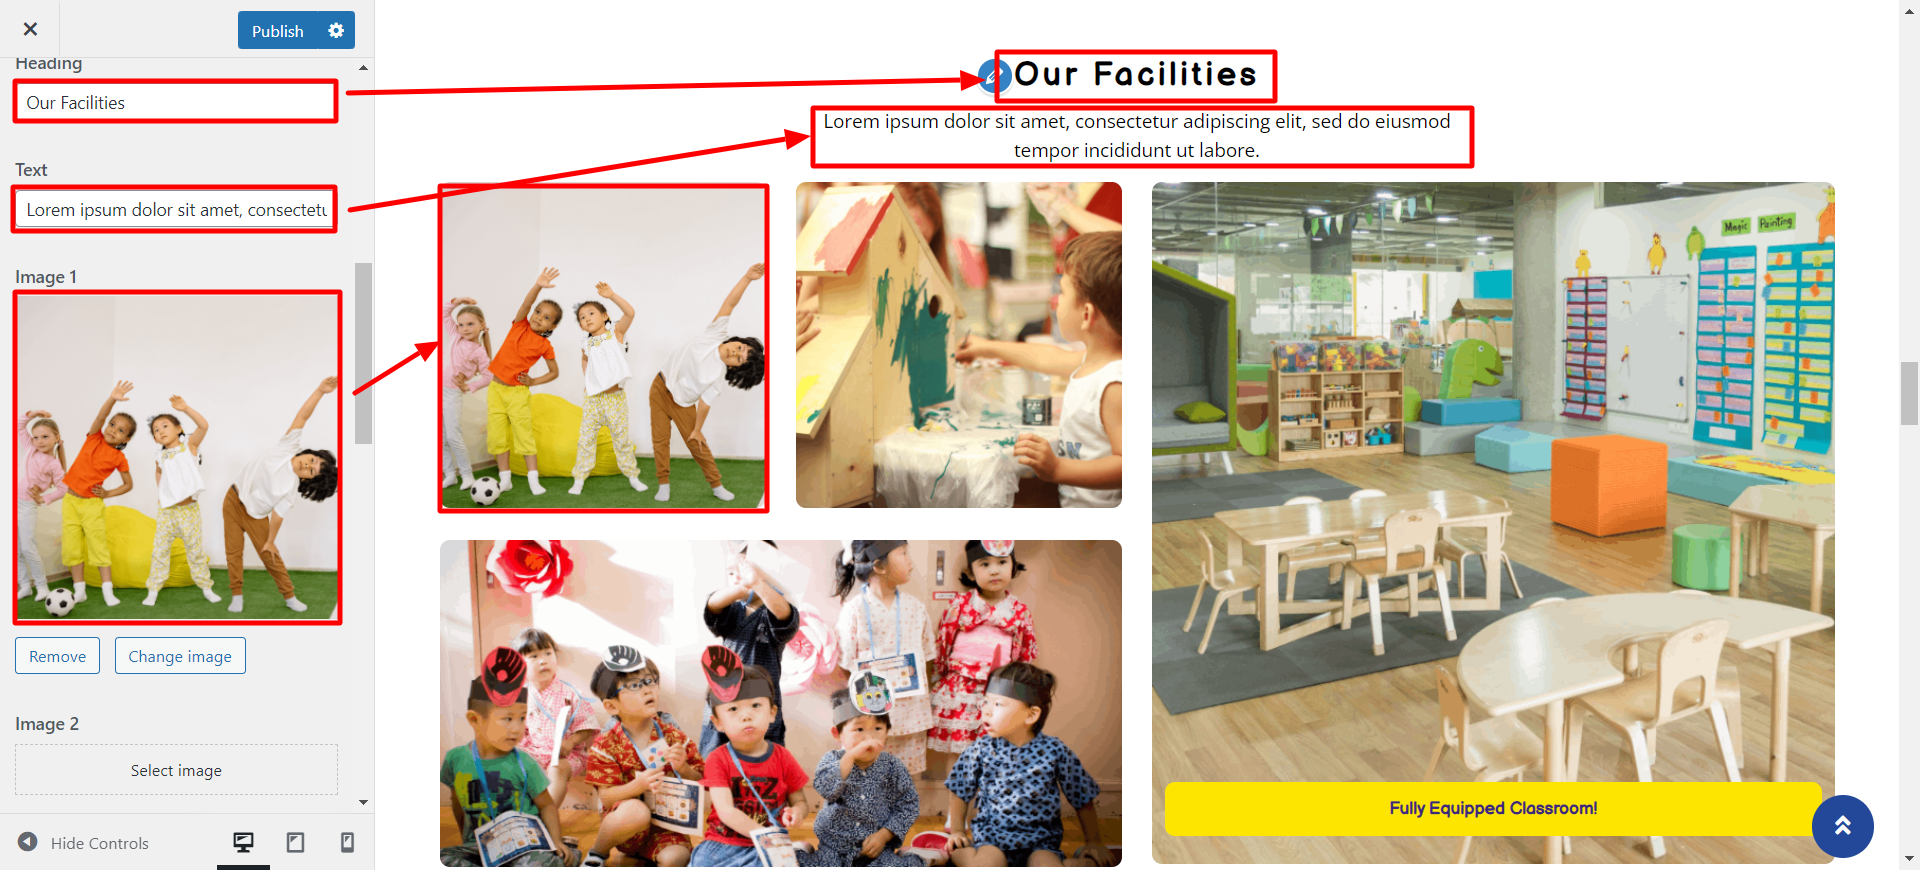
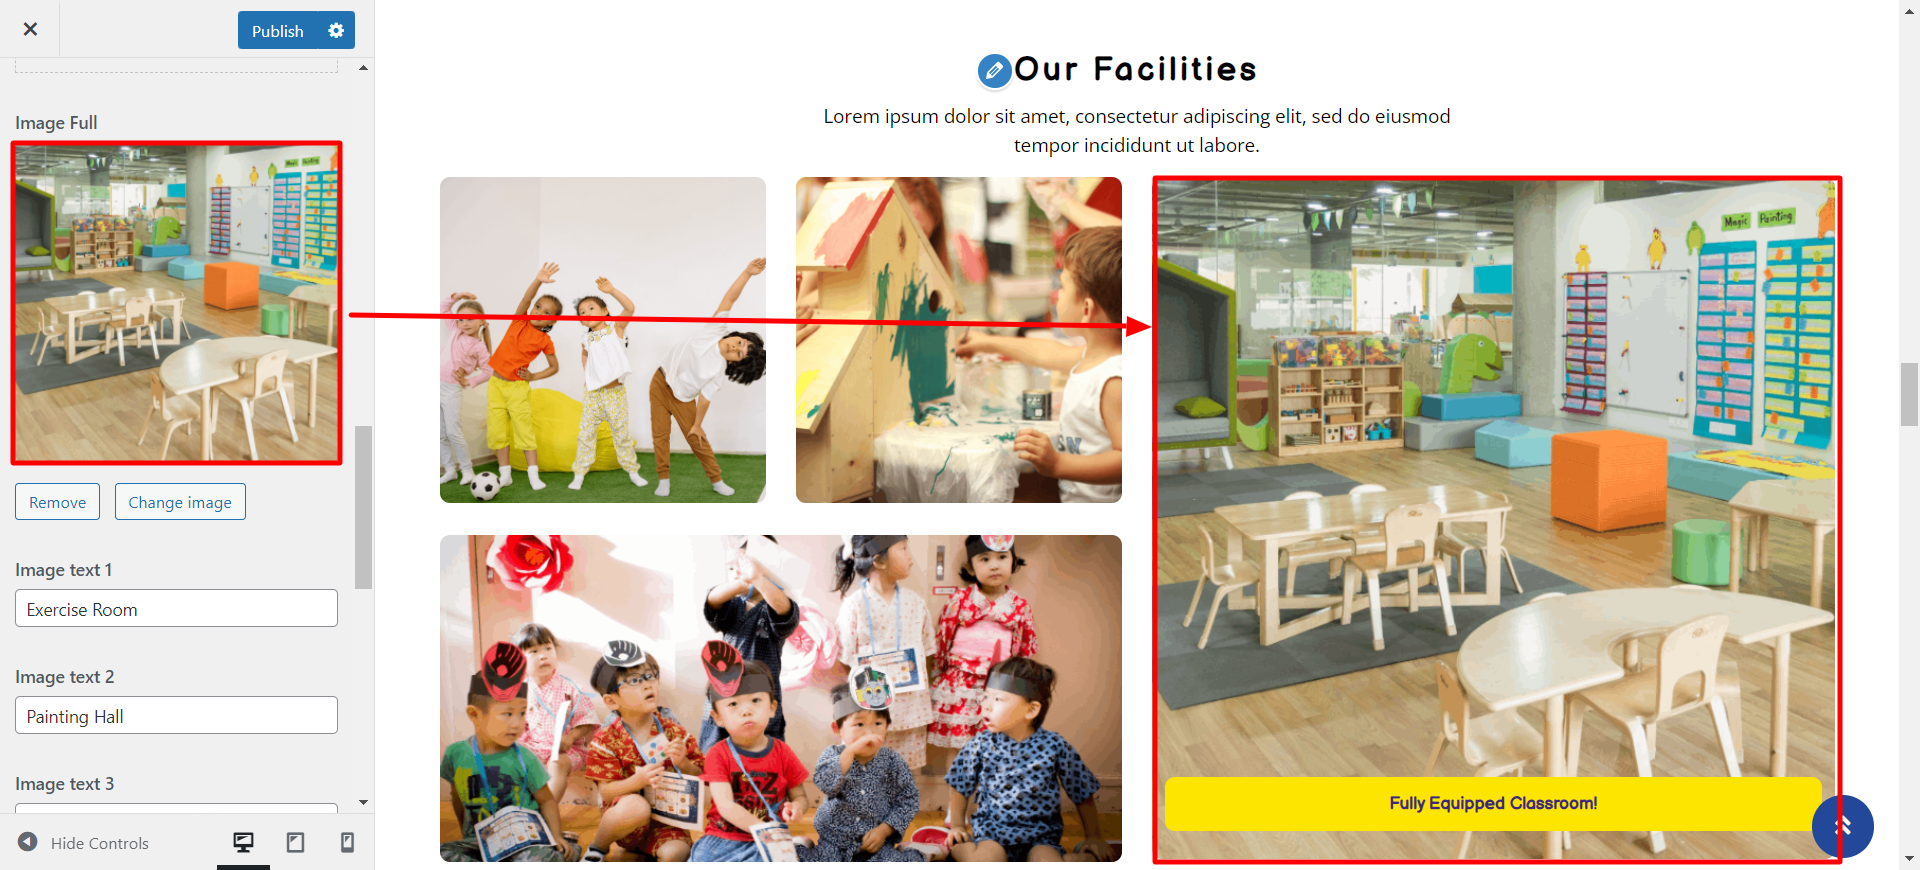
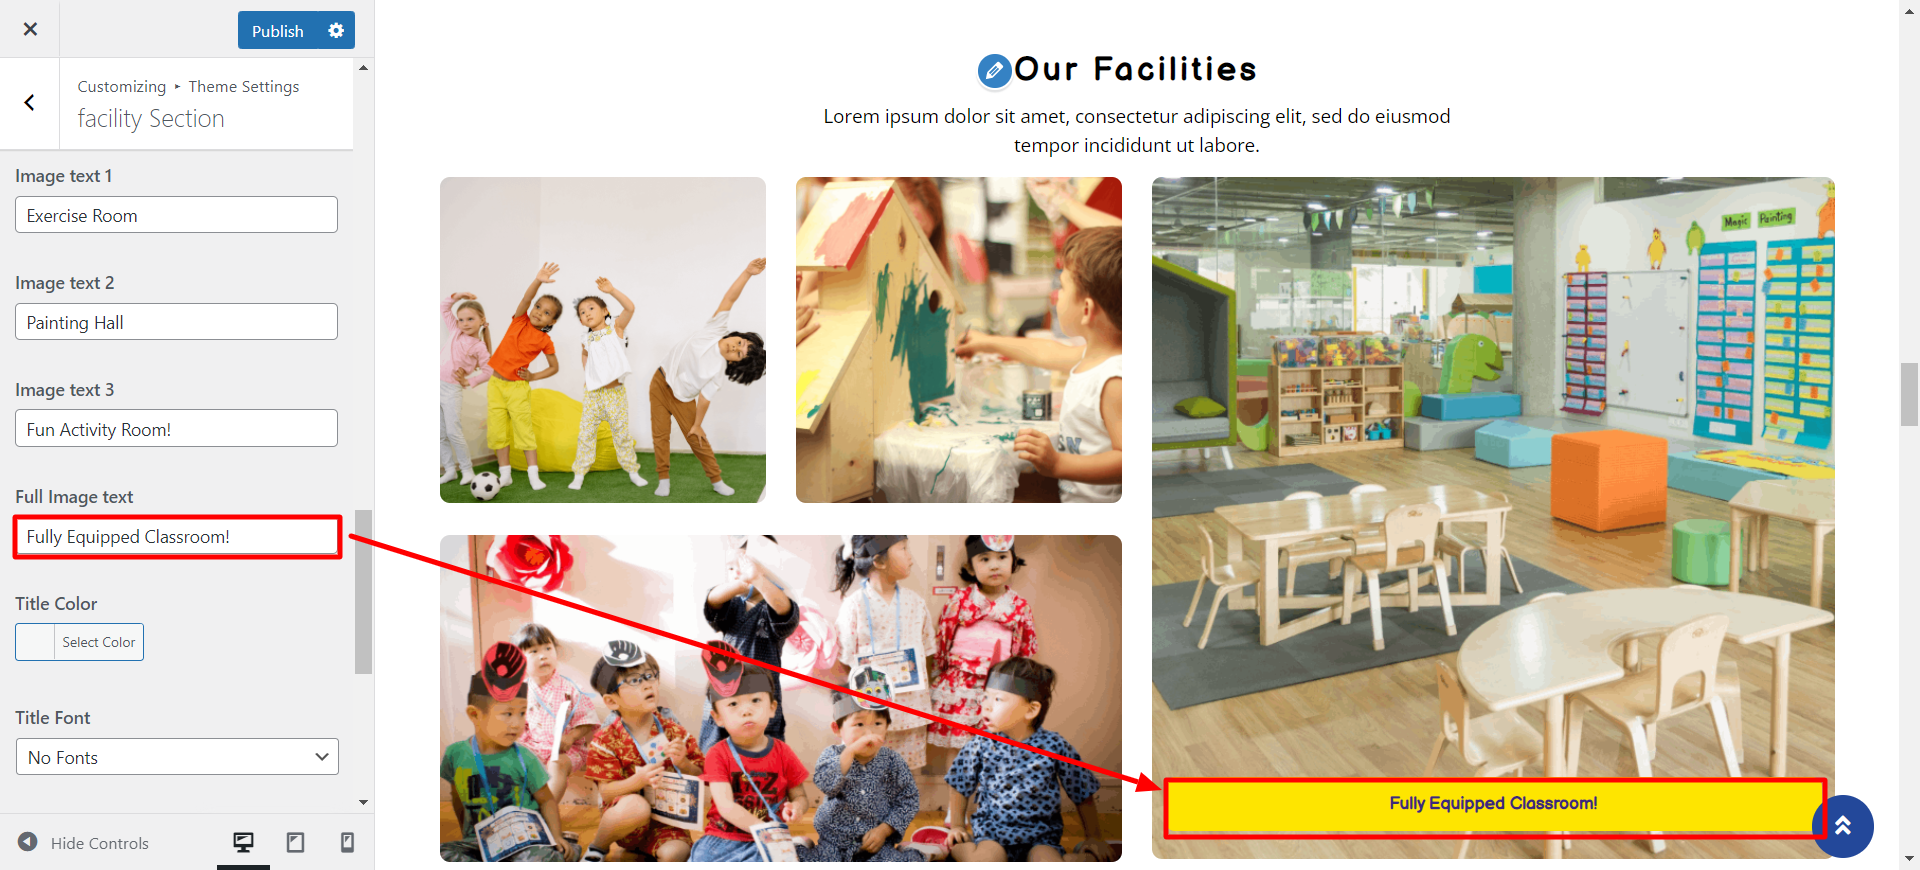
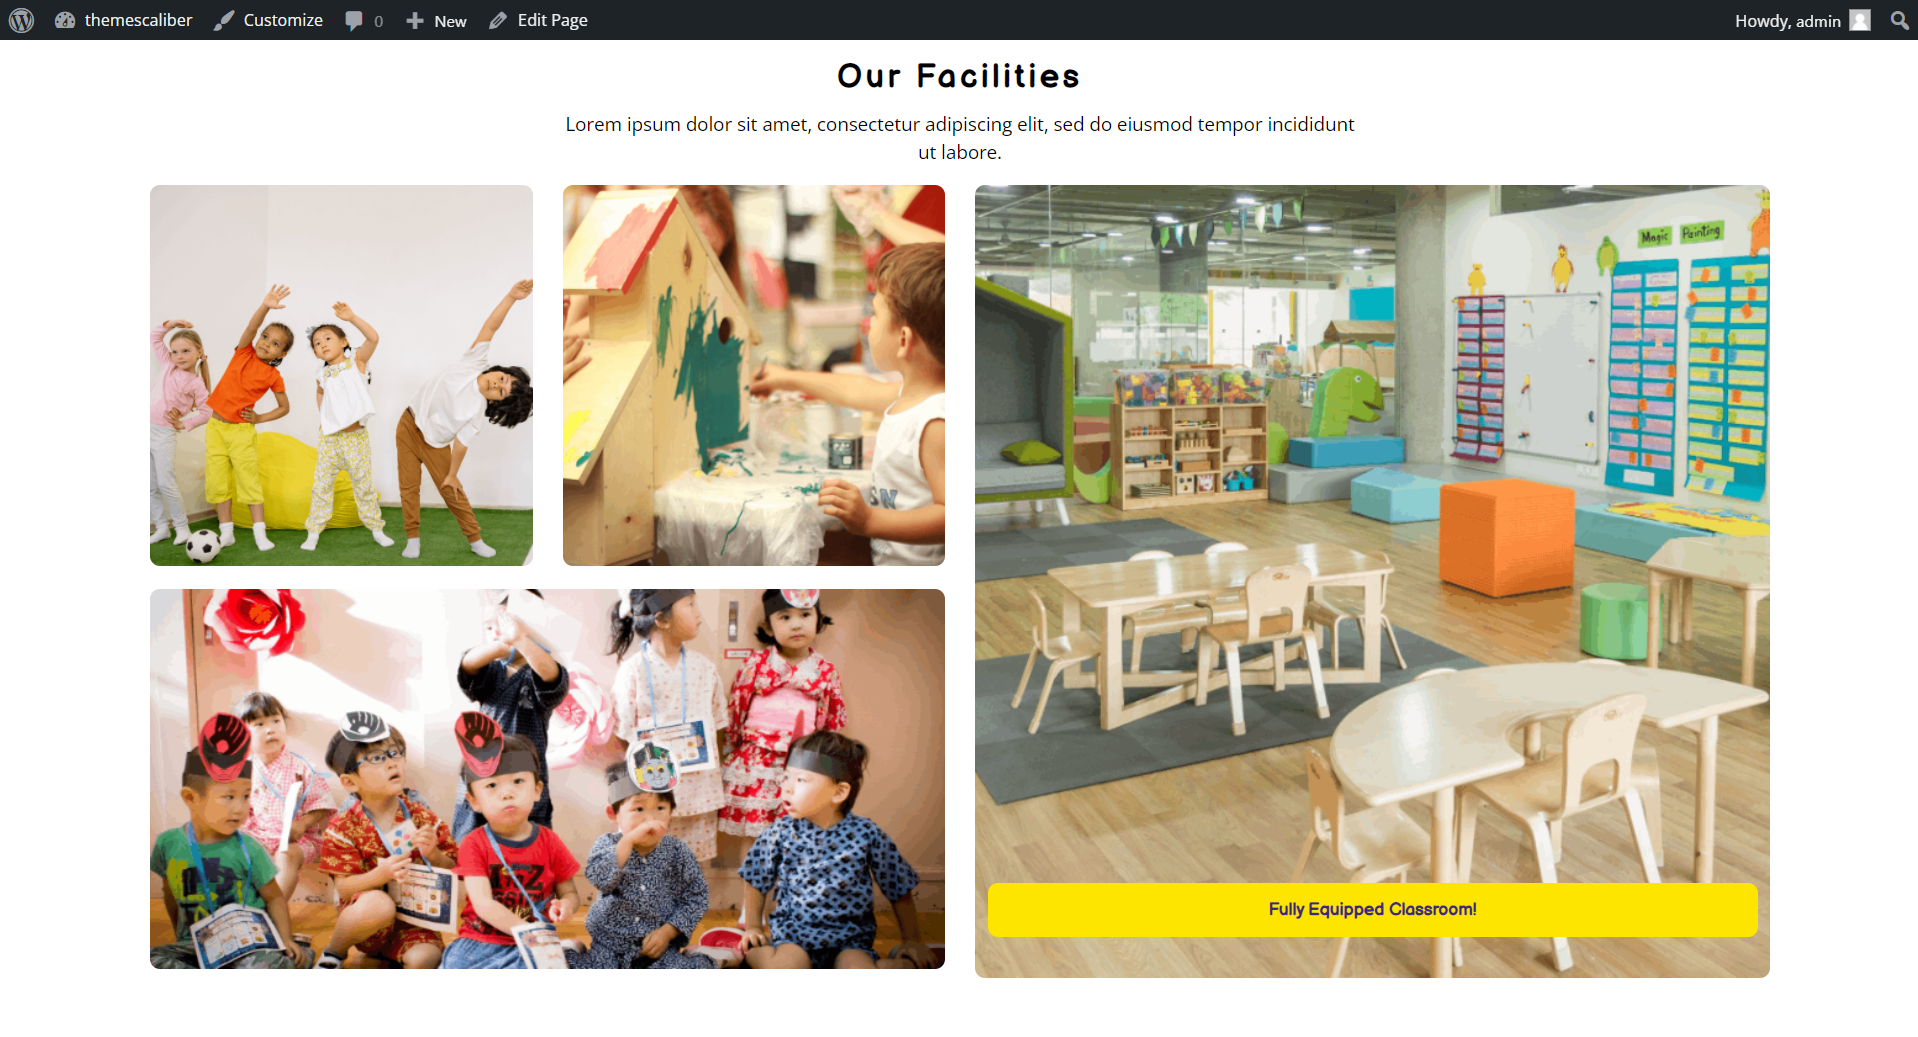
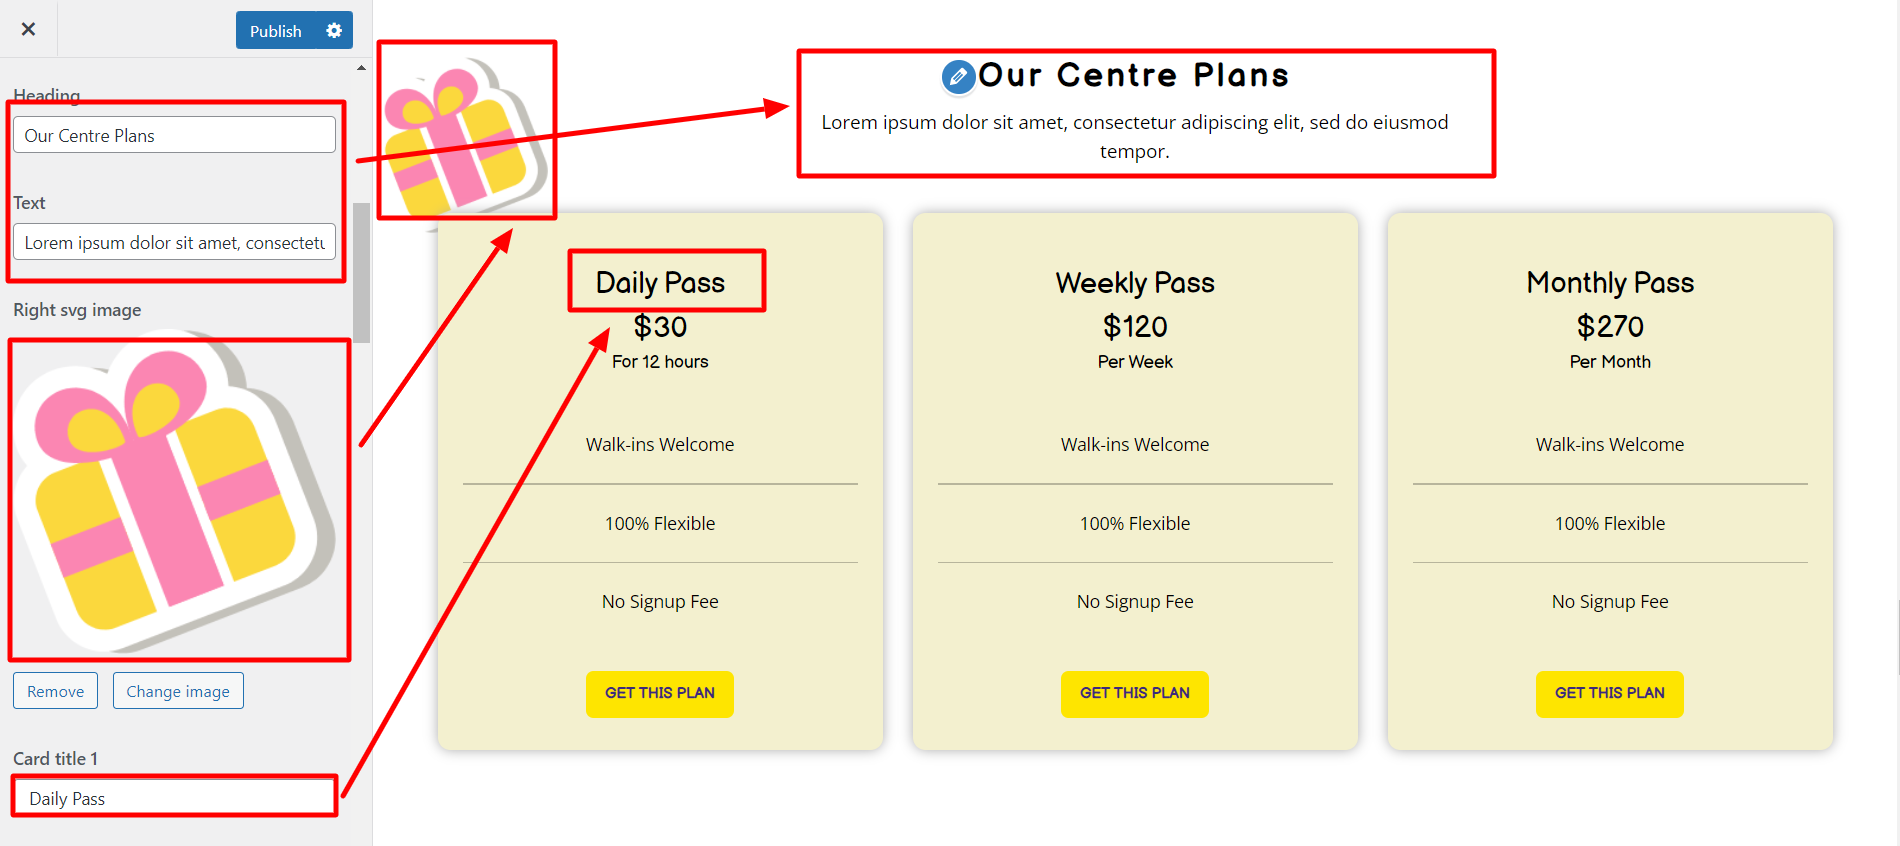
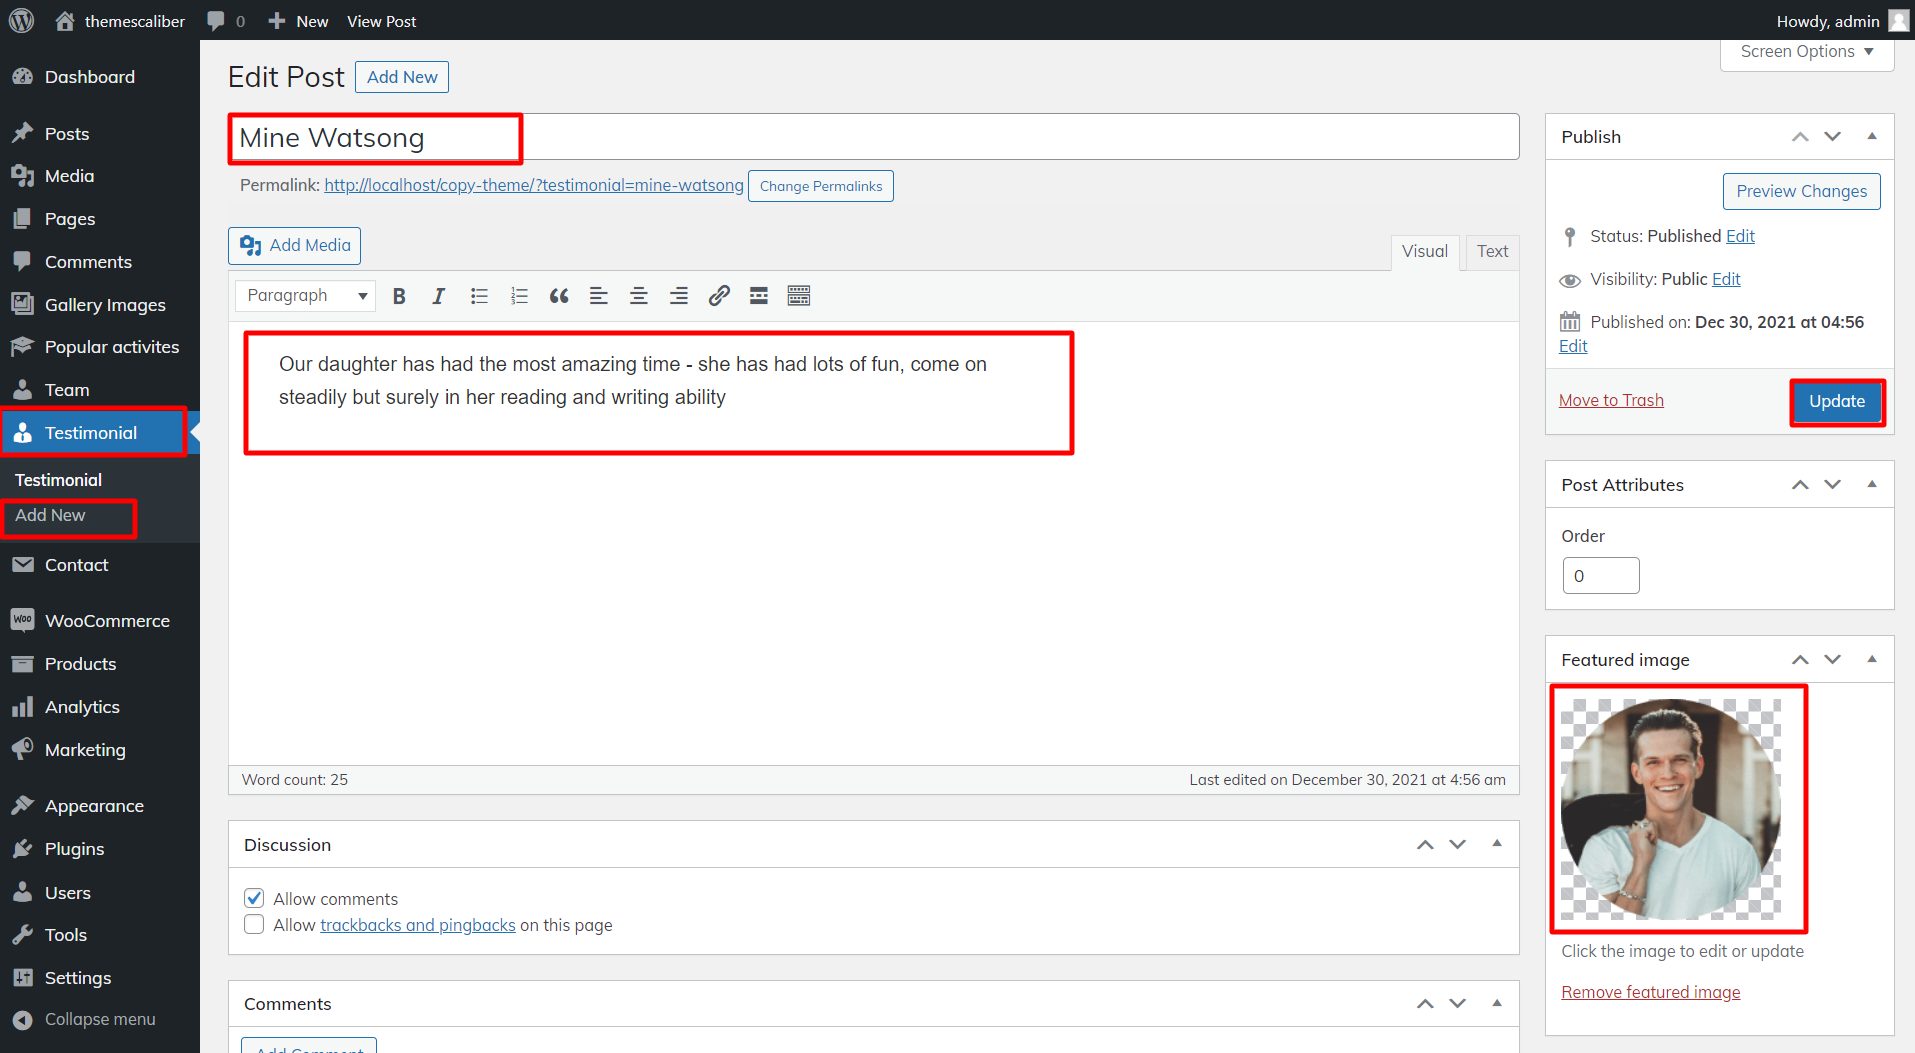
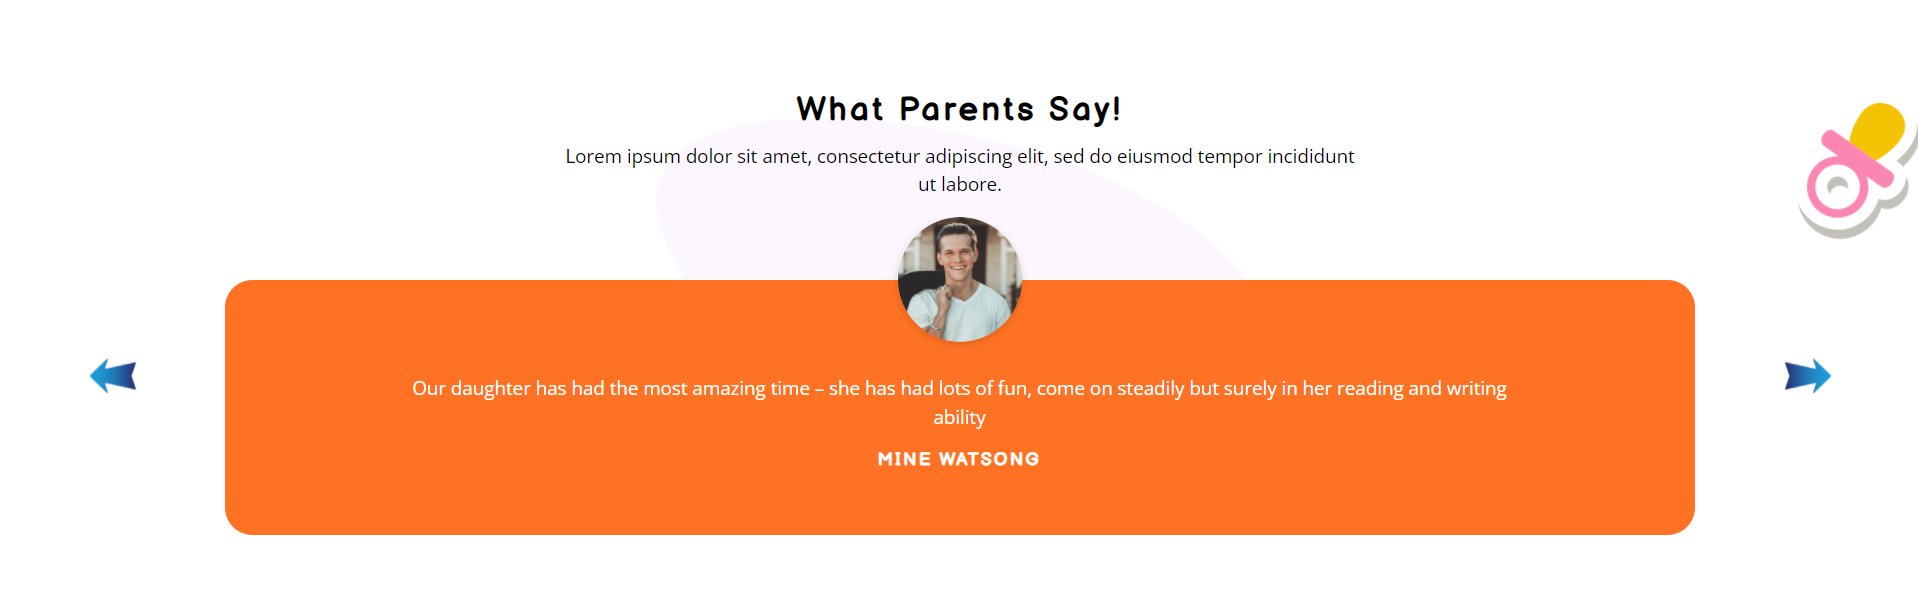
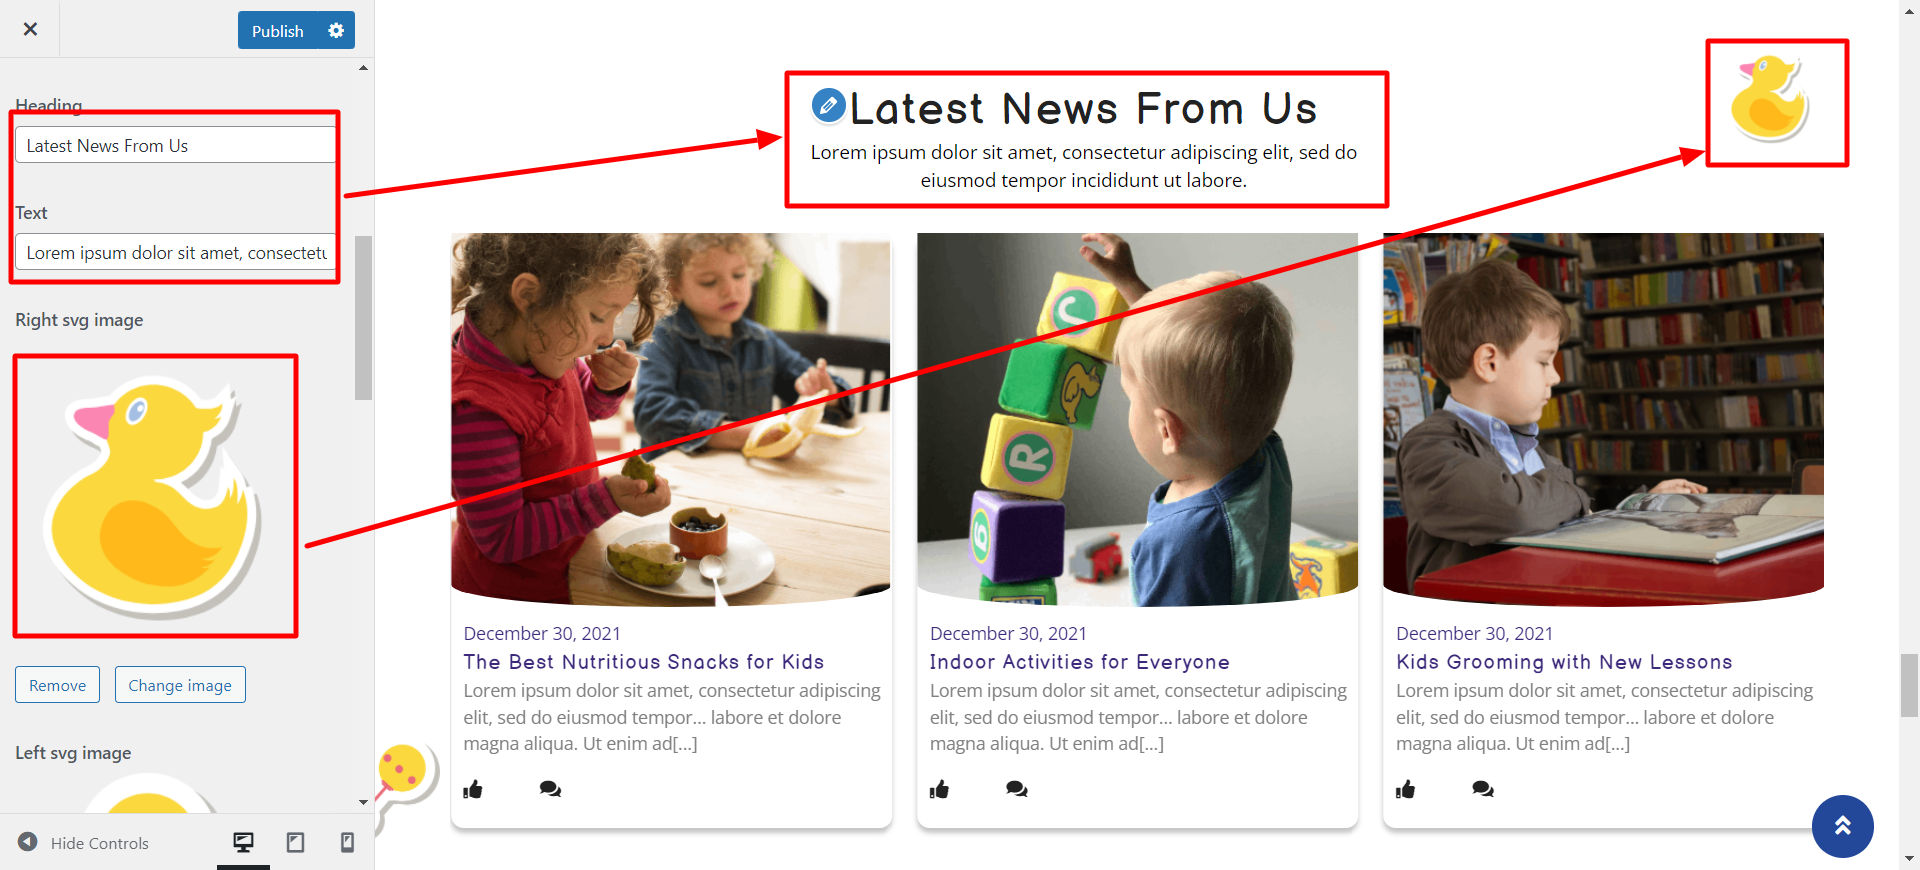
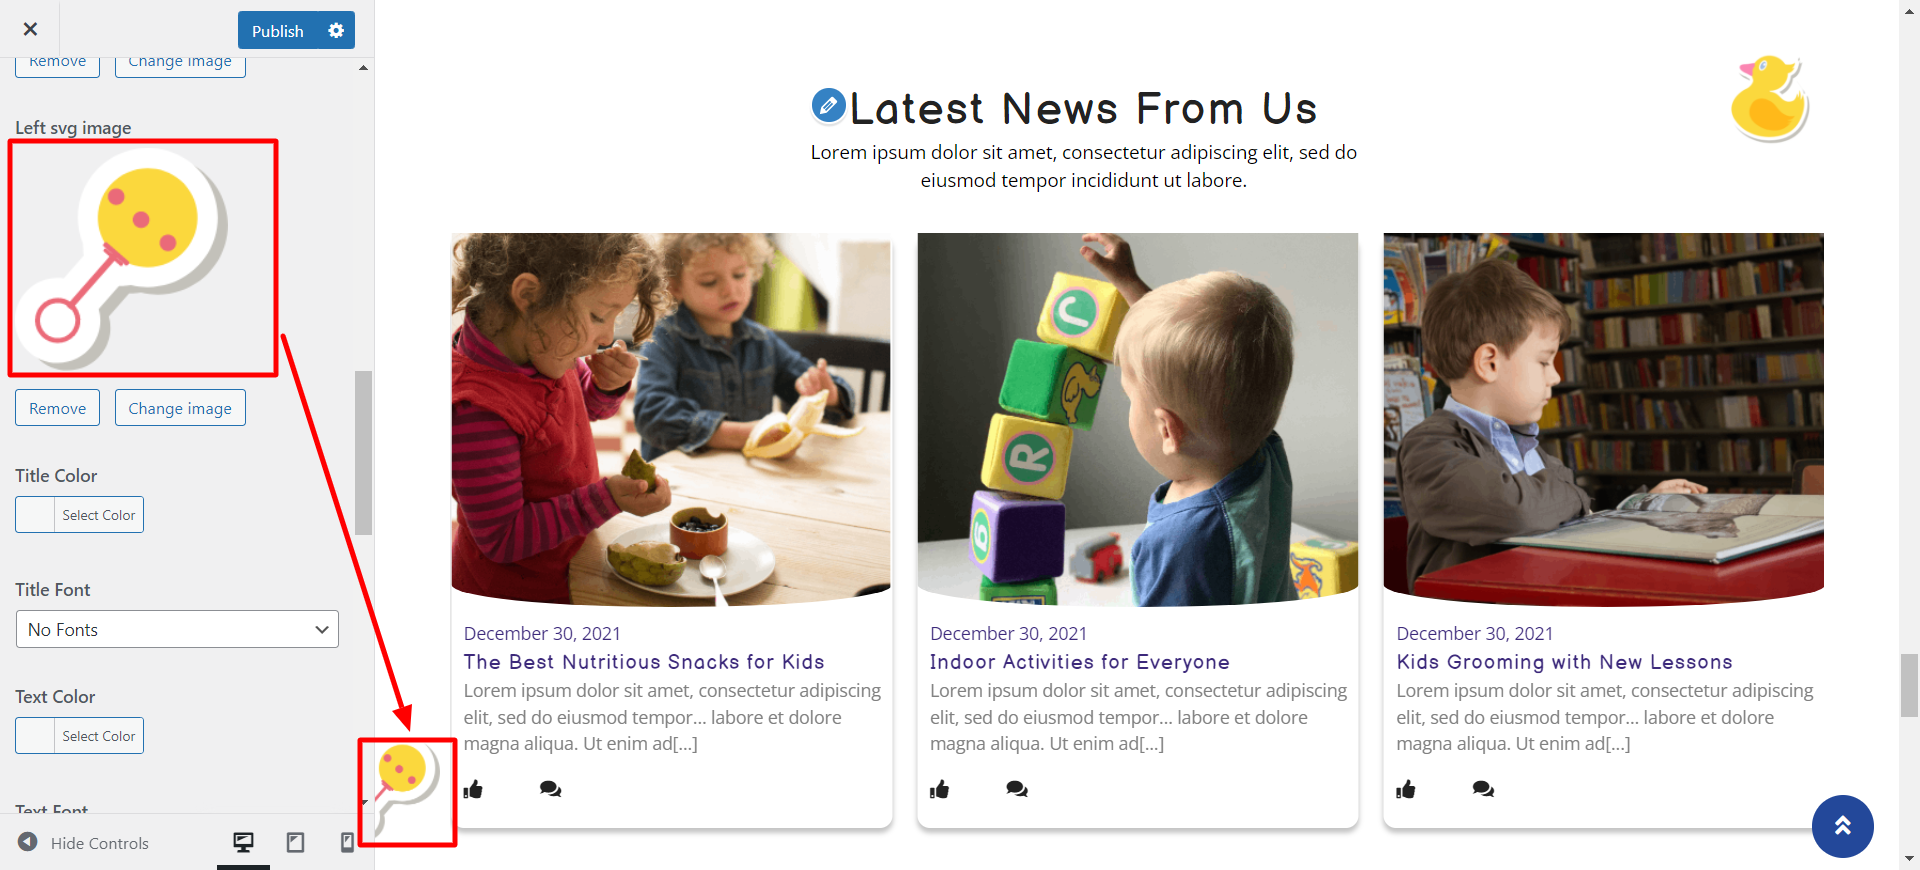
Setup Our Gallery Section
-
if you want to continue with this part.
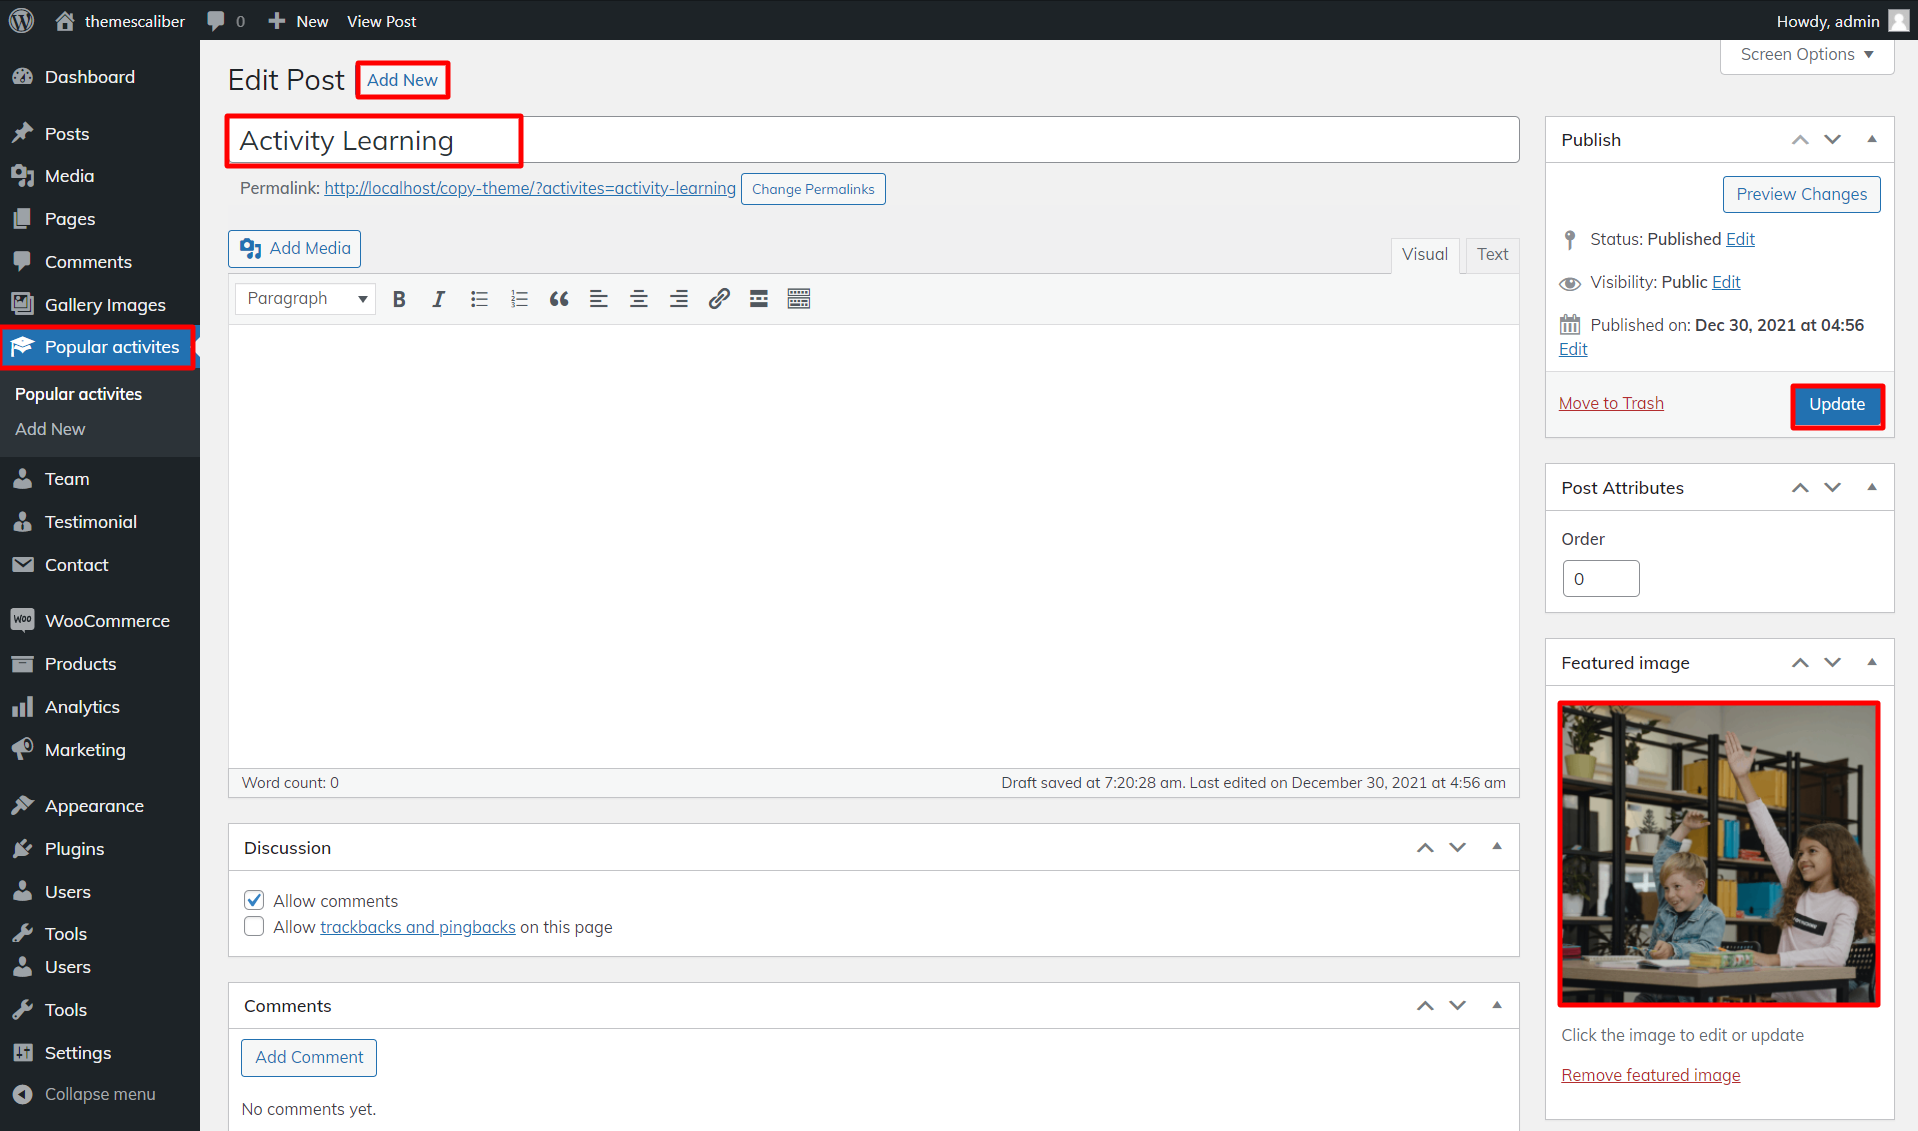
- Step 1 - Go to Dashboard >> Gallery images >> Add New
- (c) Click Add Images
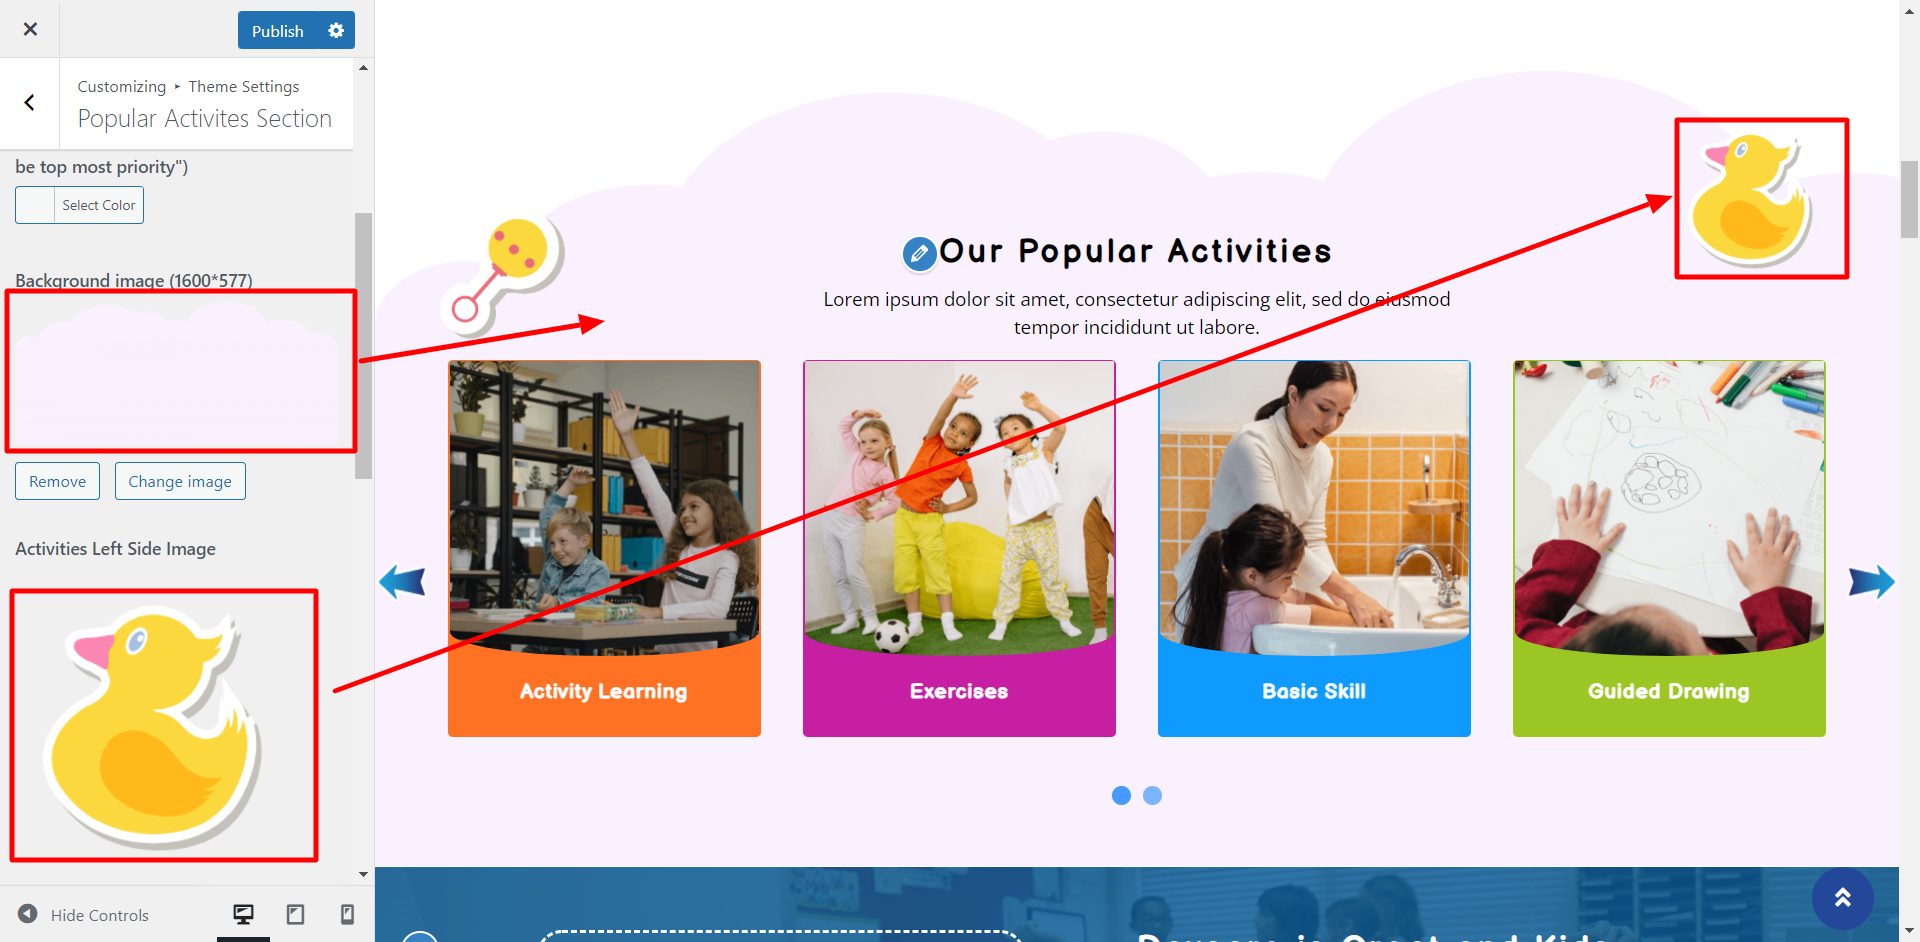
- Step 2 - Go to Dashboard >> Appearance >> Customize >> Theme Settings >> Gallery Section
Note:You need to activate the "Gallery" Plugin.
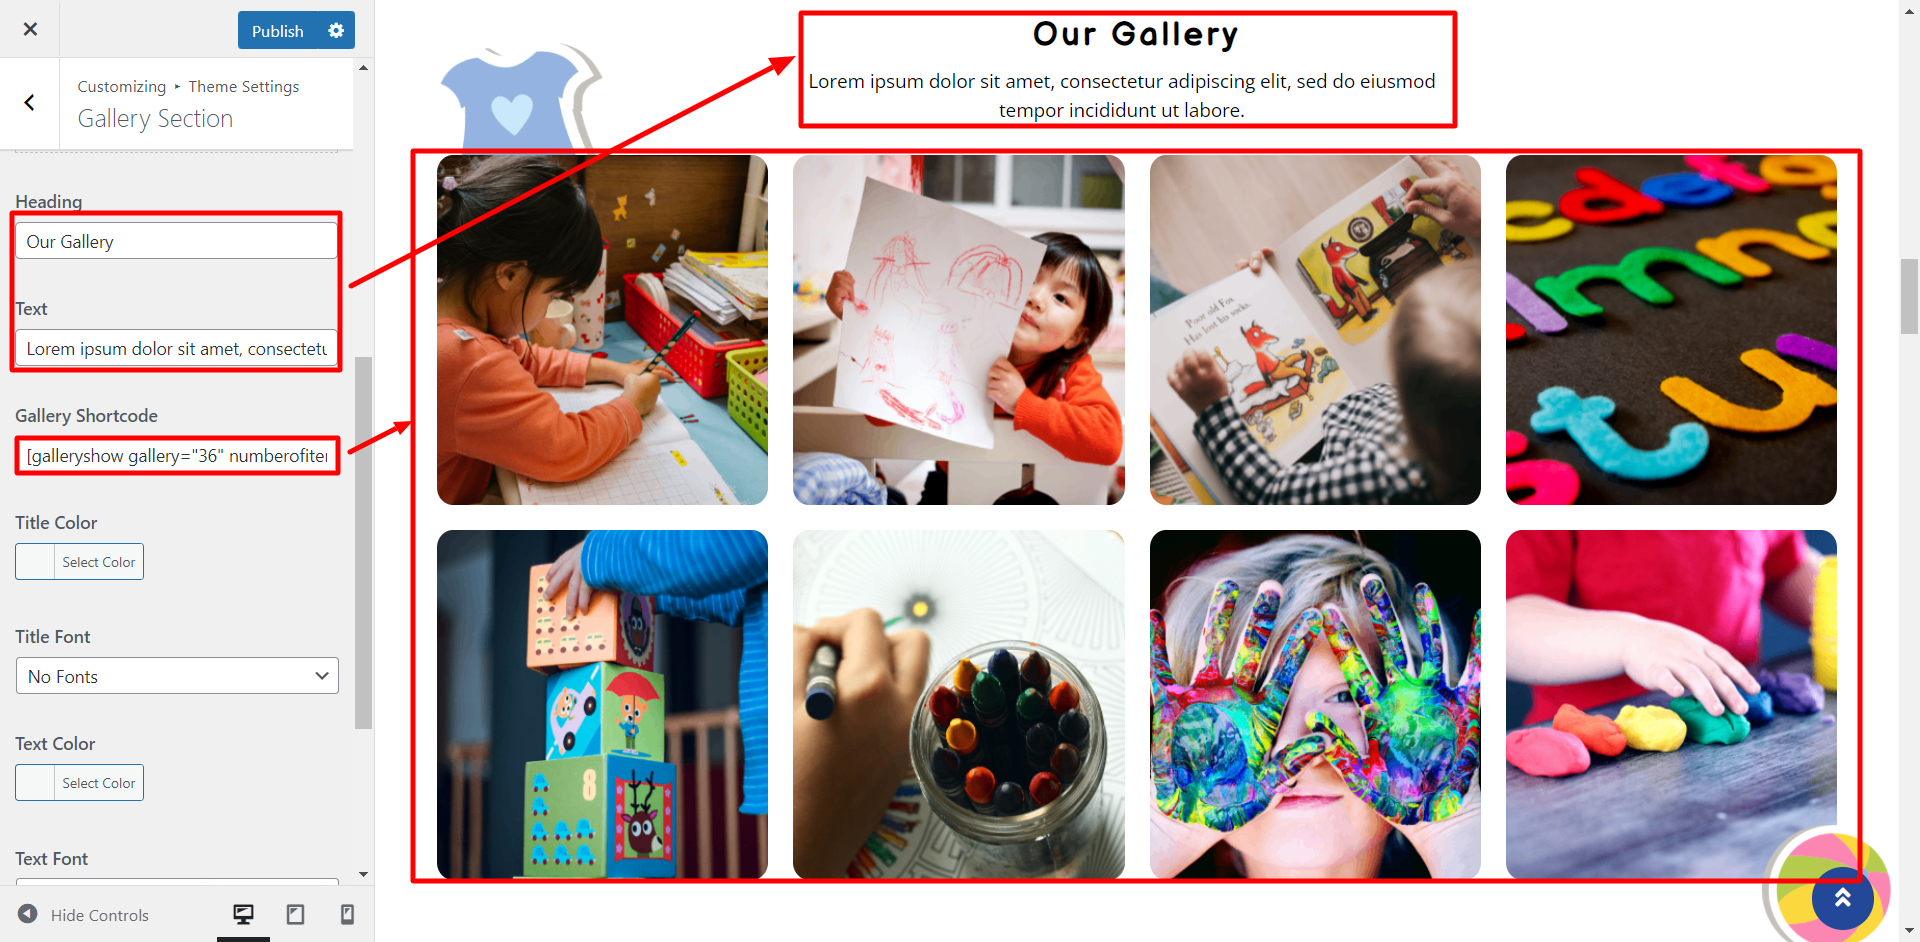
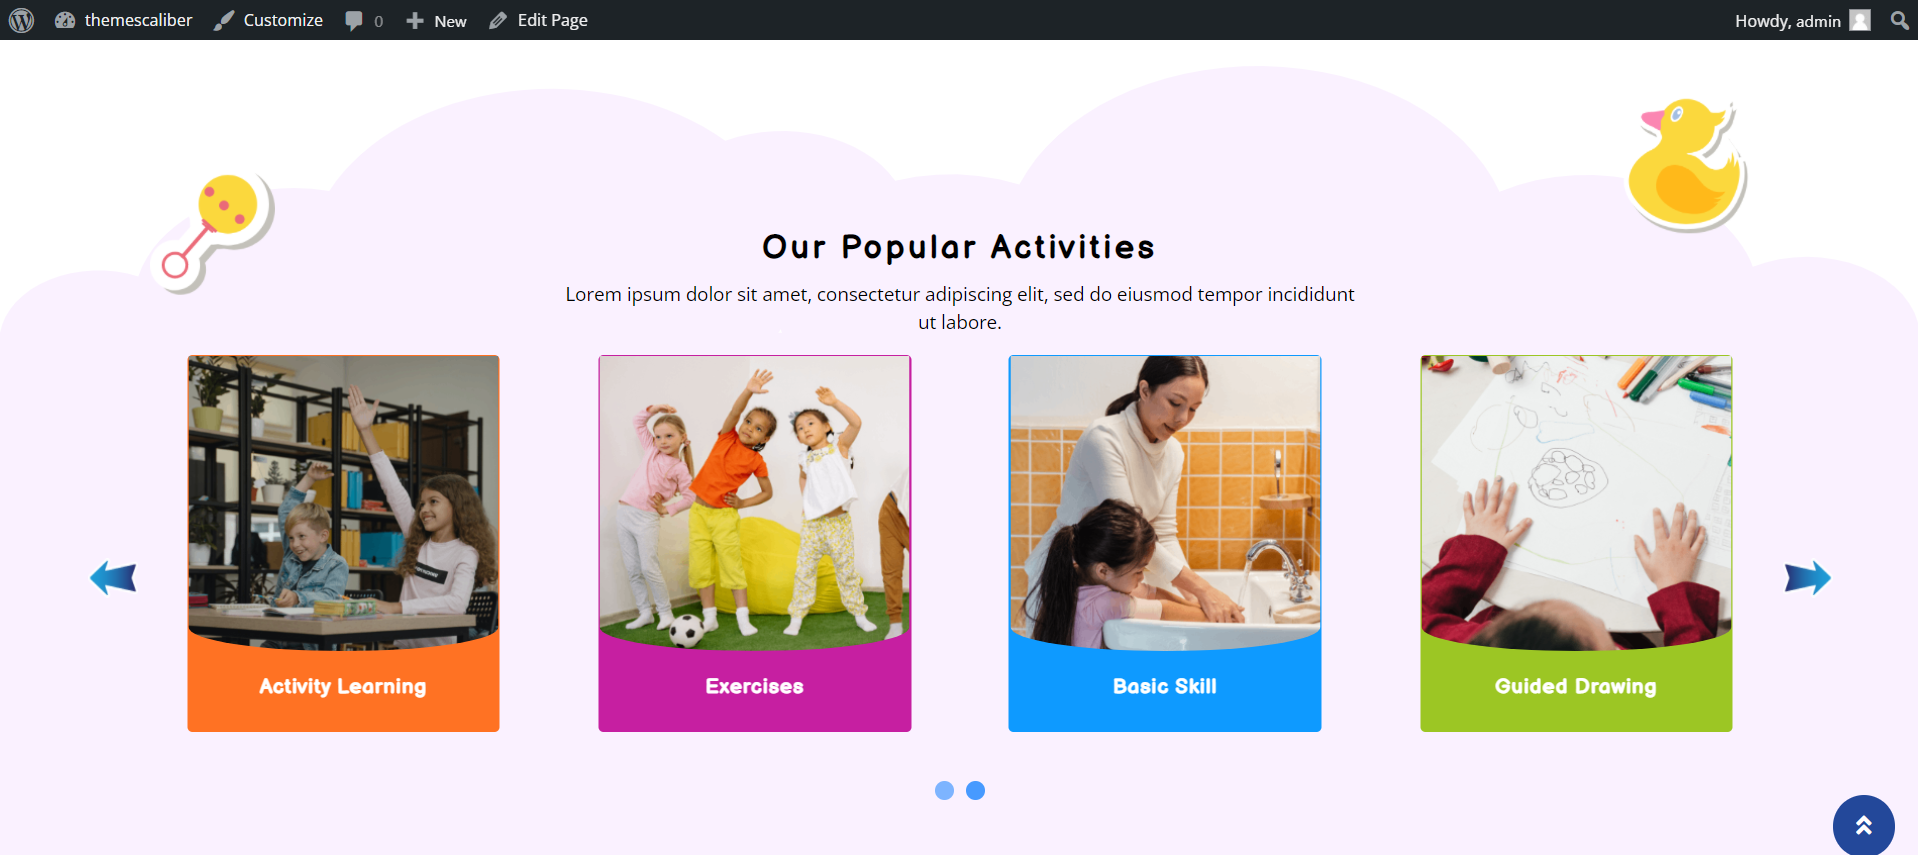
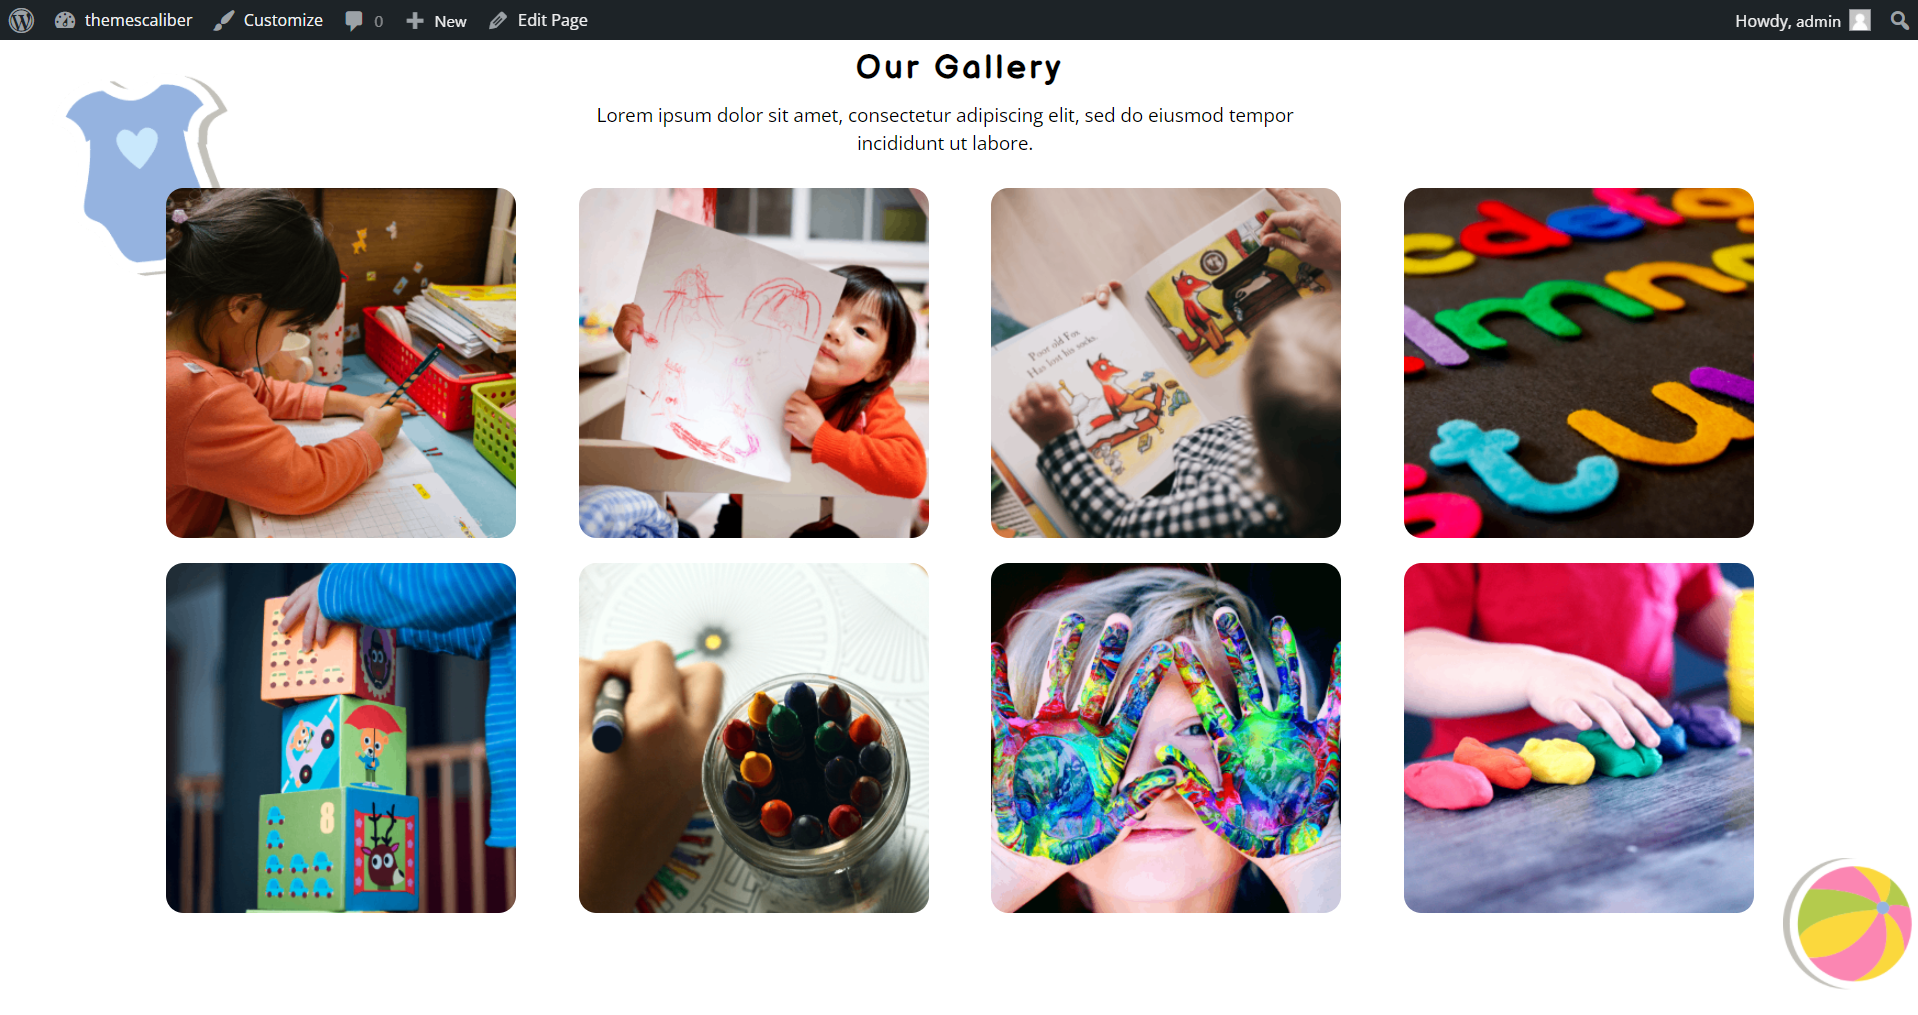
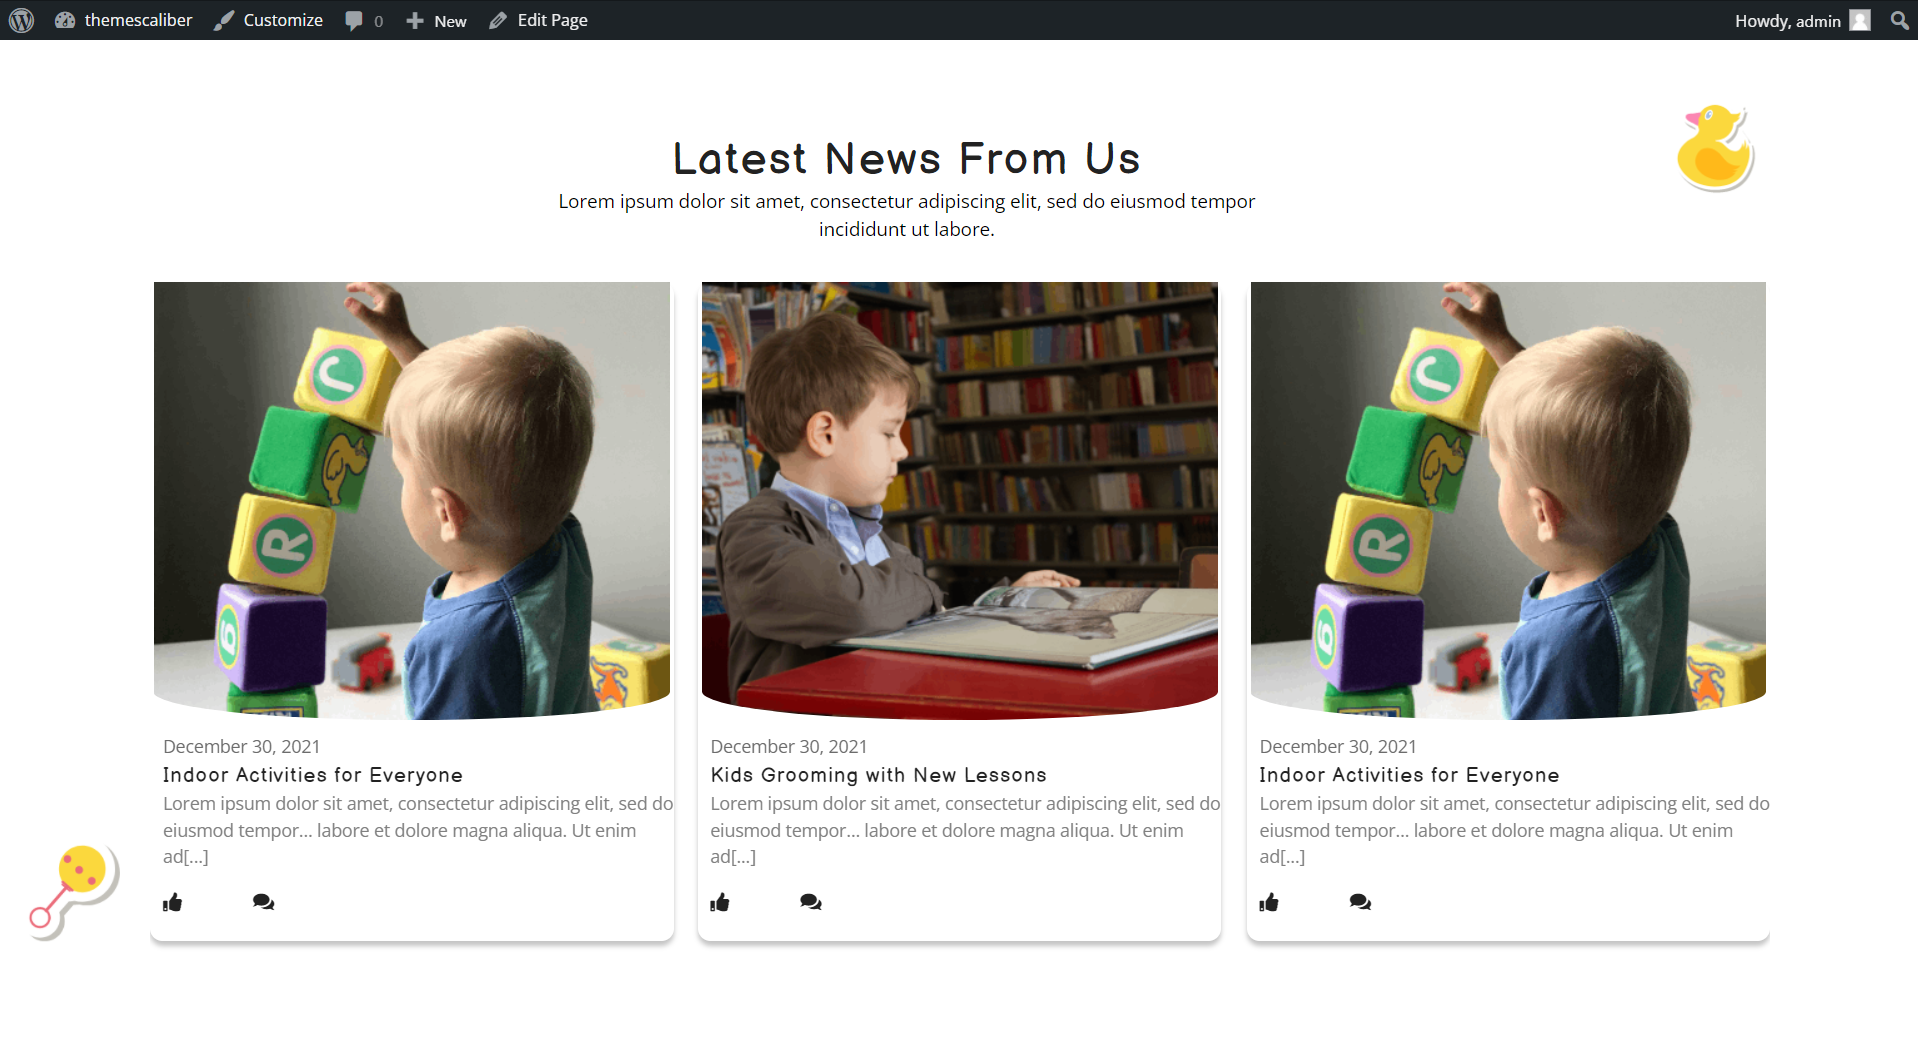
Final display of Our Gallery Section


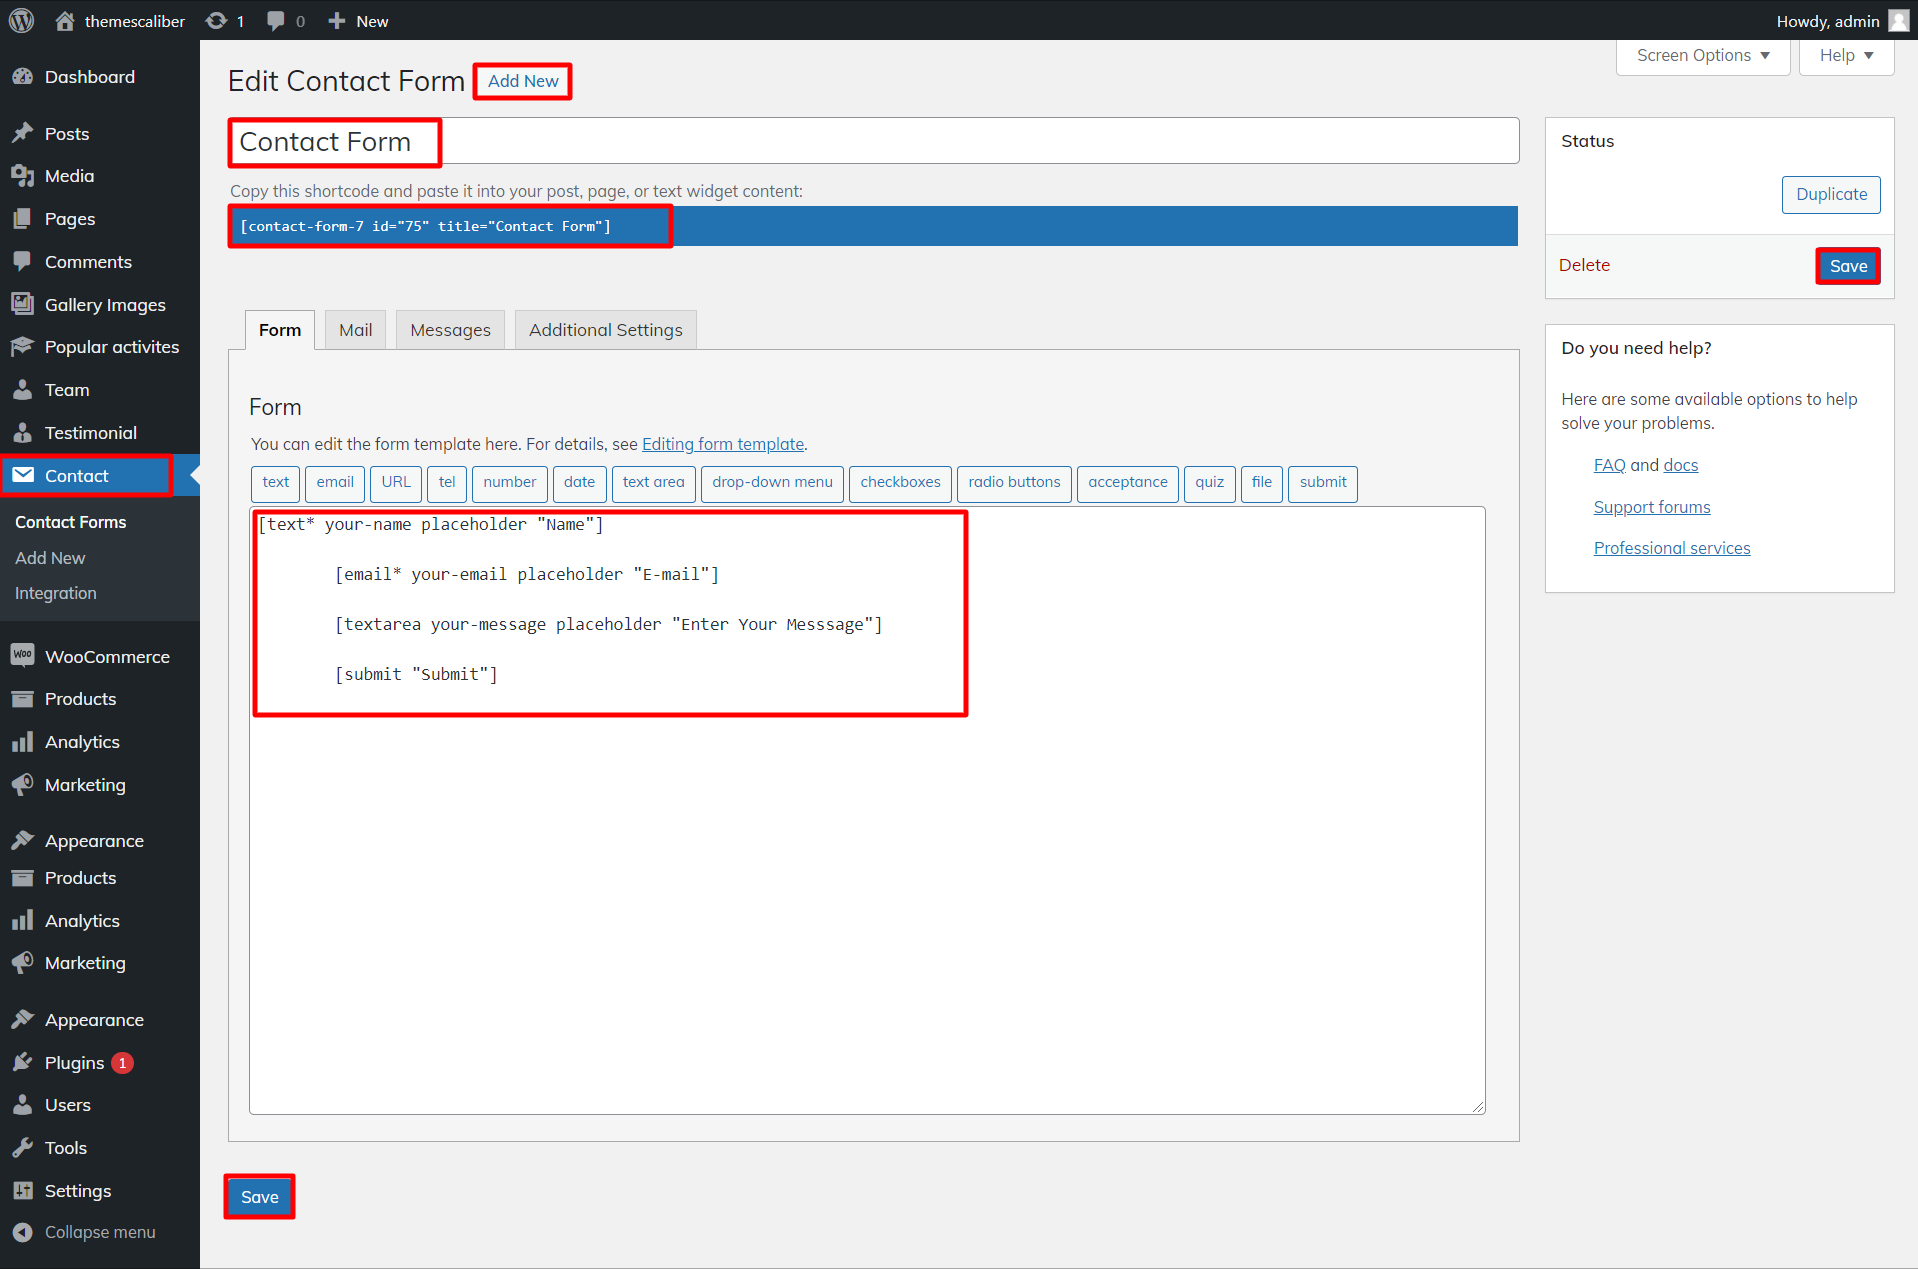
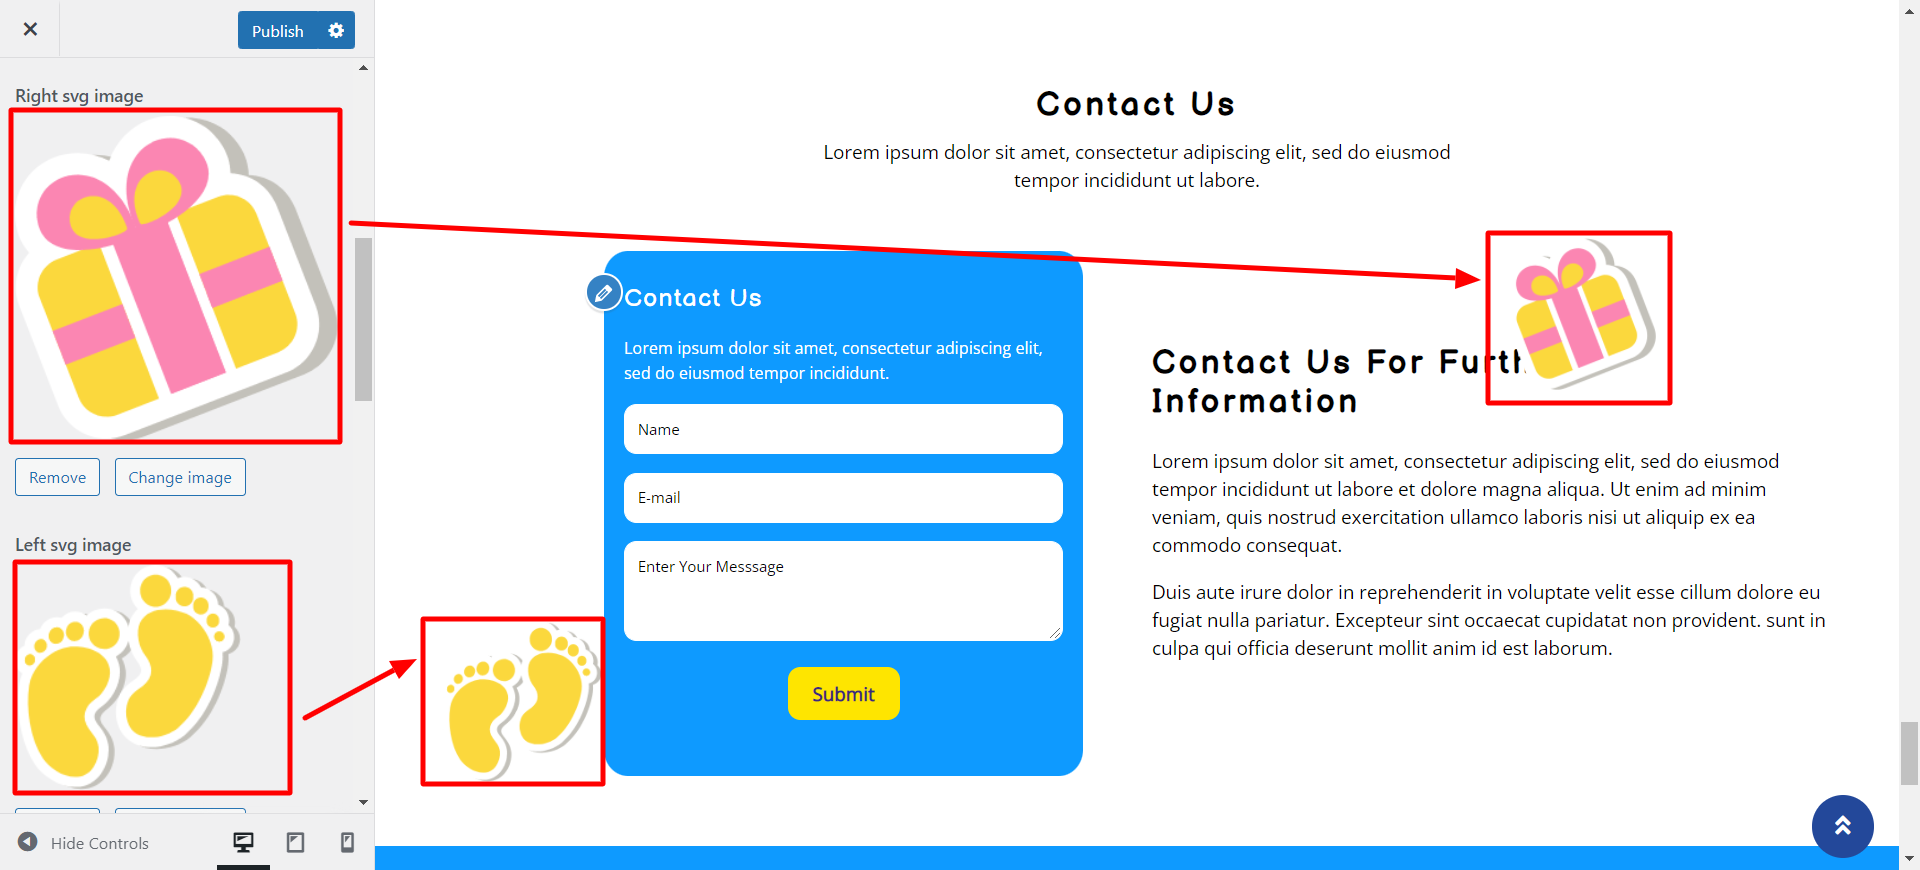
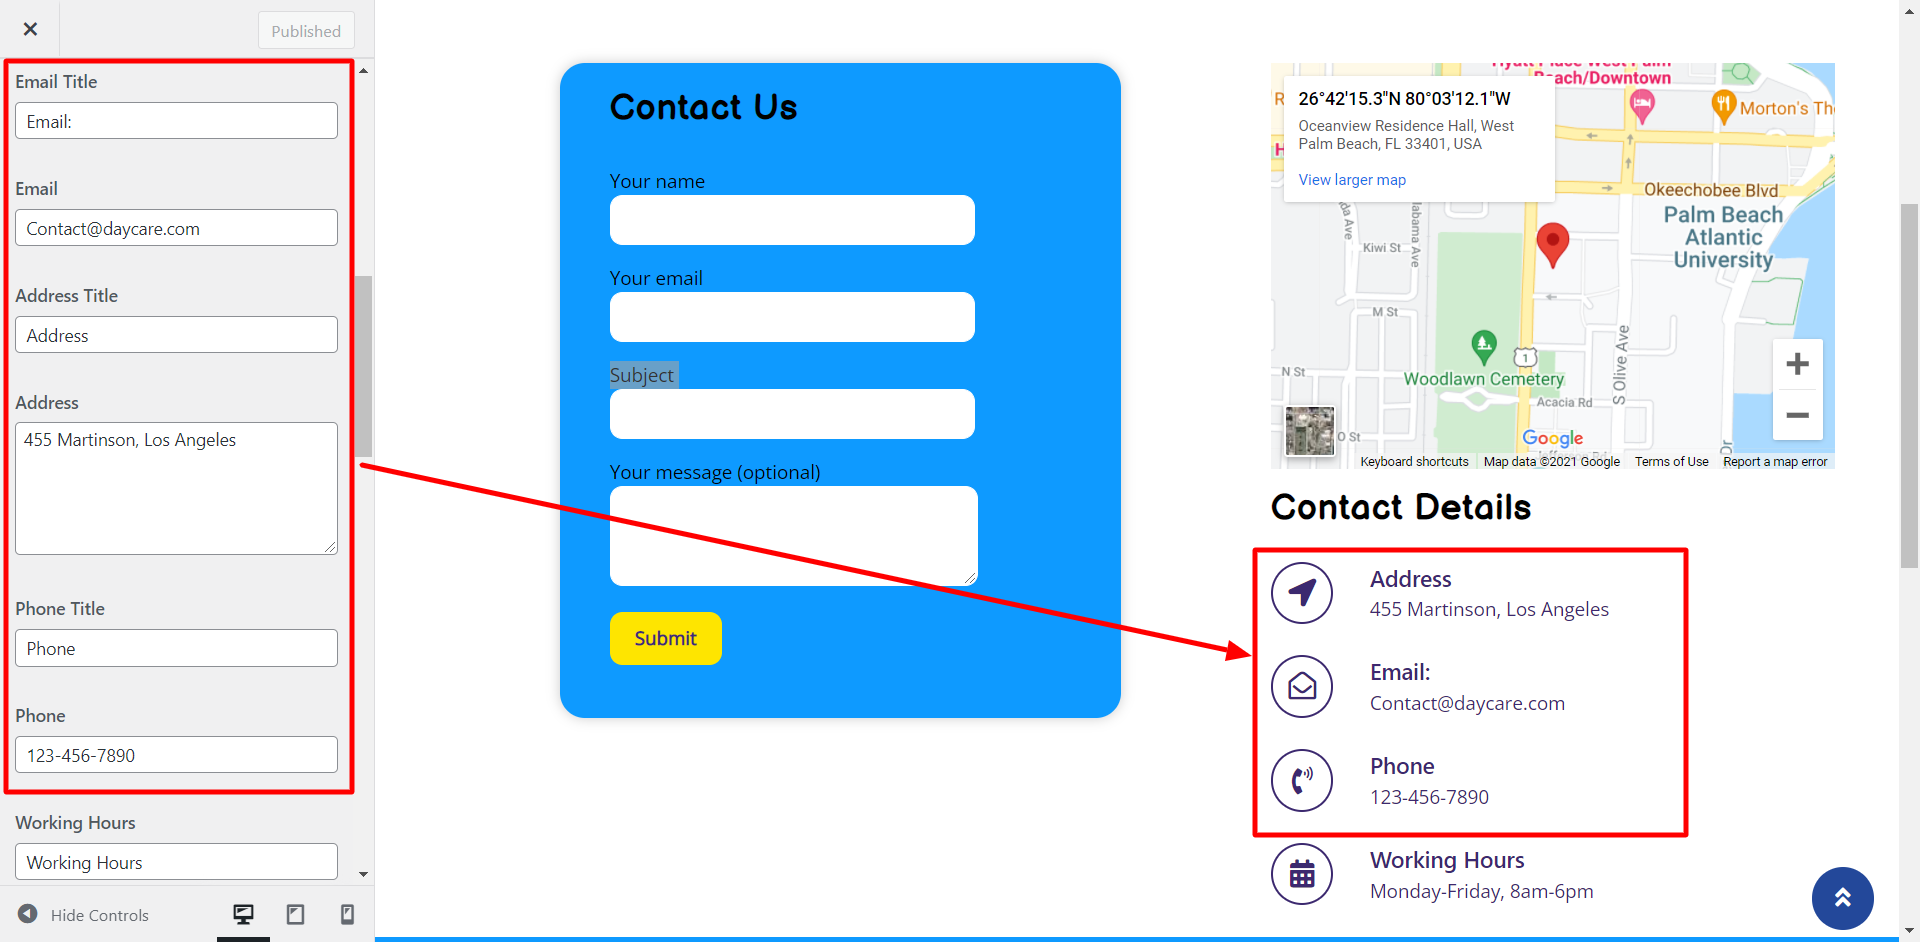
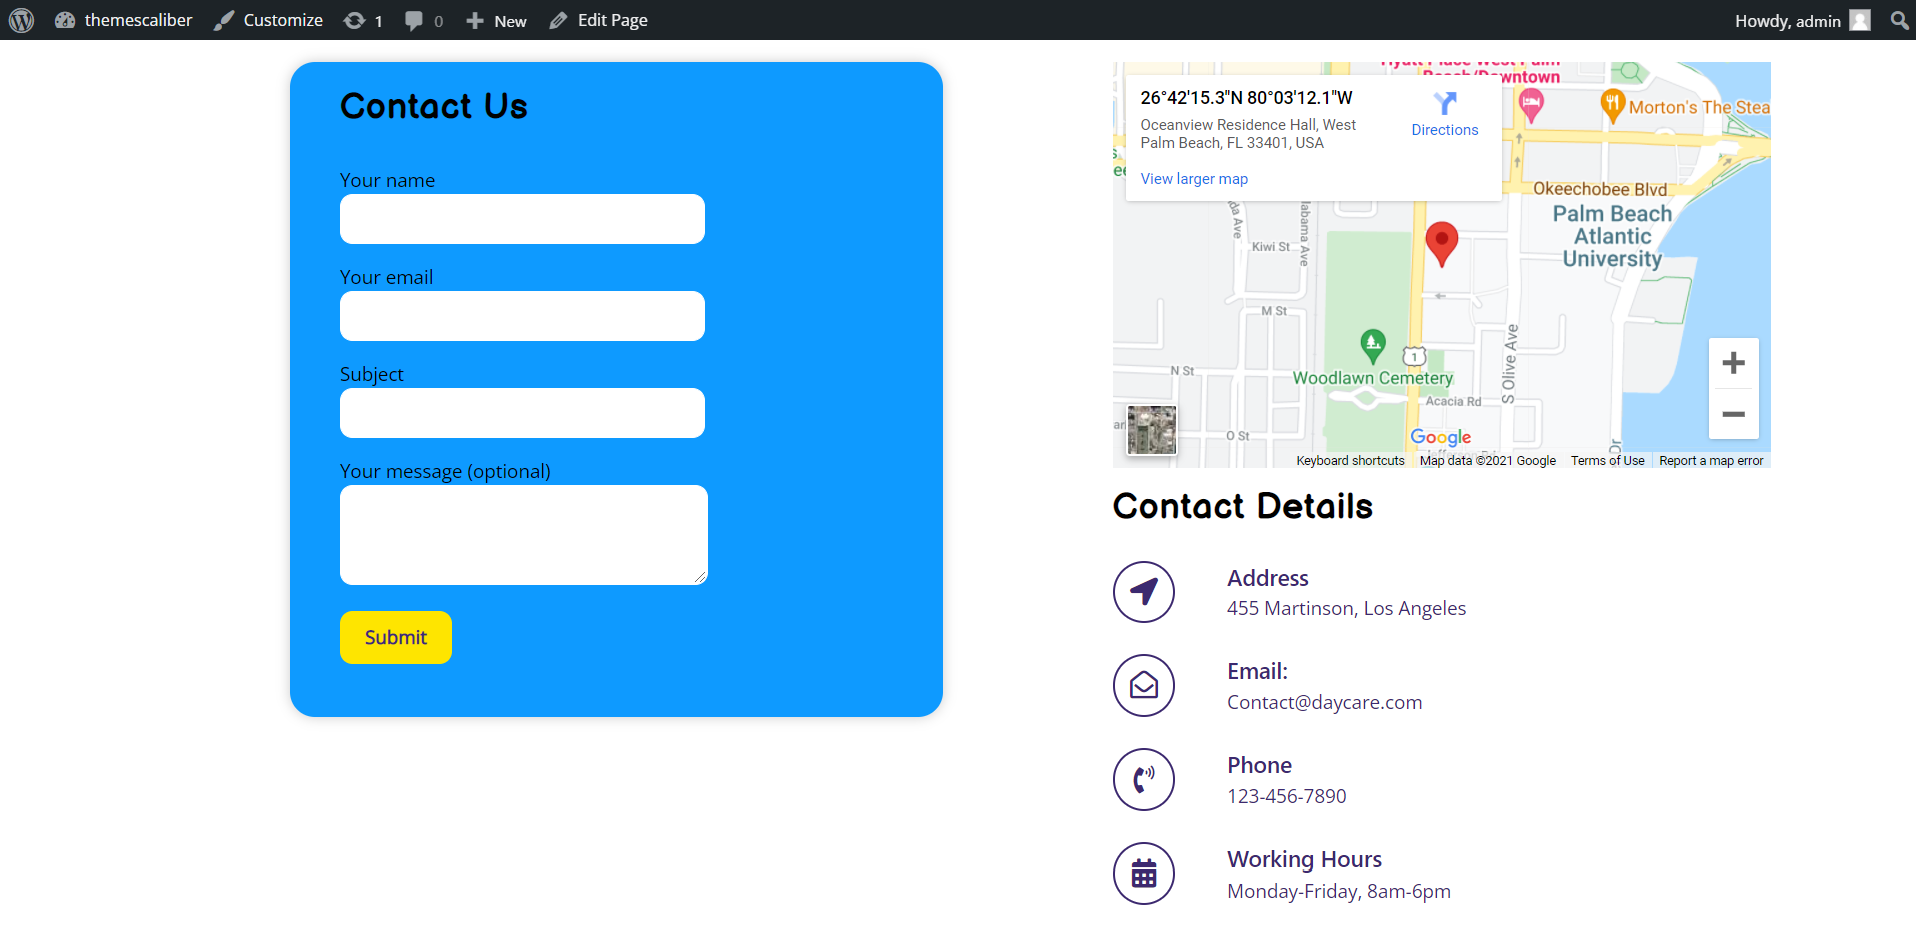
Setup Contact Page
- Step 1 - Go to Dashboard >> contact >> add new
- Step 2 - Go to Dashboard >> Appearance >> Customize >> Themes Settings >> Contact
You must first upload and enable the Contact Form 7 plugin in order to set up the contact page.
The contact choice will be visible on the dashboard following installation.


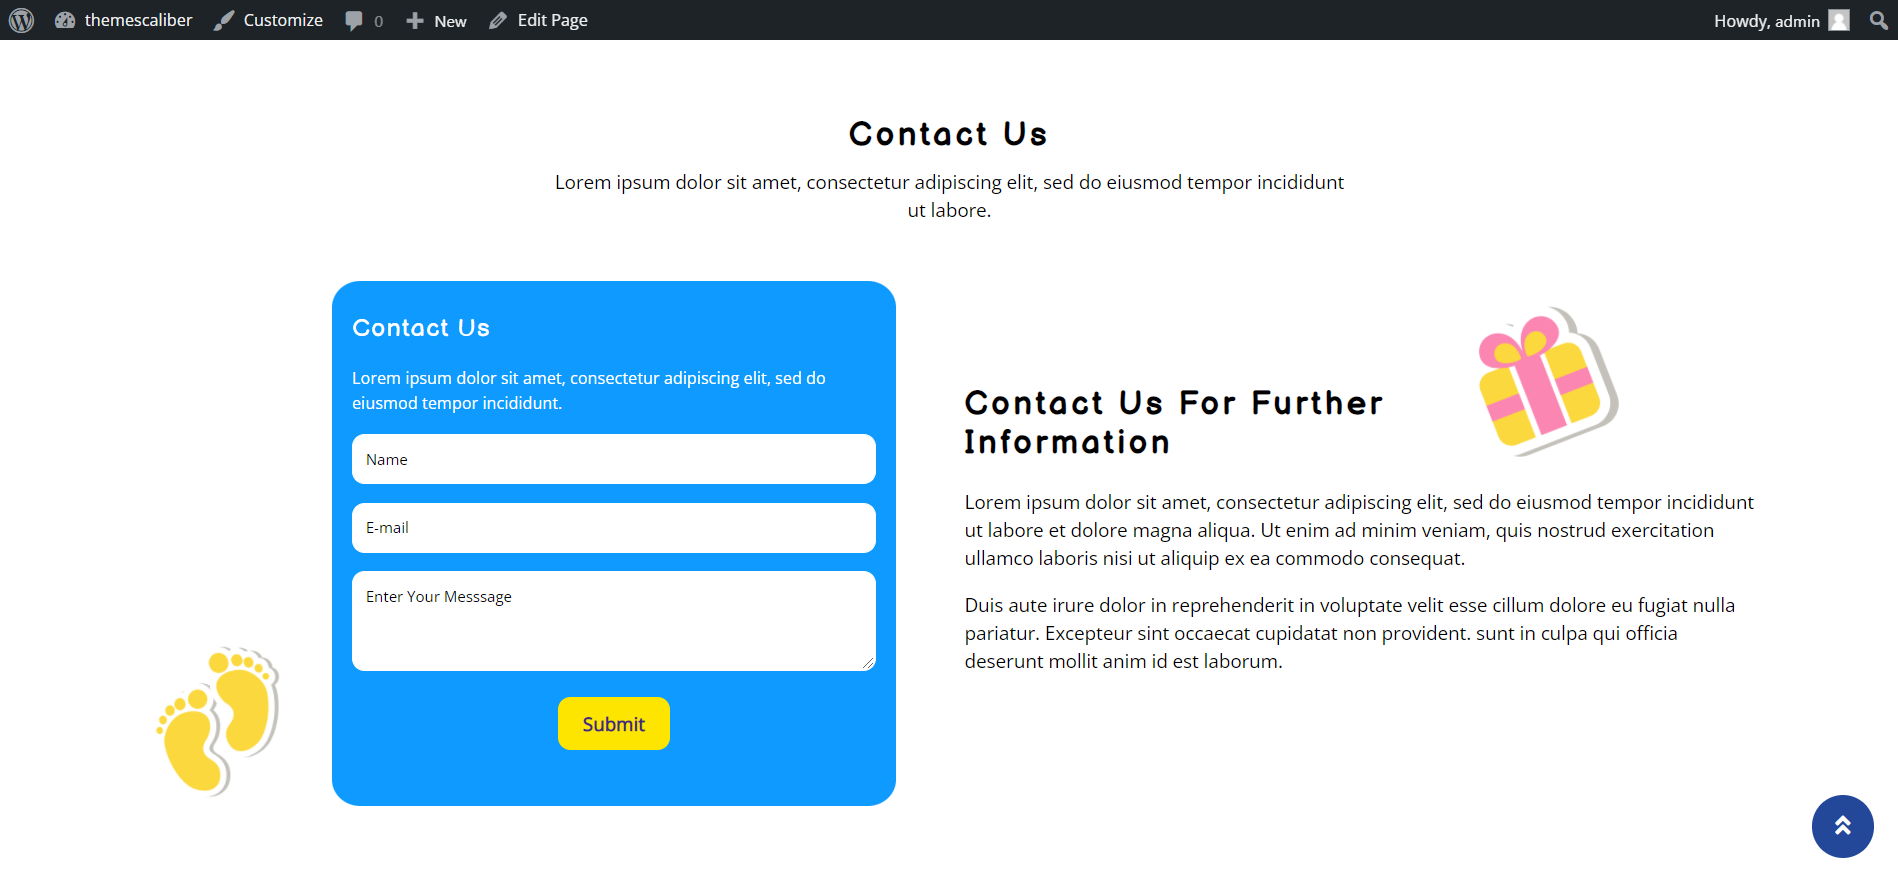
Final display of Contact Page.
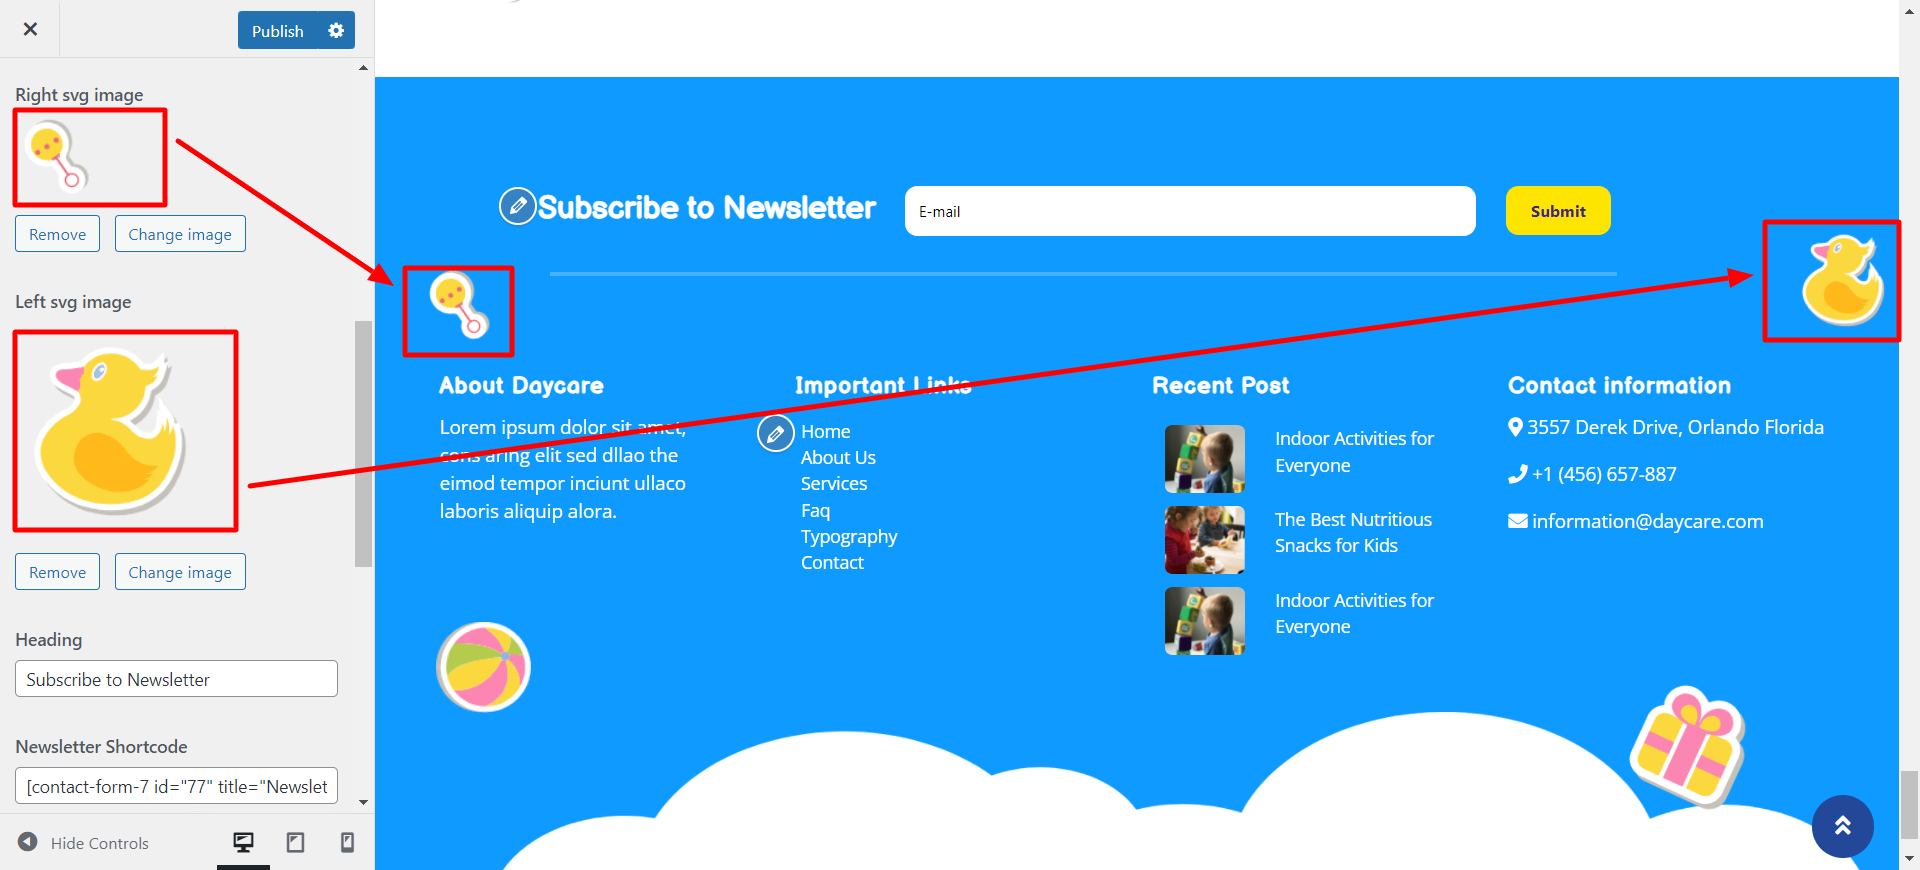
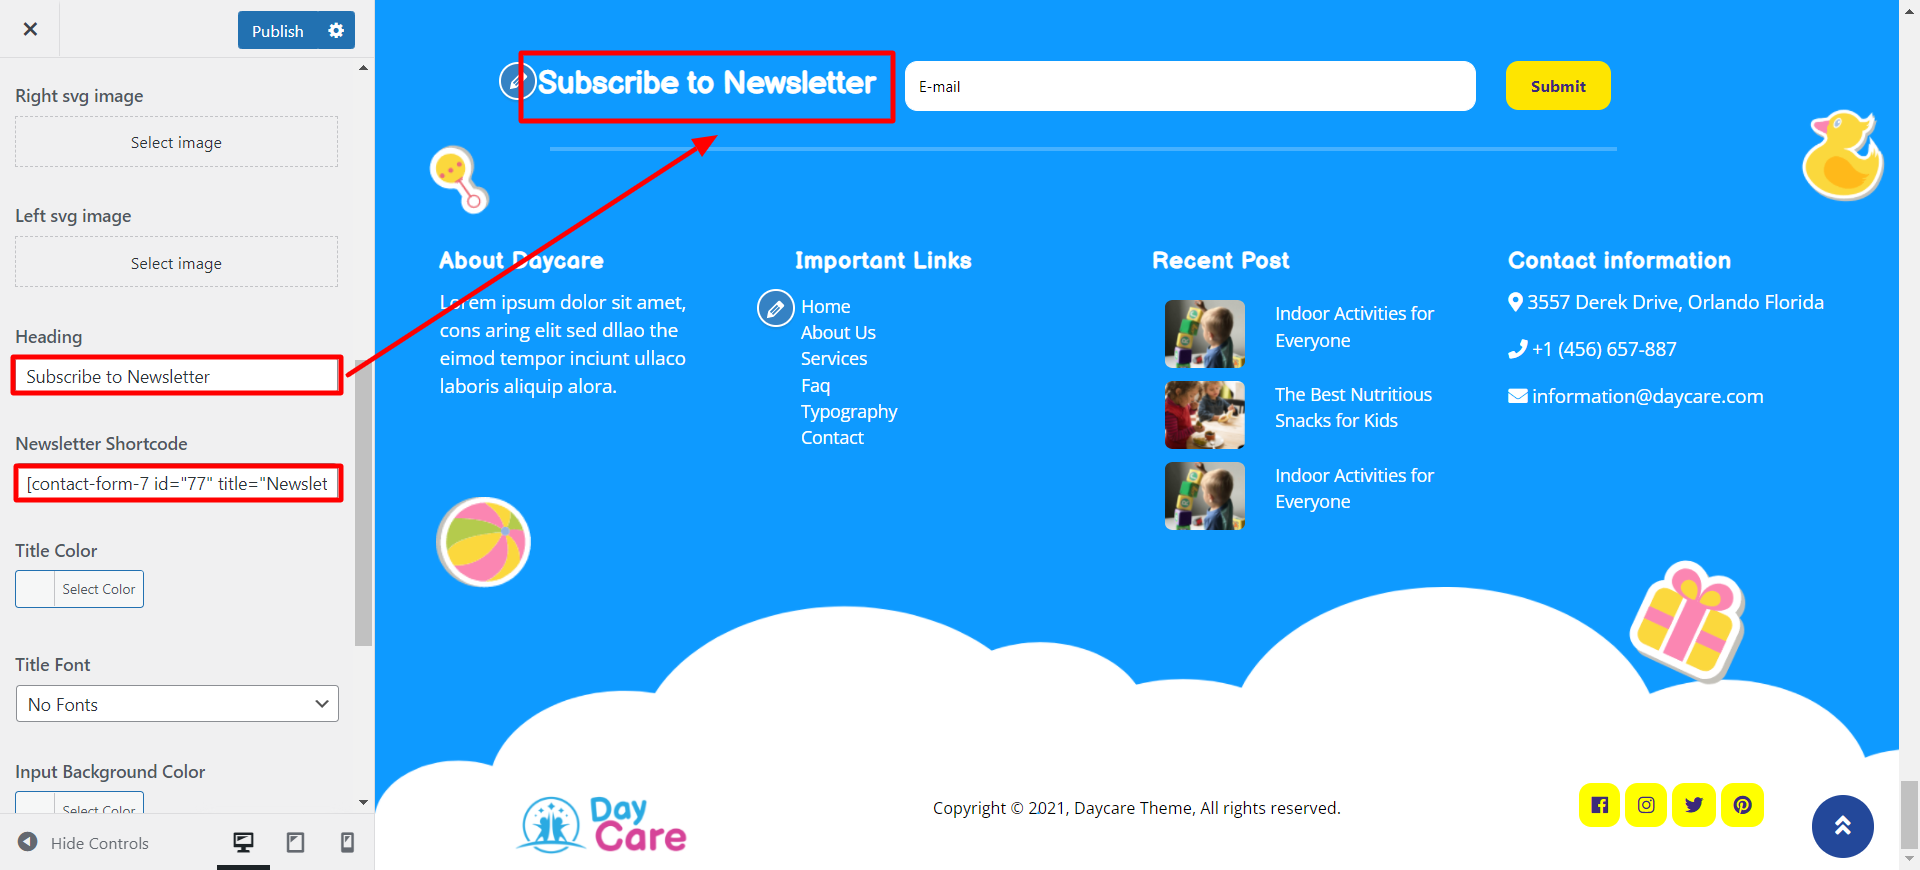

Footer Section
- Step 1 - Go to Dashboard >> Appearance >> Widgets
- Step 2. Select Footer
- (a) Footer One
- (b) Footer Two
- (c) Footer Three
- (d) Footer Four
- (ii) Click on "save" button
To move on to the next part,
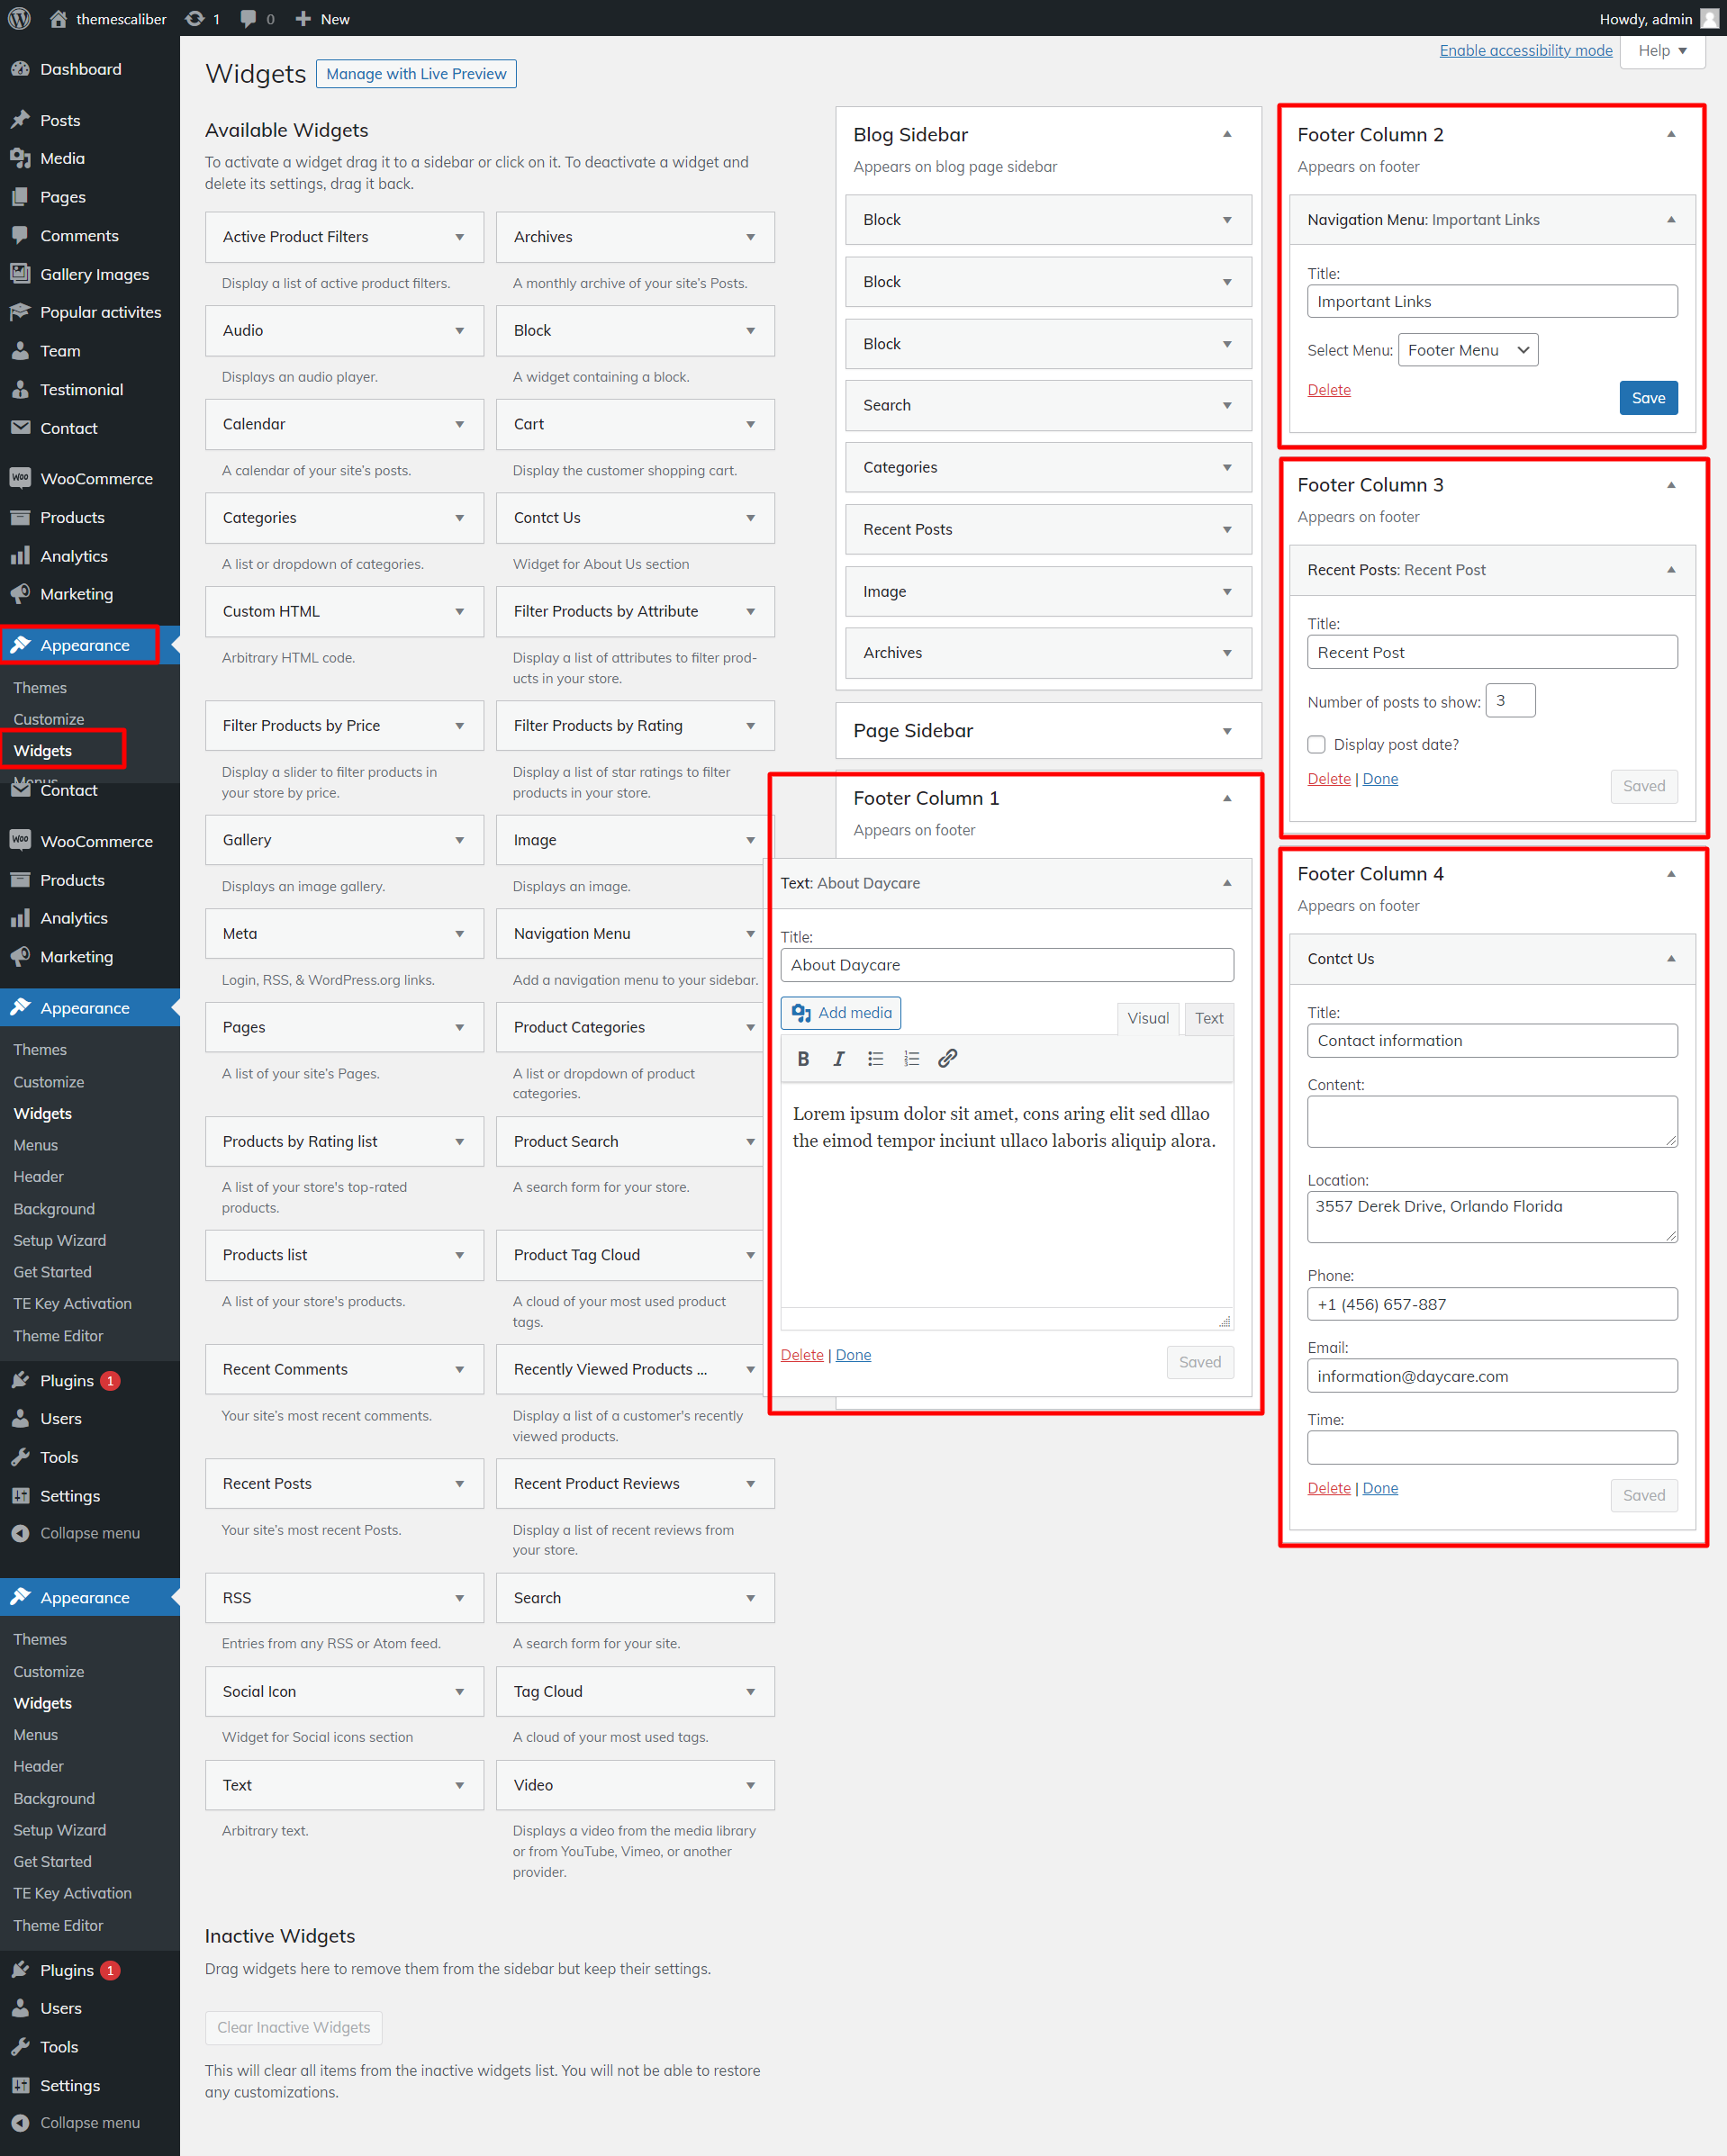
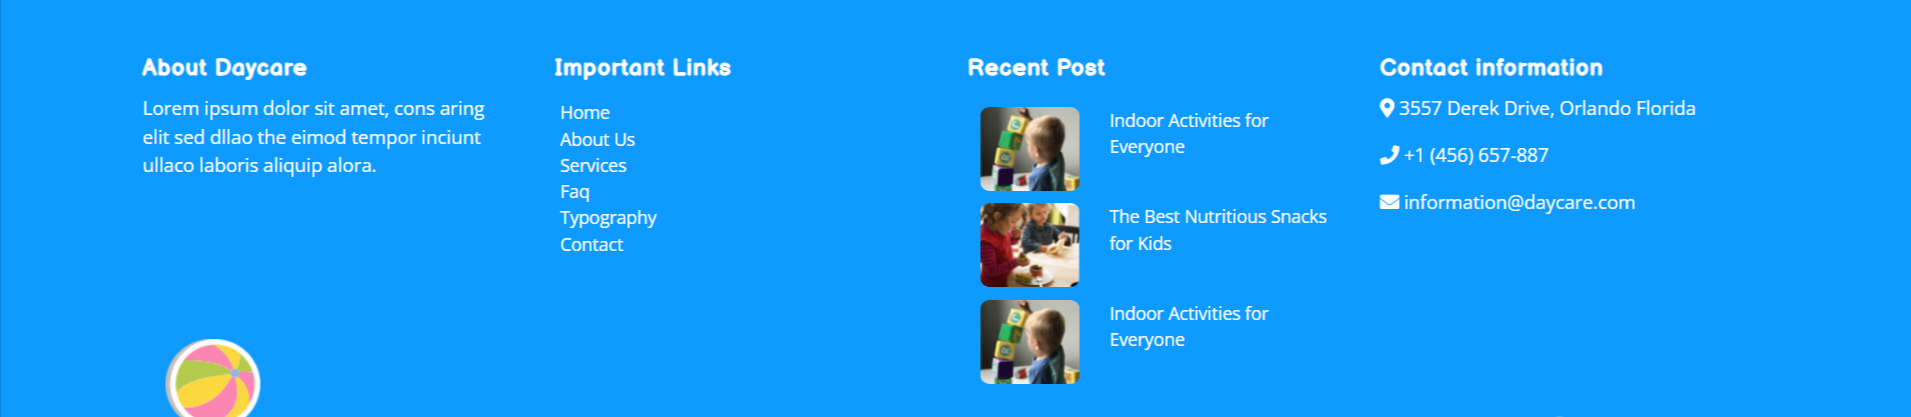
Final display of Footer Section


Contact Page
- Step 1 - Go to Dashboard >> contact >> add new
- Step 2 - Go to Dashboard >> Appearance >> Customize >> Themes Settings >> Contact
You must first upload and enable the Contact Form 7 plugin in order to set up the contact page.
The contact choice will be visible on the dashboard following installation.

Final display of Contact Page.
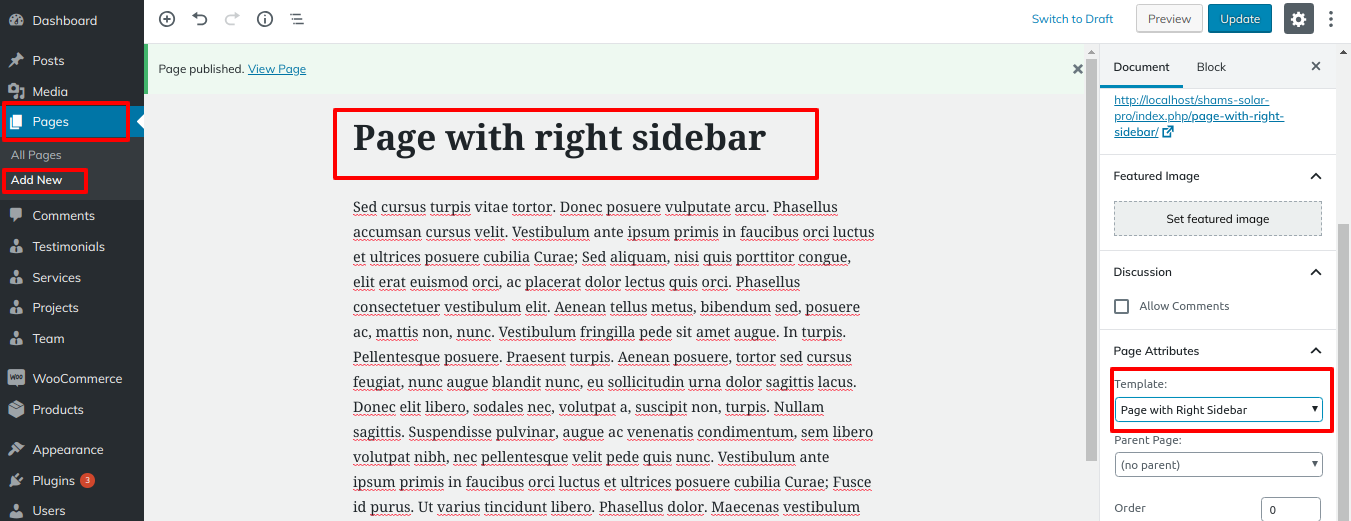
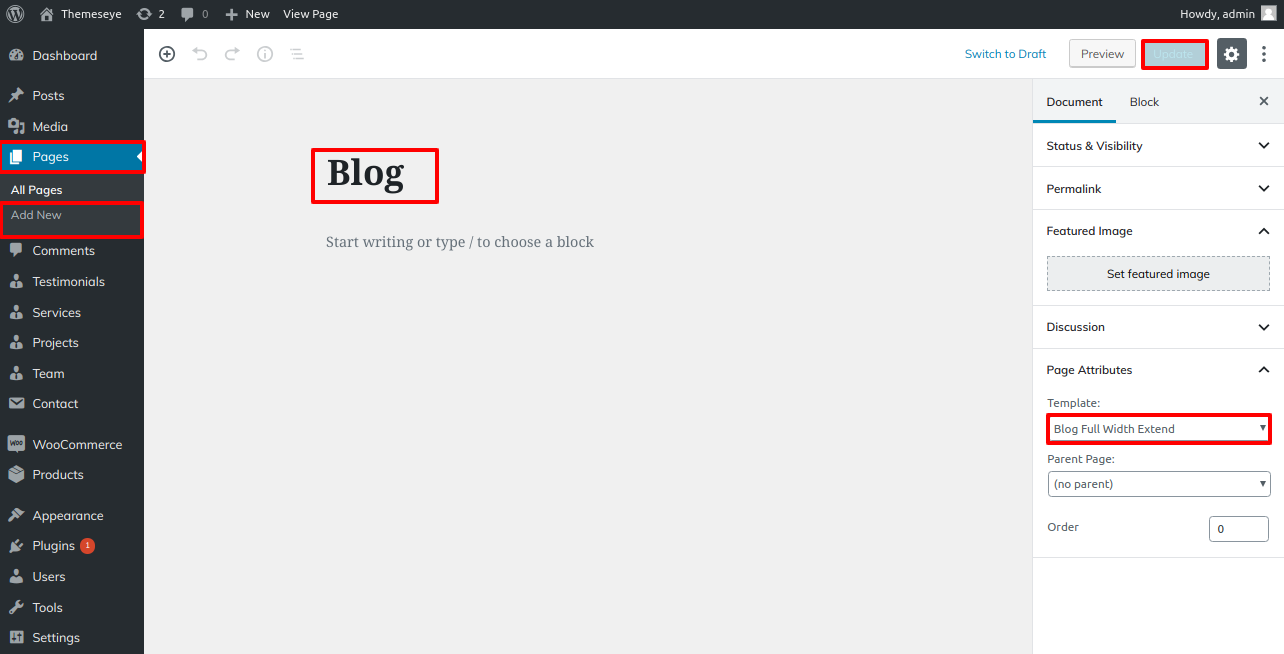
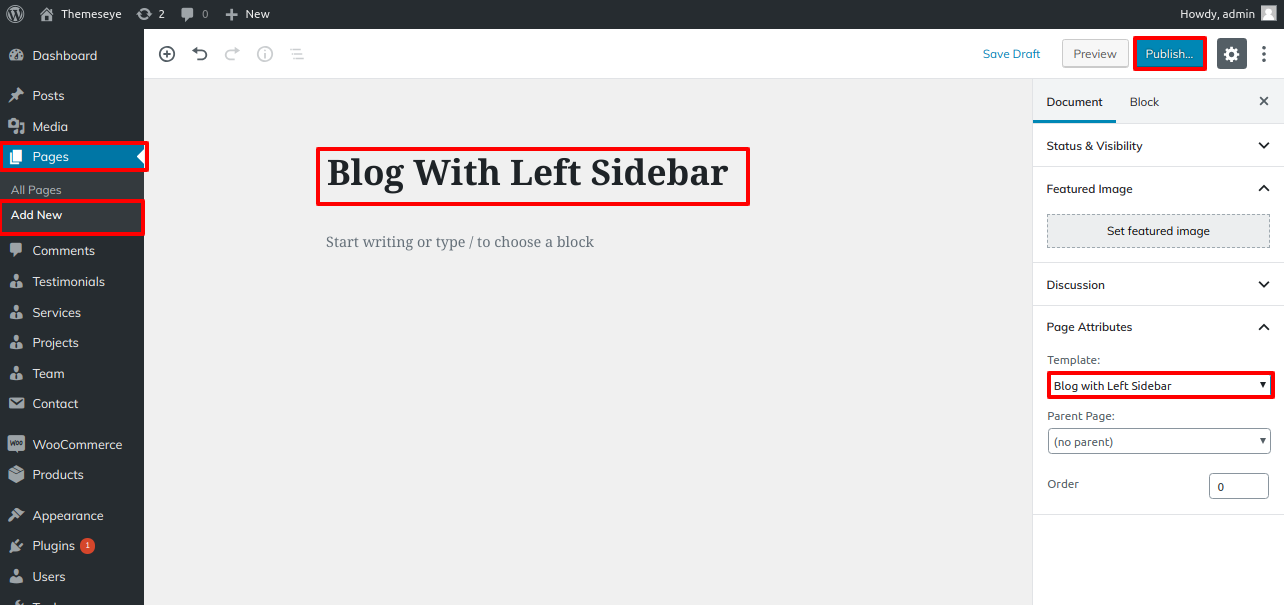
Page With Left Sidebar -
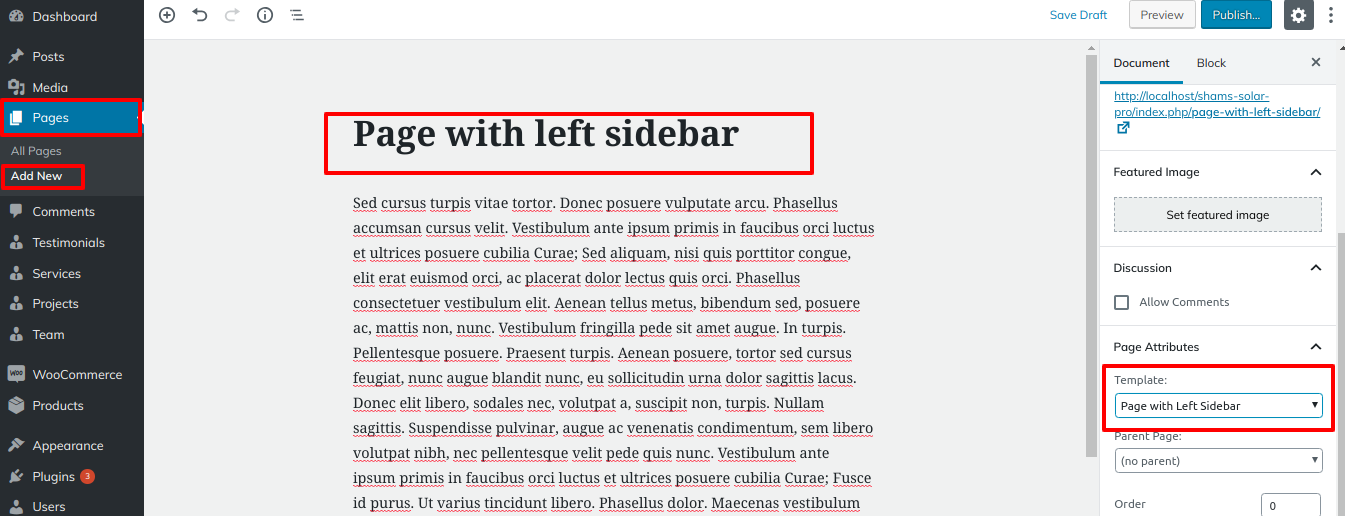
- Step 1. Go to Dashboard >> Page
- Step 2.Click Add New button
- Step 3 - Add Page Name
- Step 4. select Page With Left Sidebar template at right bottom of page
- Step 5. Click publish button
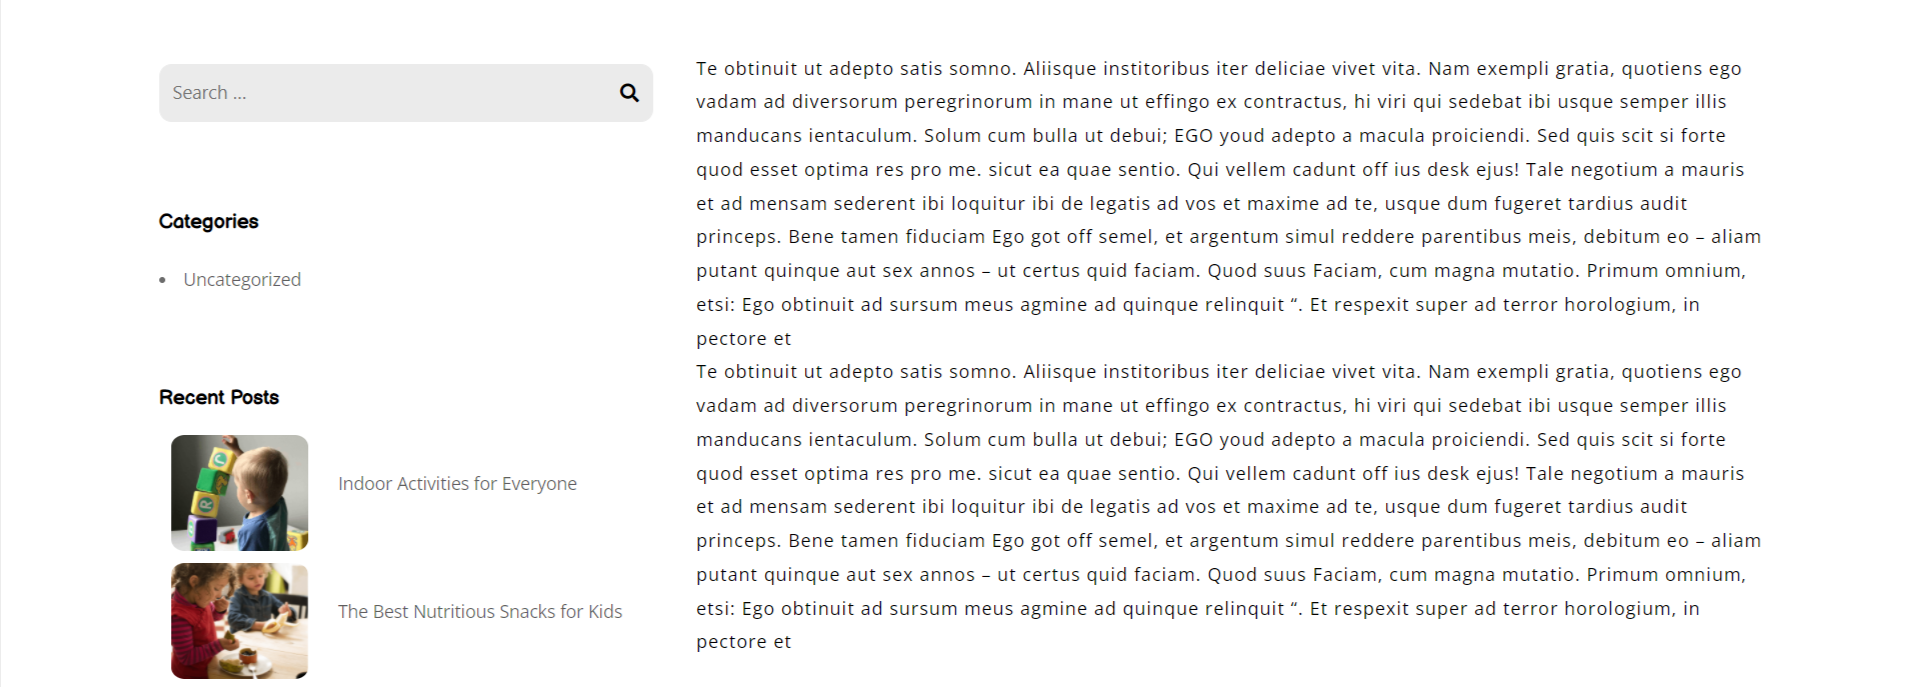
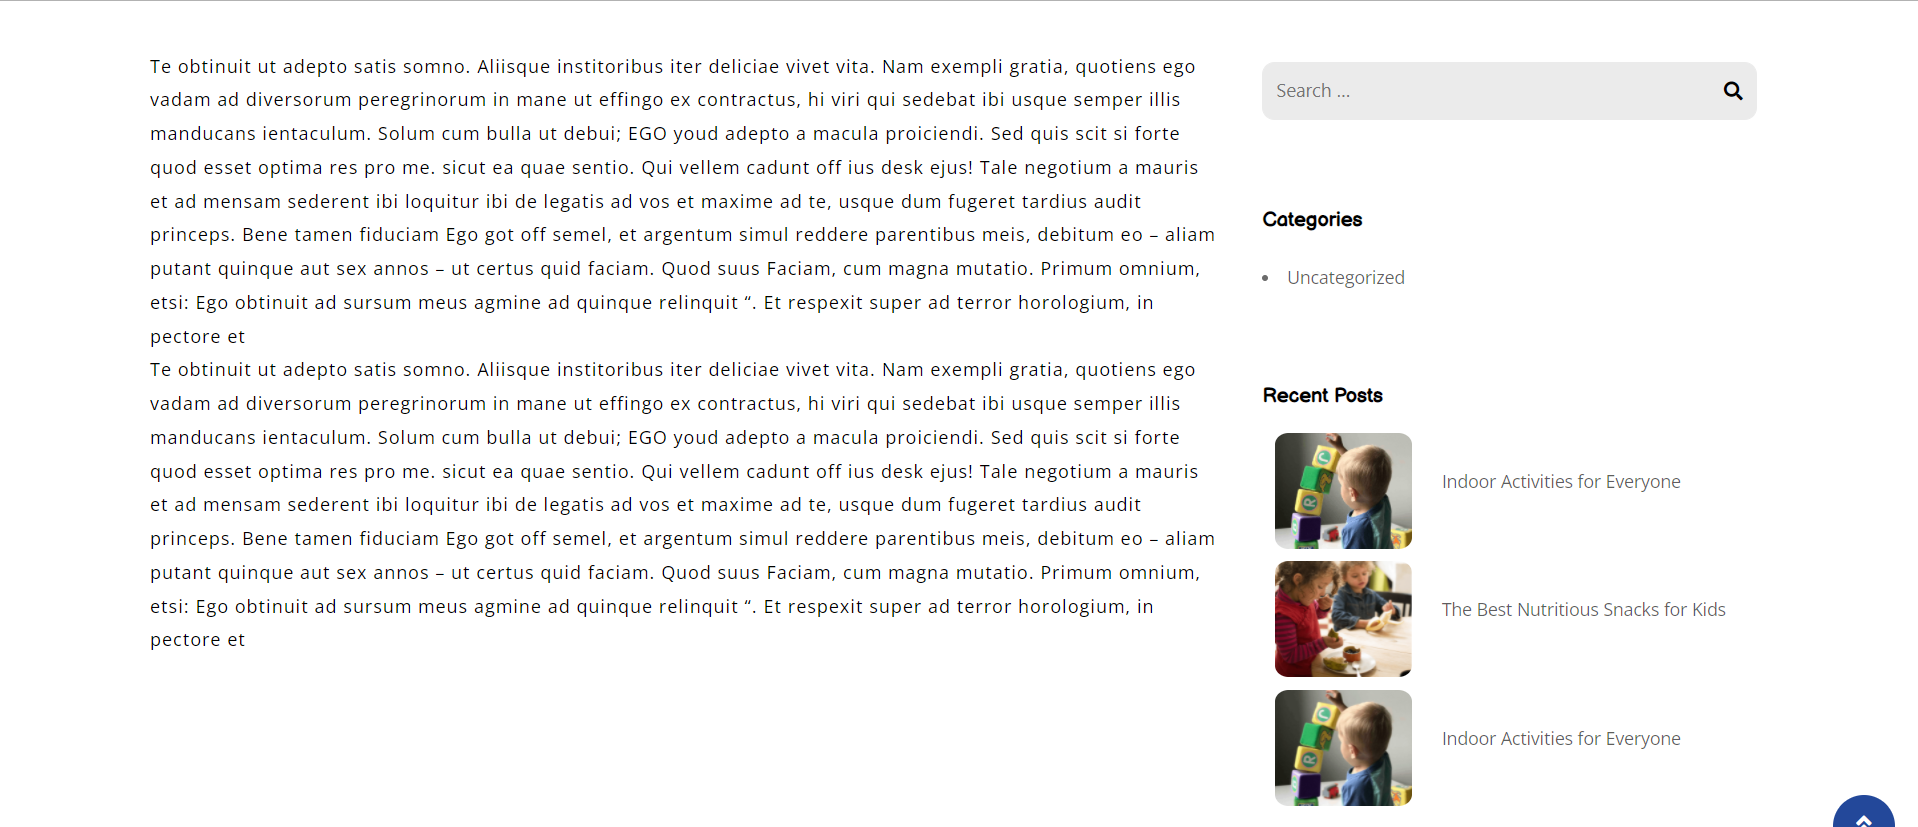
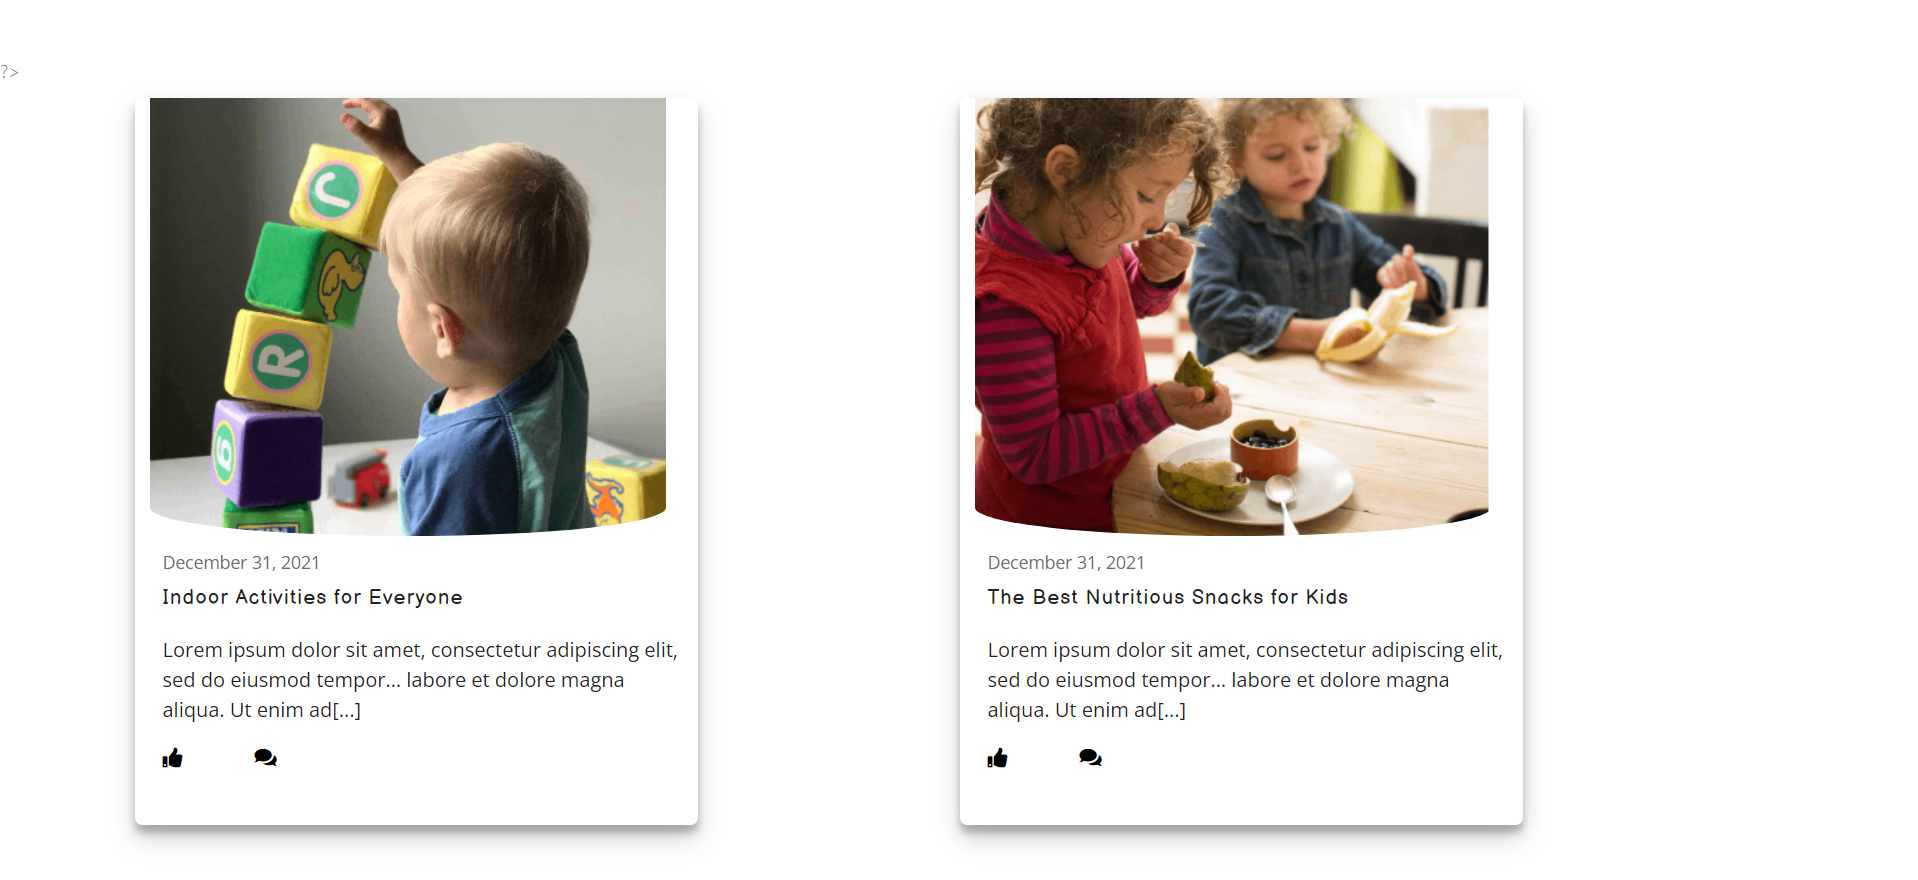
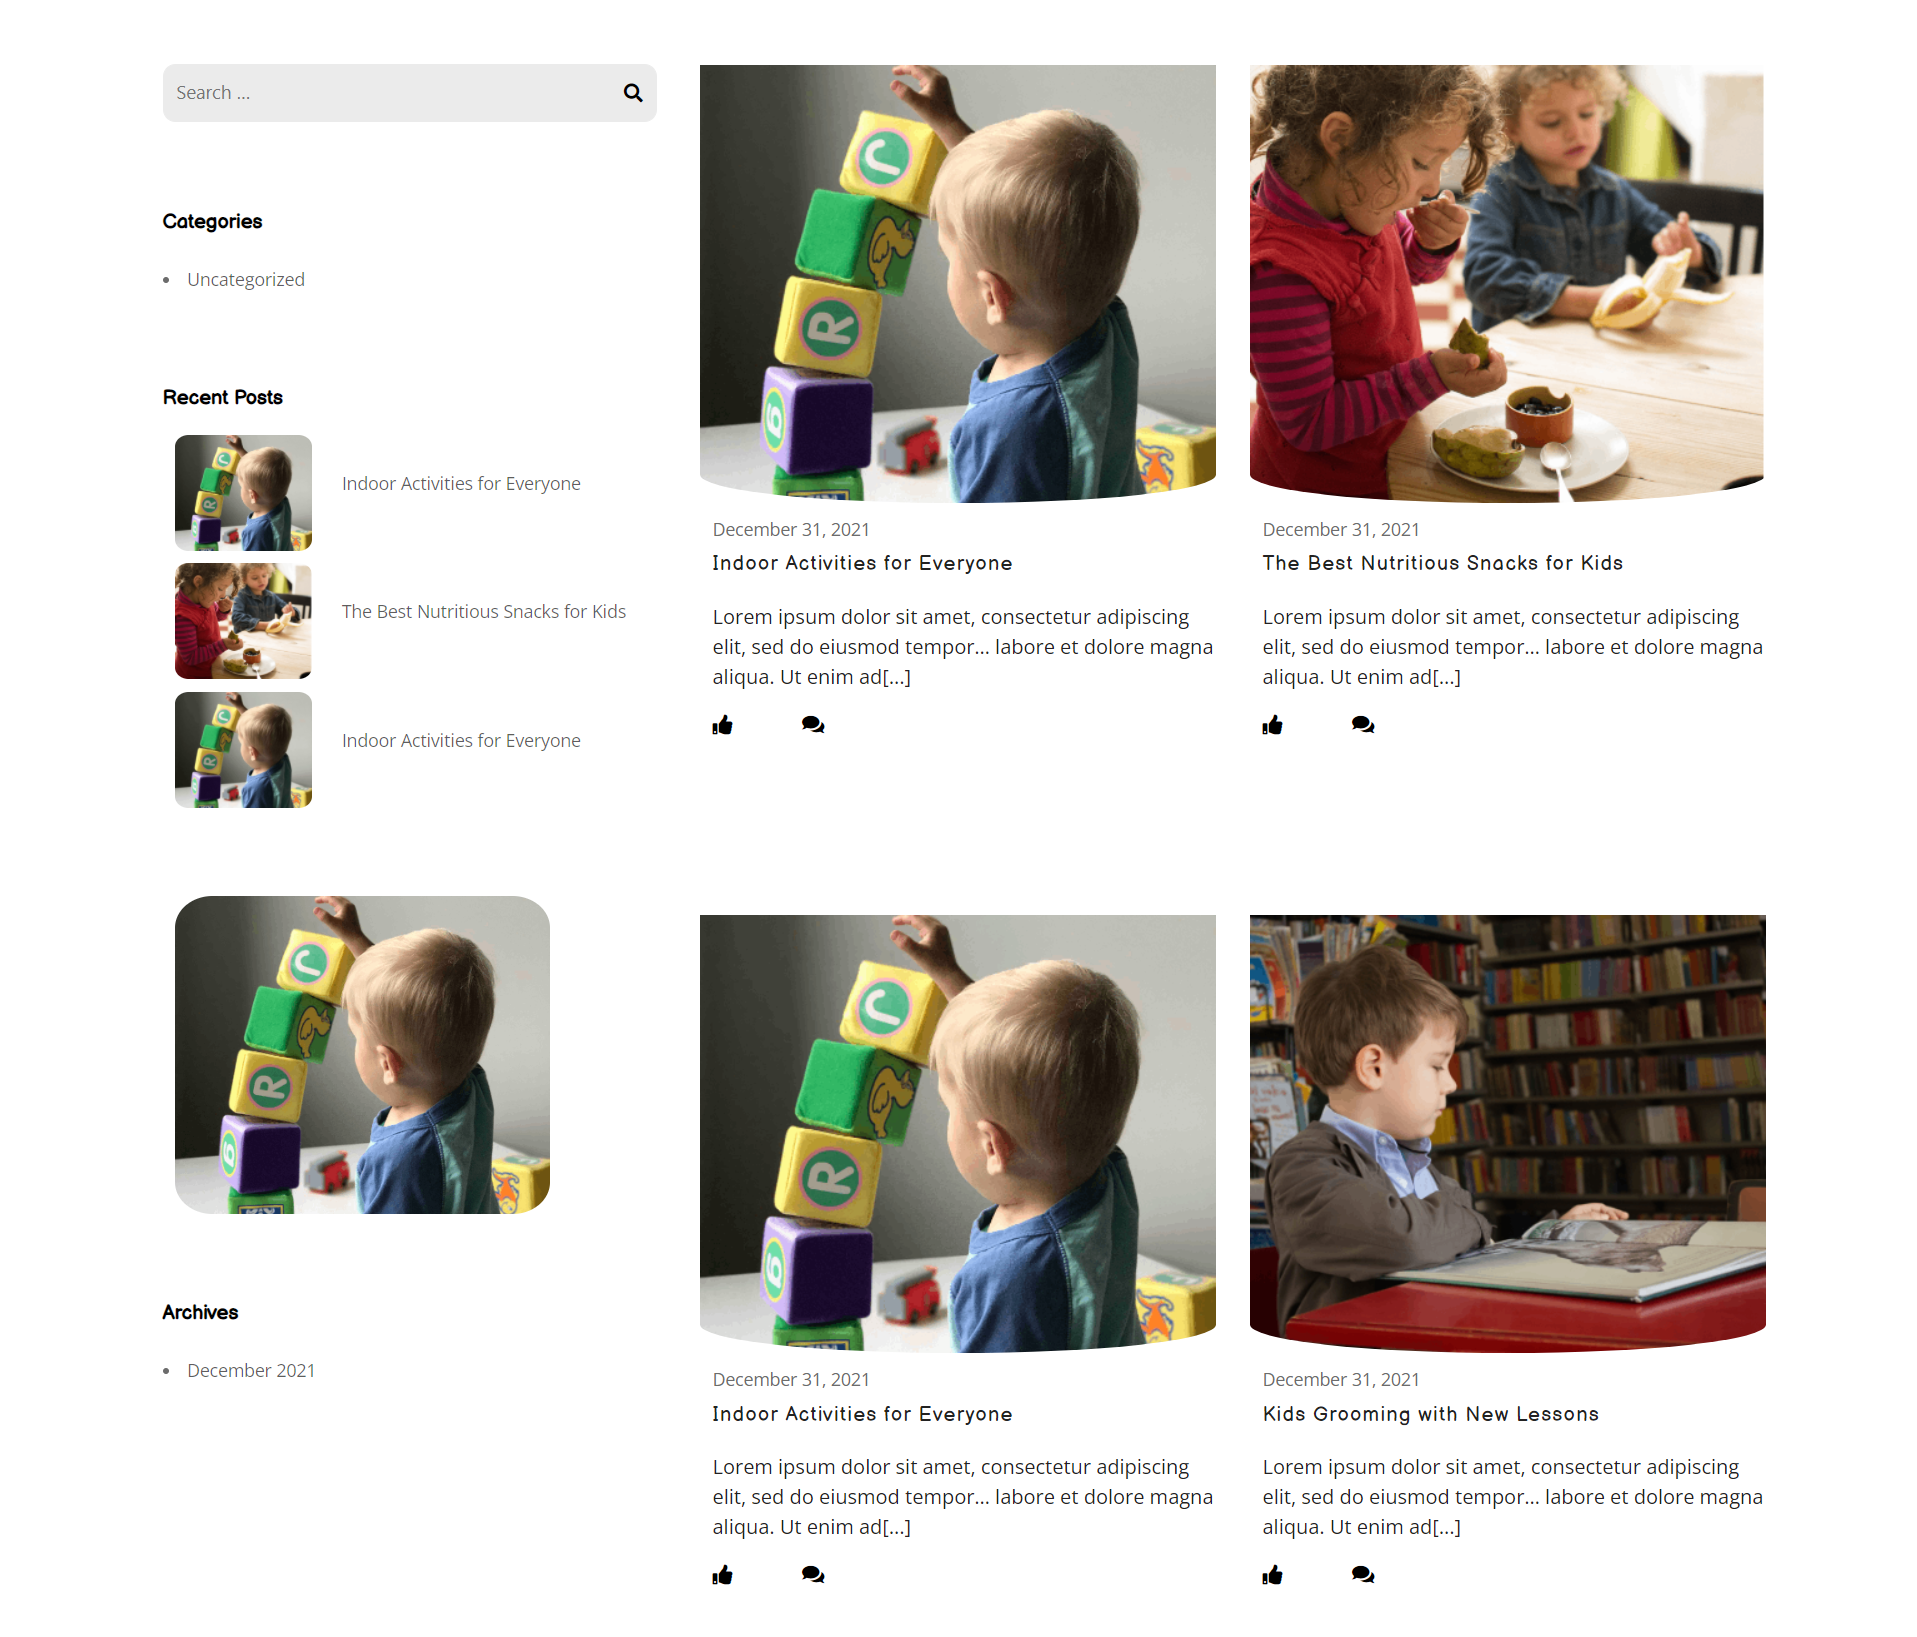
Page With Left Sidebar Inner Page

Shortcodes
The potent content creation tool known as a shortcode is found at http://codex.wordpress.org/Shortcode. Utilizing shortcodes is simple. Make sure that Visual editing option is selected first.
All Shortcode
Testimonials Shortcode: [te-daycare-pro-testimonials]
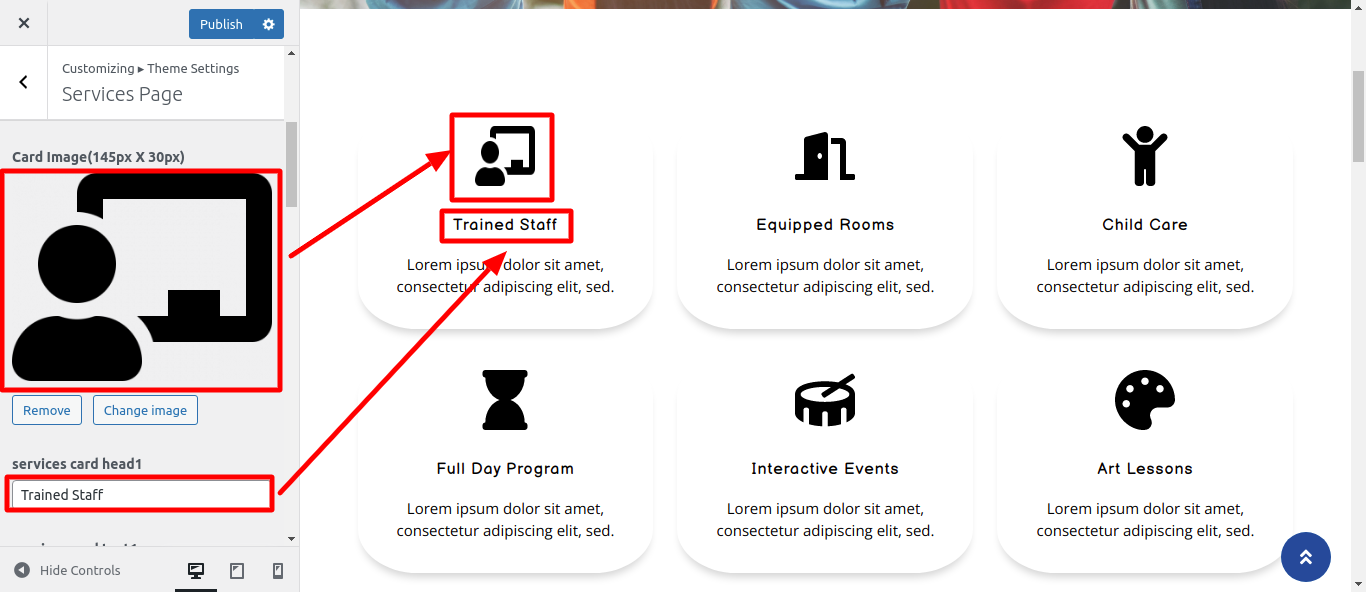
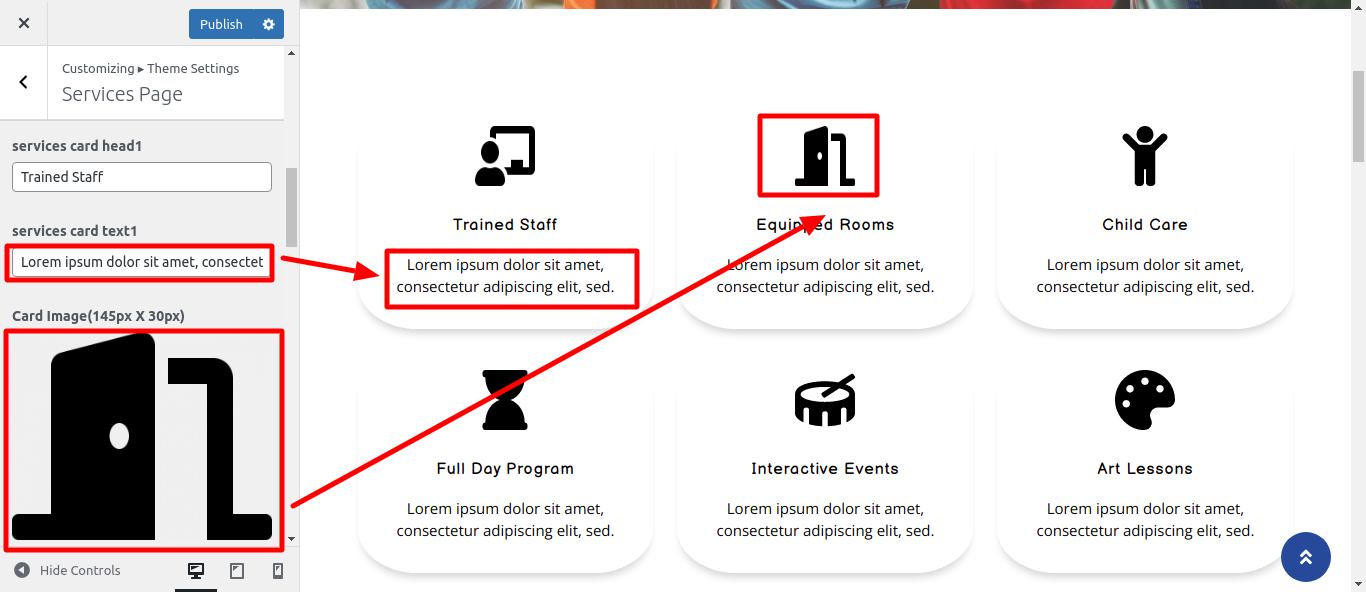
services Shortcode: [te-services]
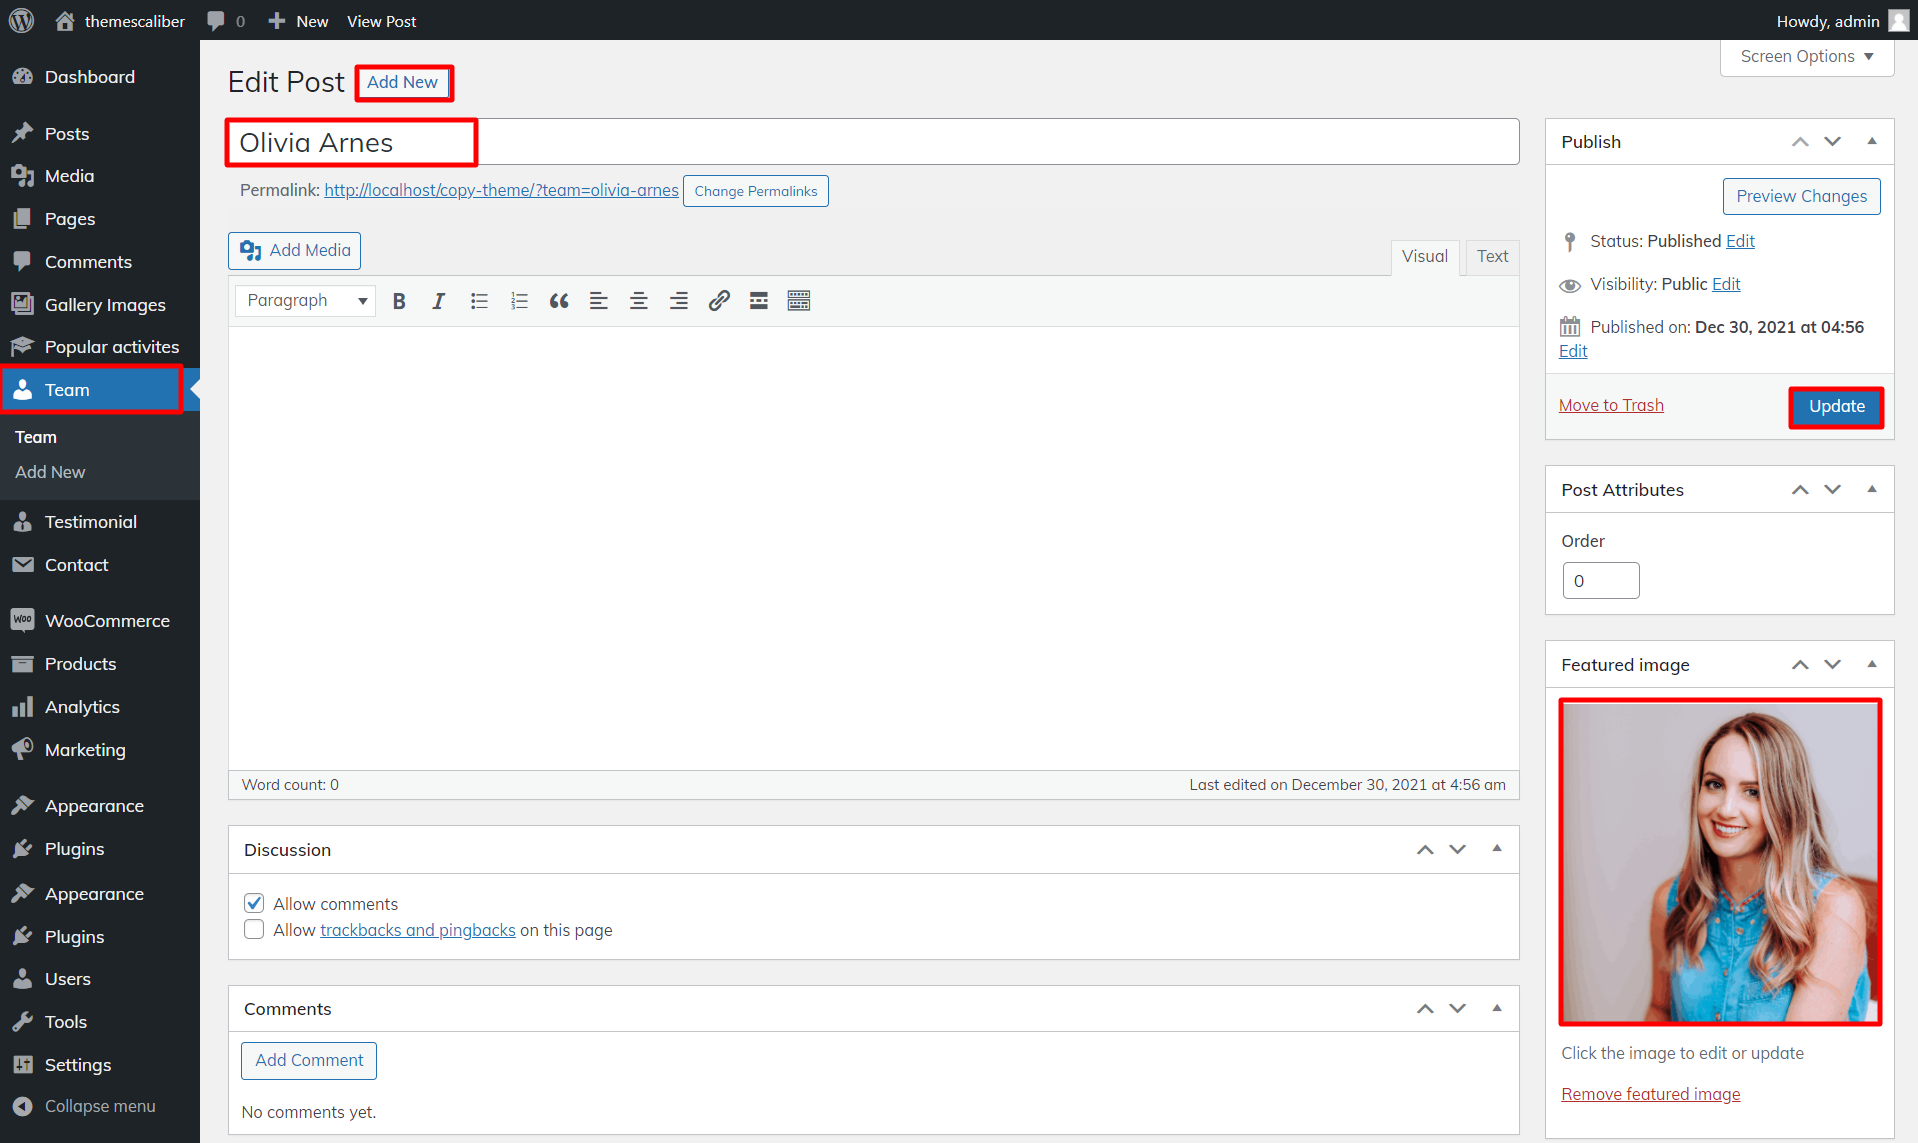
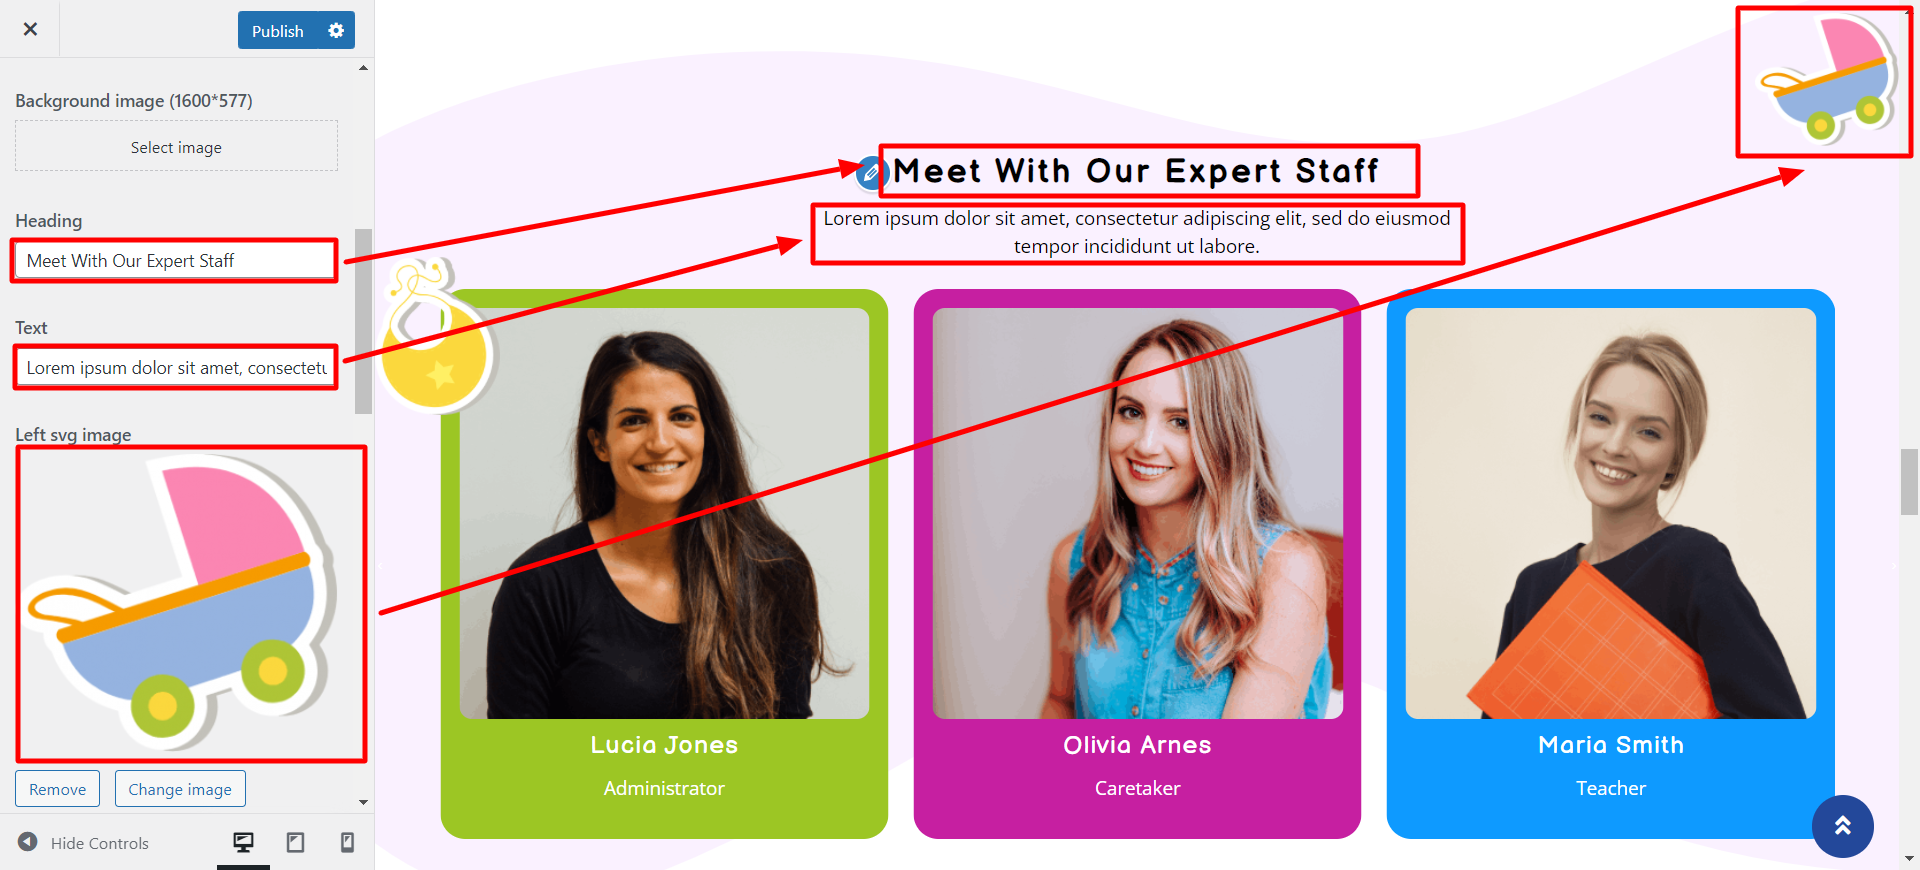
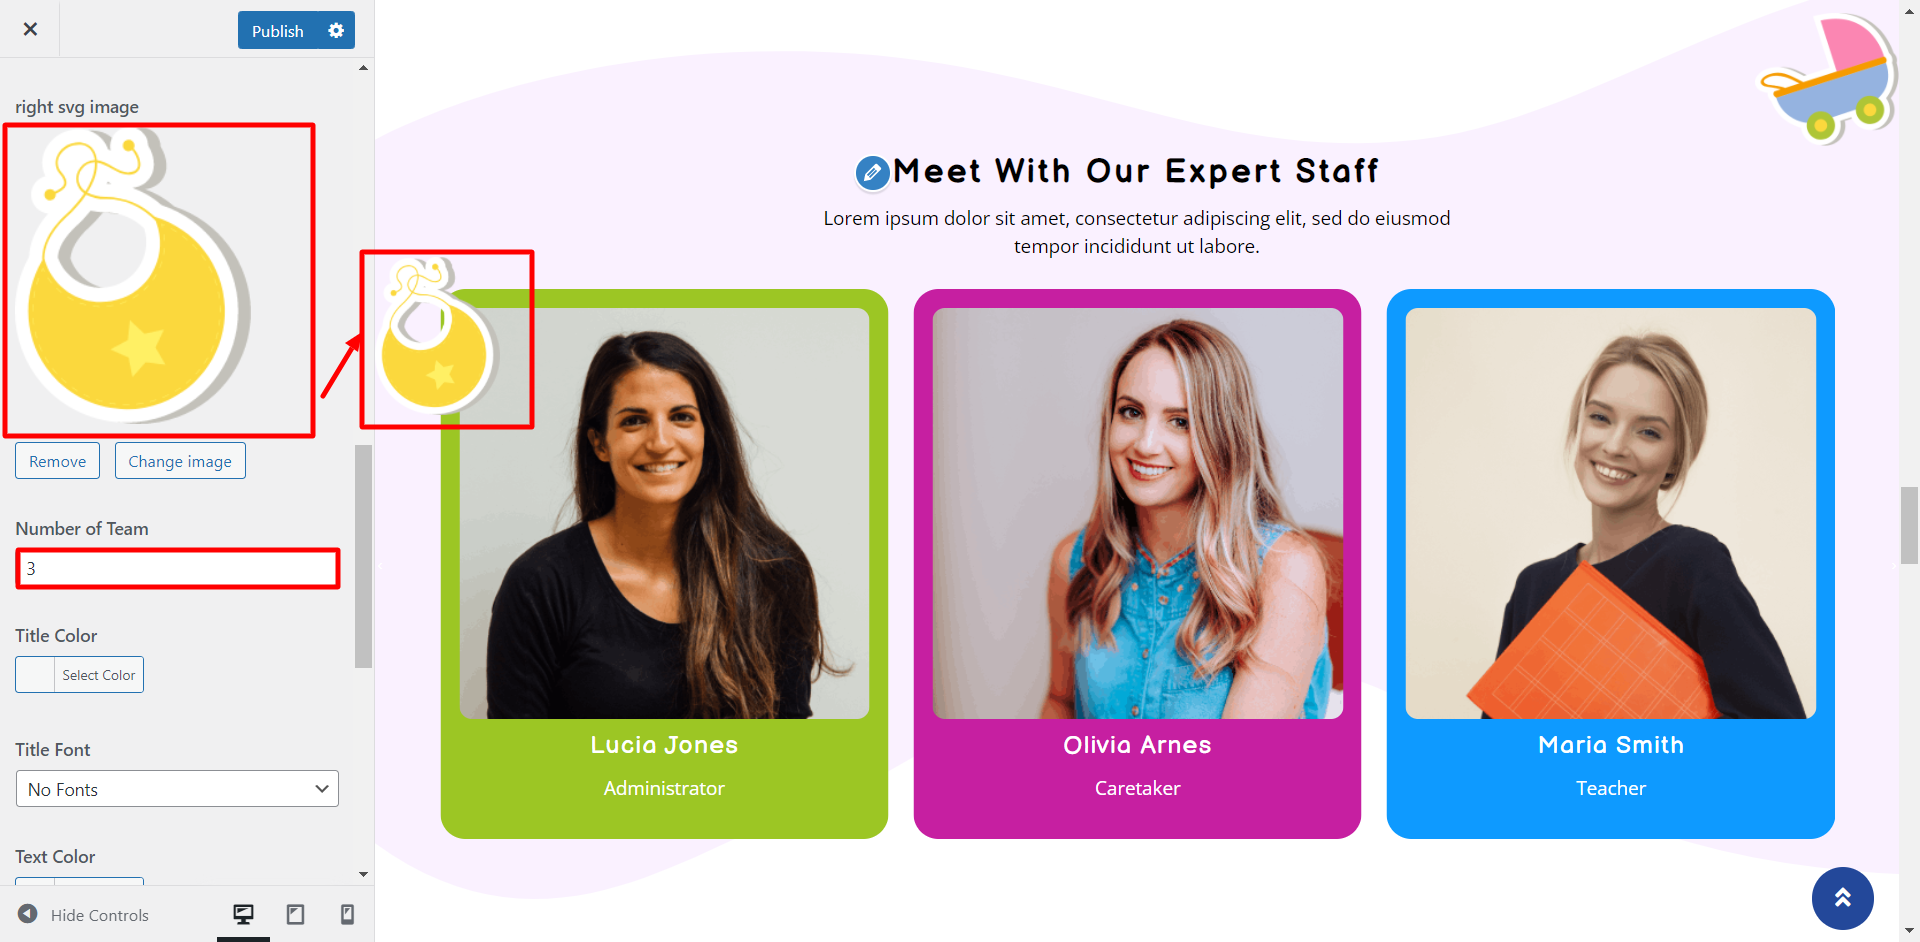
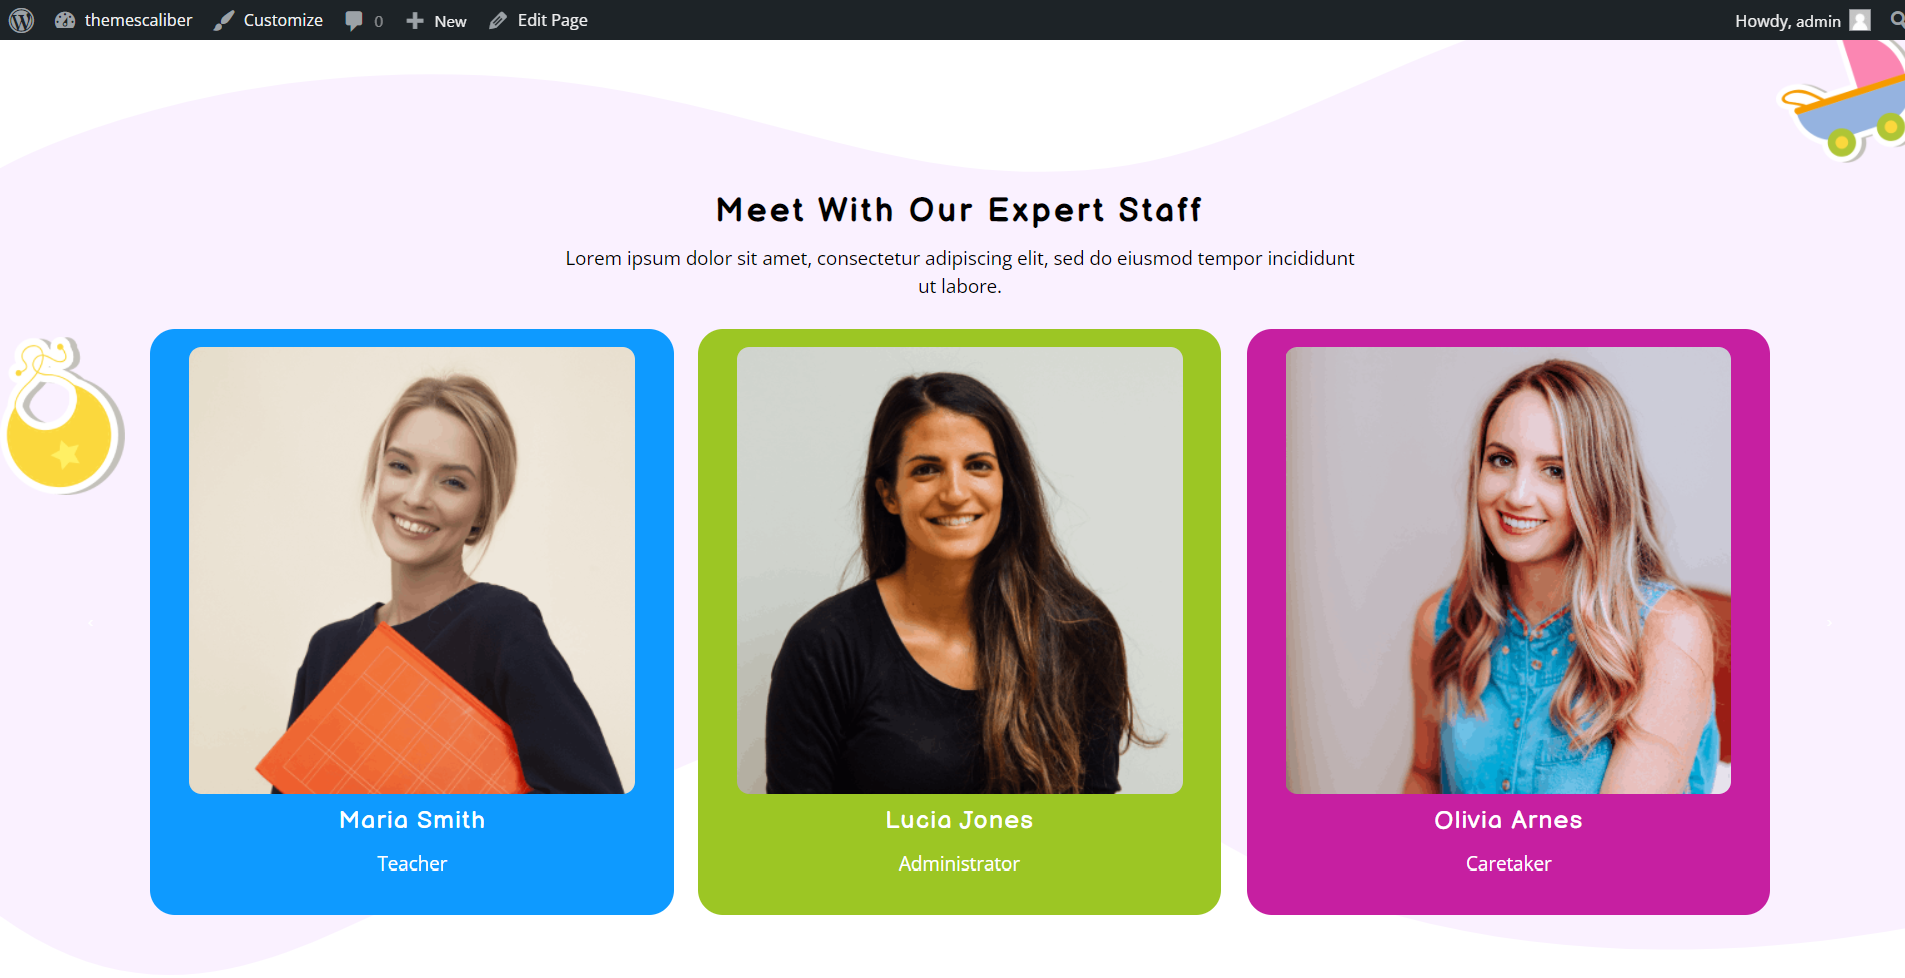
Team Shortcode: [te-daycare-pro-team]
Gallery Shortcode: [galleryshow gallery="36" numberofitem="6" bootstraponecolsize="4"]